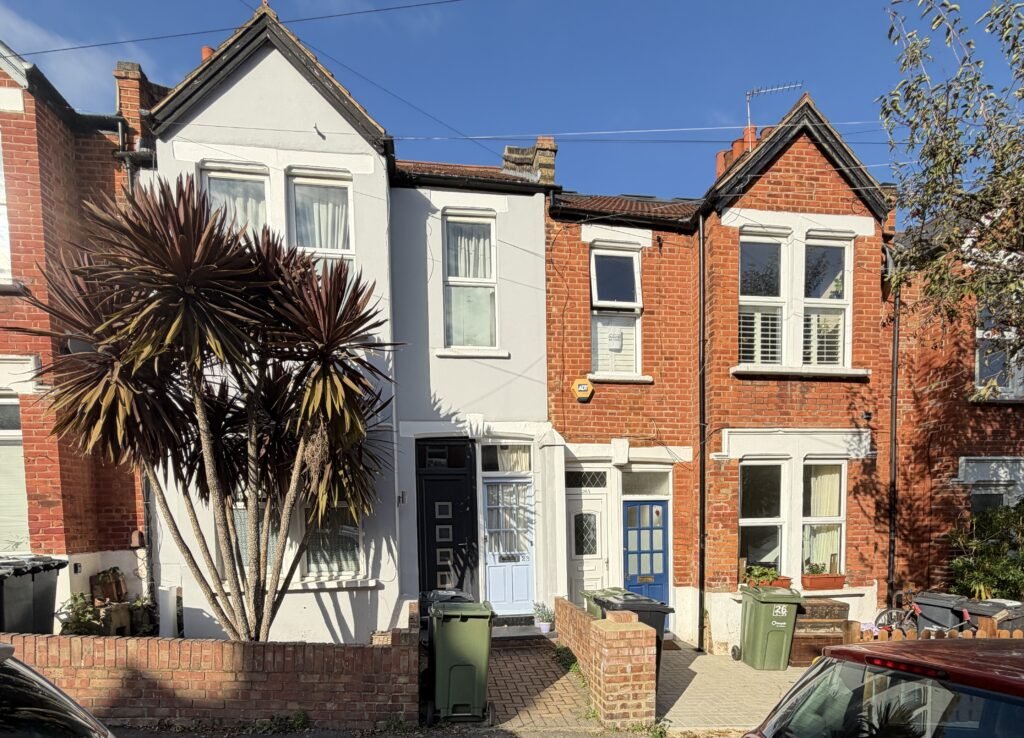
Rosie owns a tenanted flat in Norwood and asked her architect, Marco, to help with proposed works. Marco then introduced us to prepare a proper measured survey and CAD-ready existing drawings.
From Rosie’s side, this was her first time commissioning a measured survey – she was understandably cautious about:
- How the survey works when tenants are in place
- Whether the existing agent’s plan could be used instead of a full measured survey
- How much on-site disruption there would be
Marco was clear that he needed:
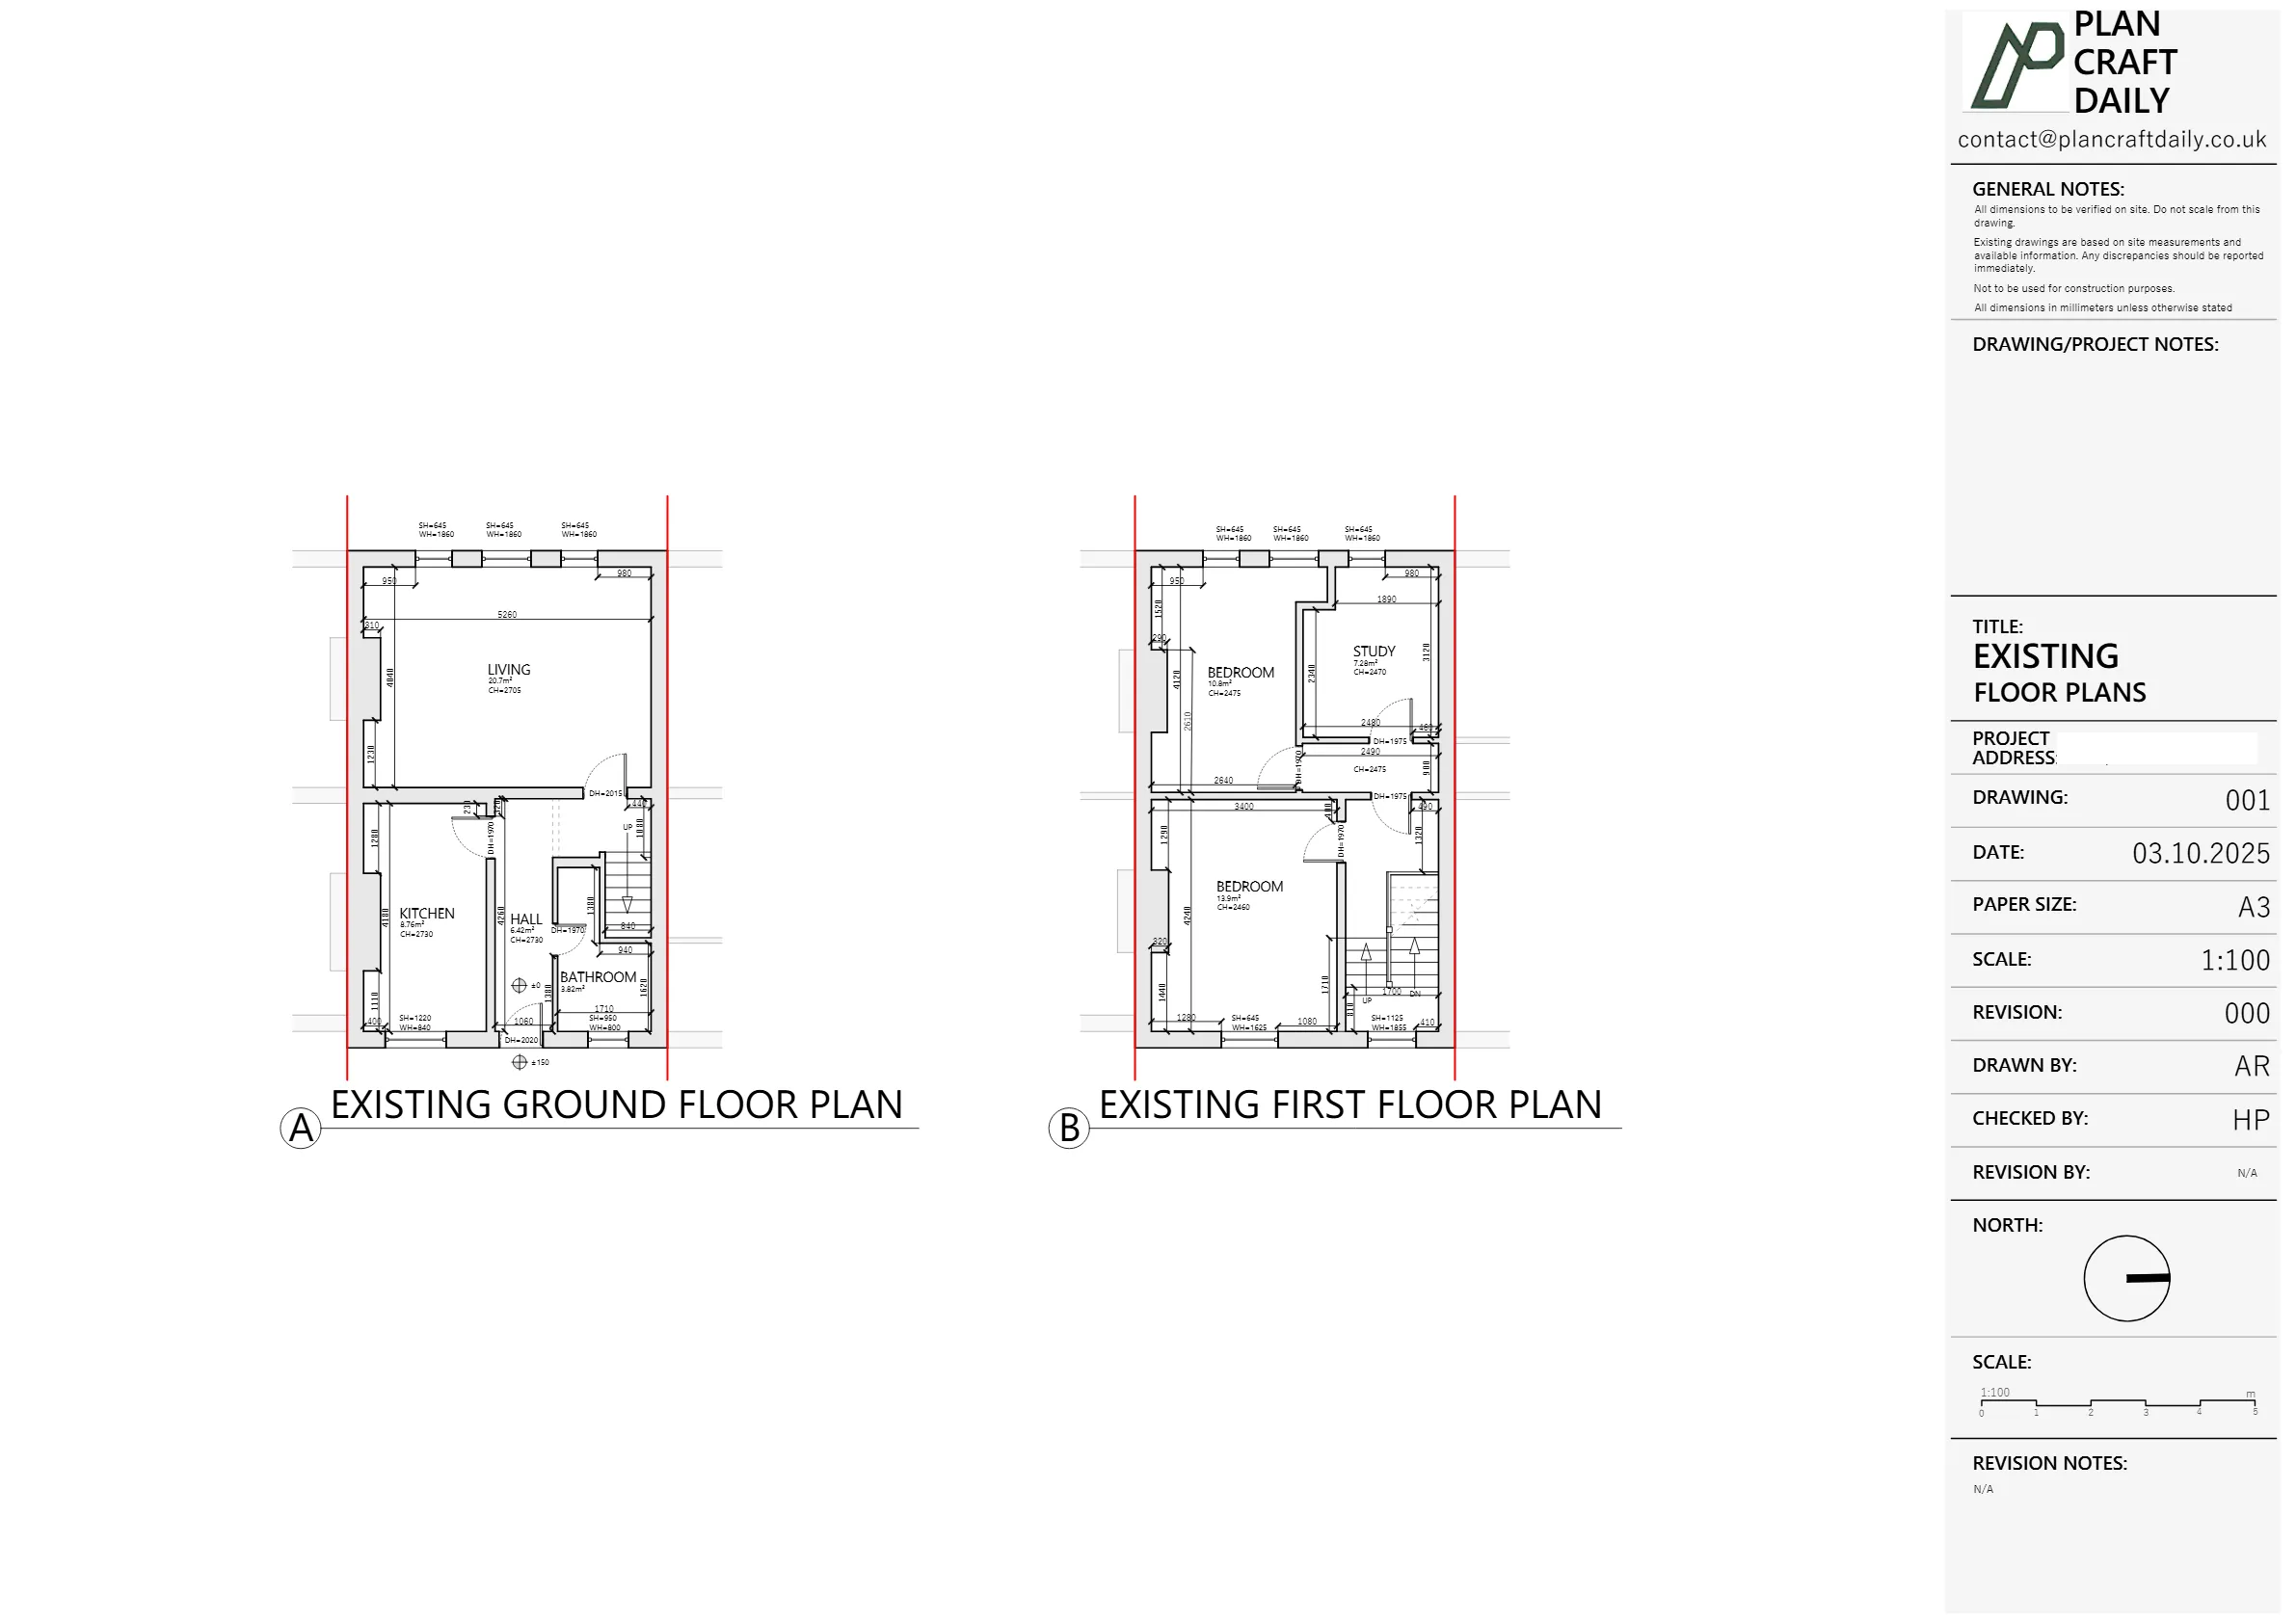
- Ground and first floor plans
- Roof plan
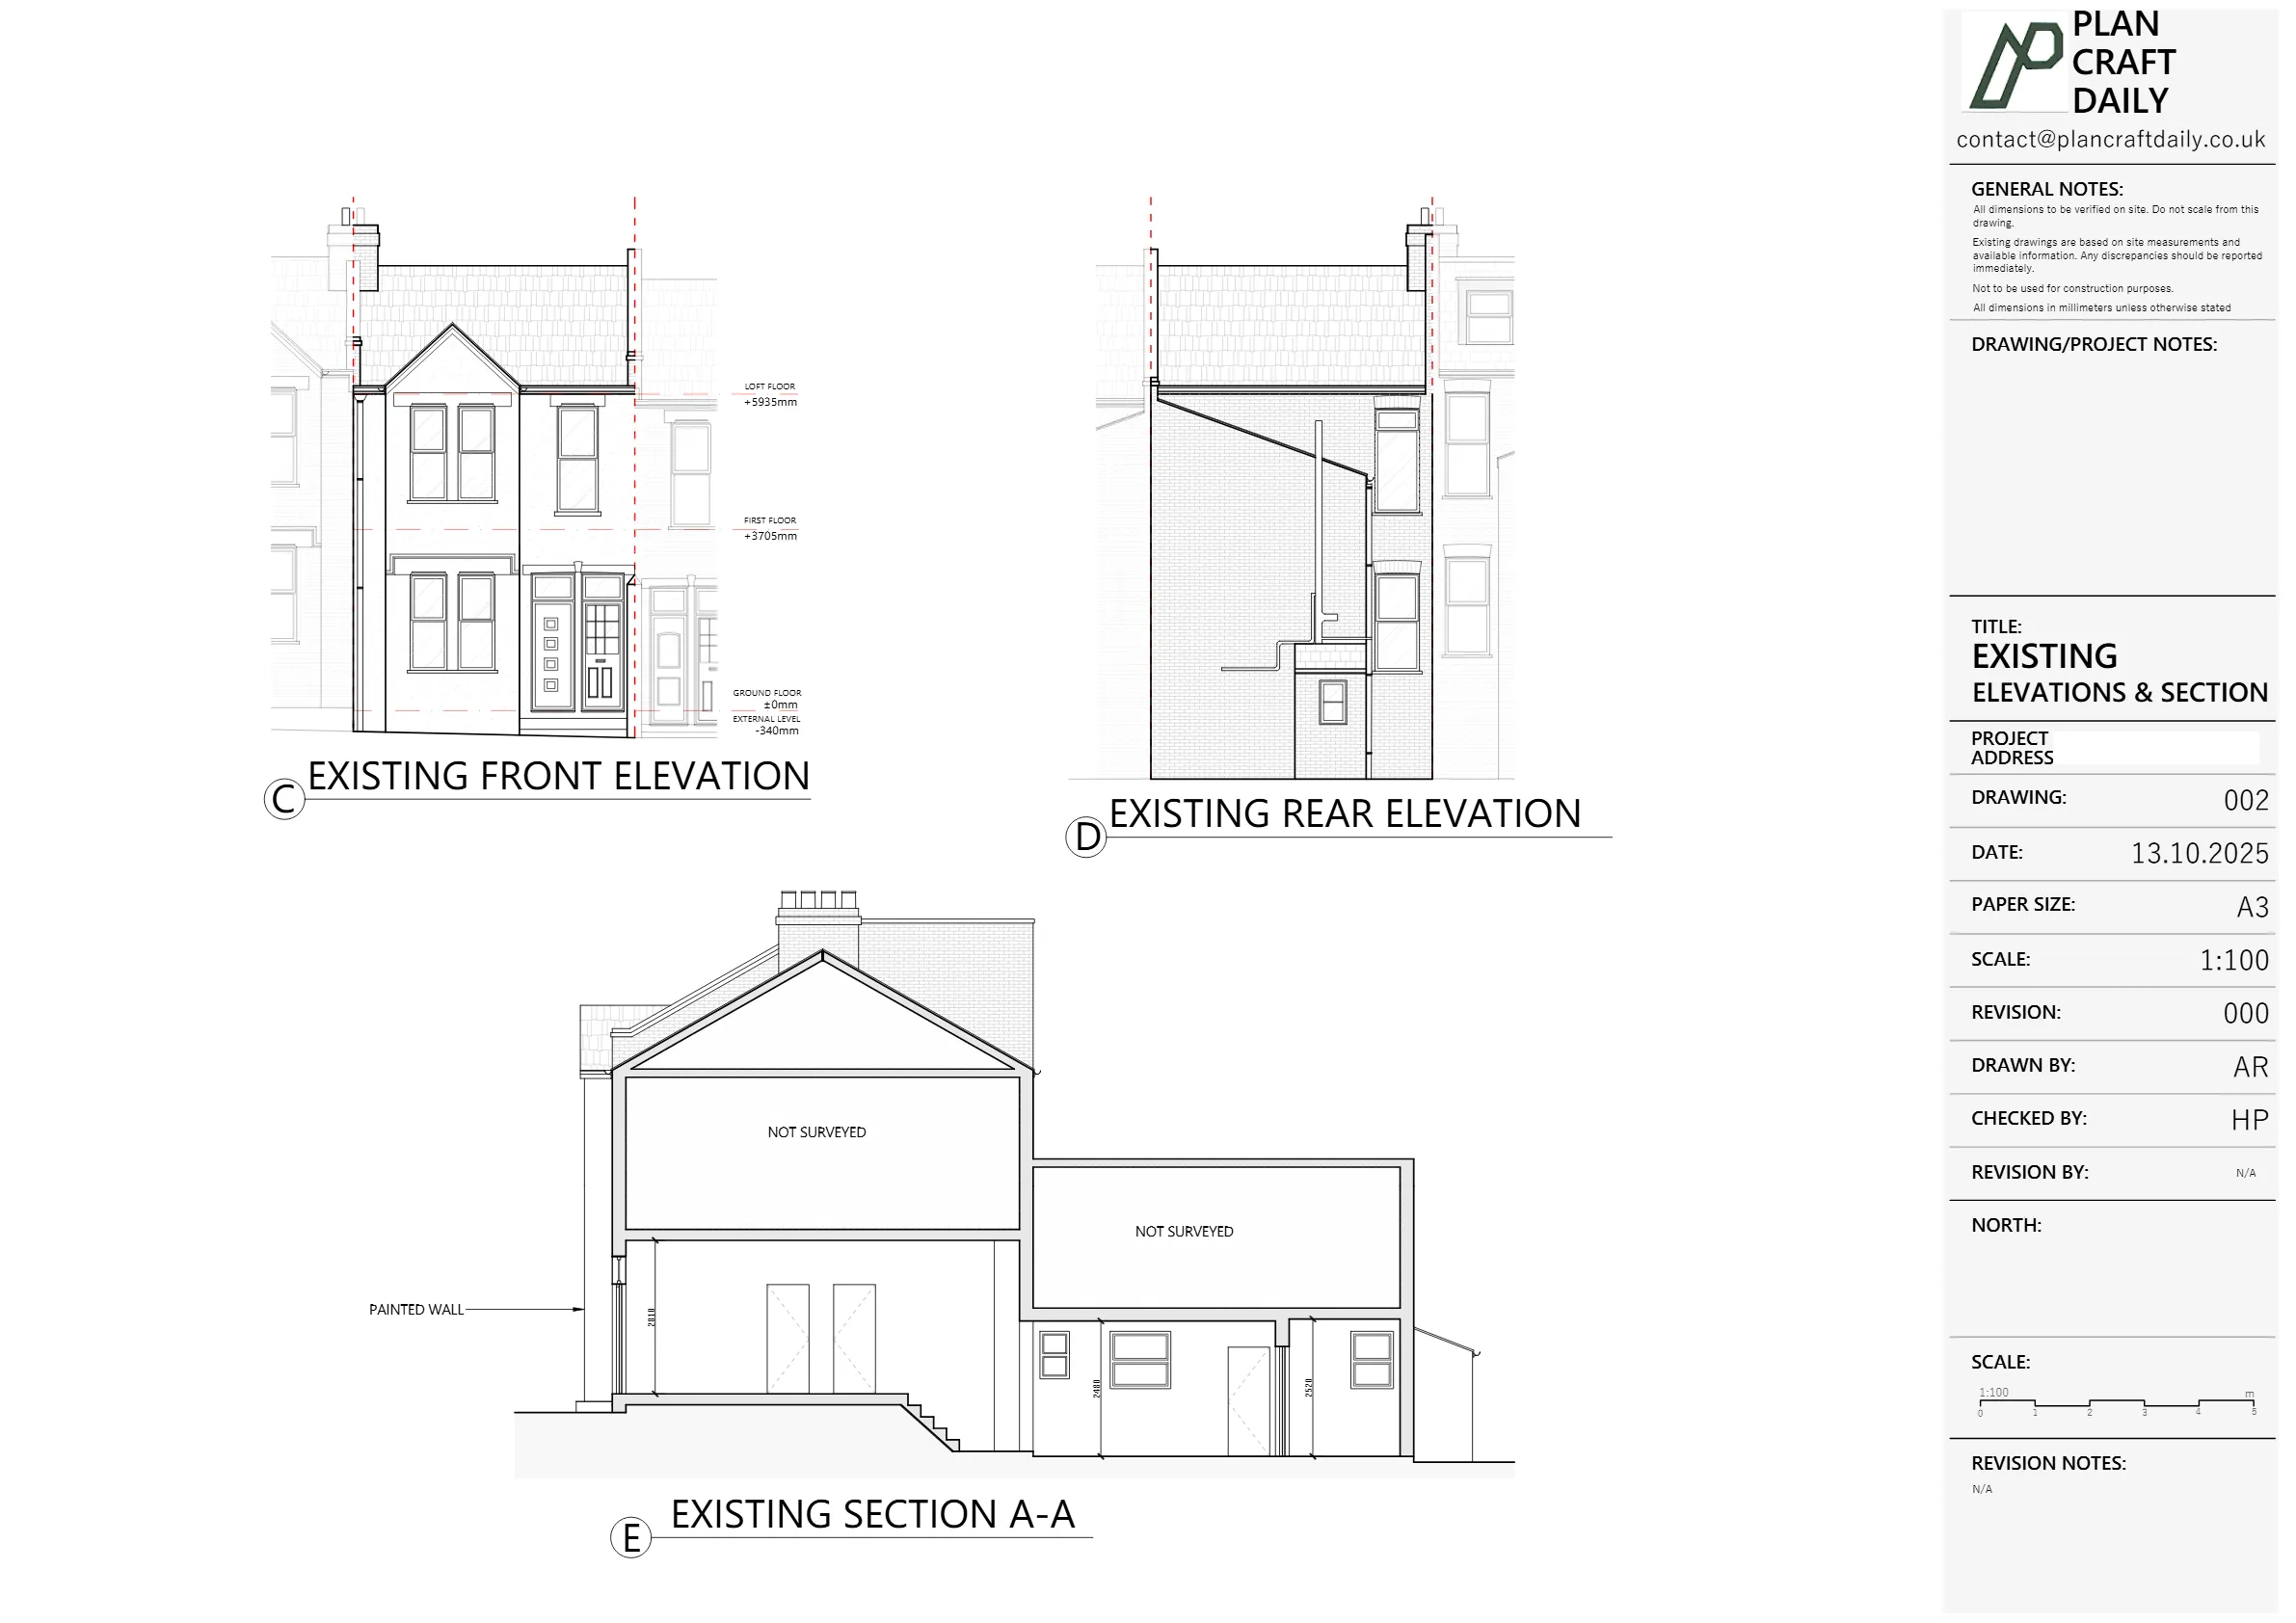
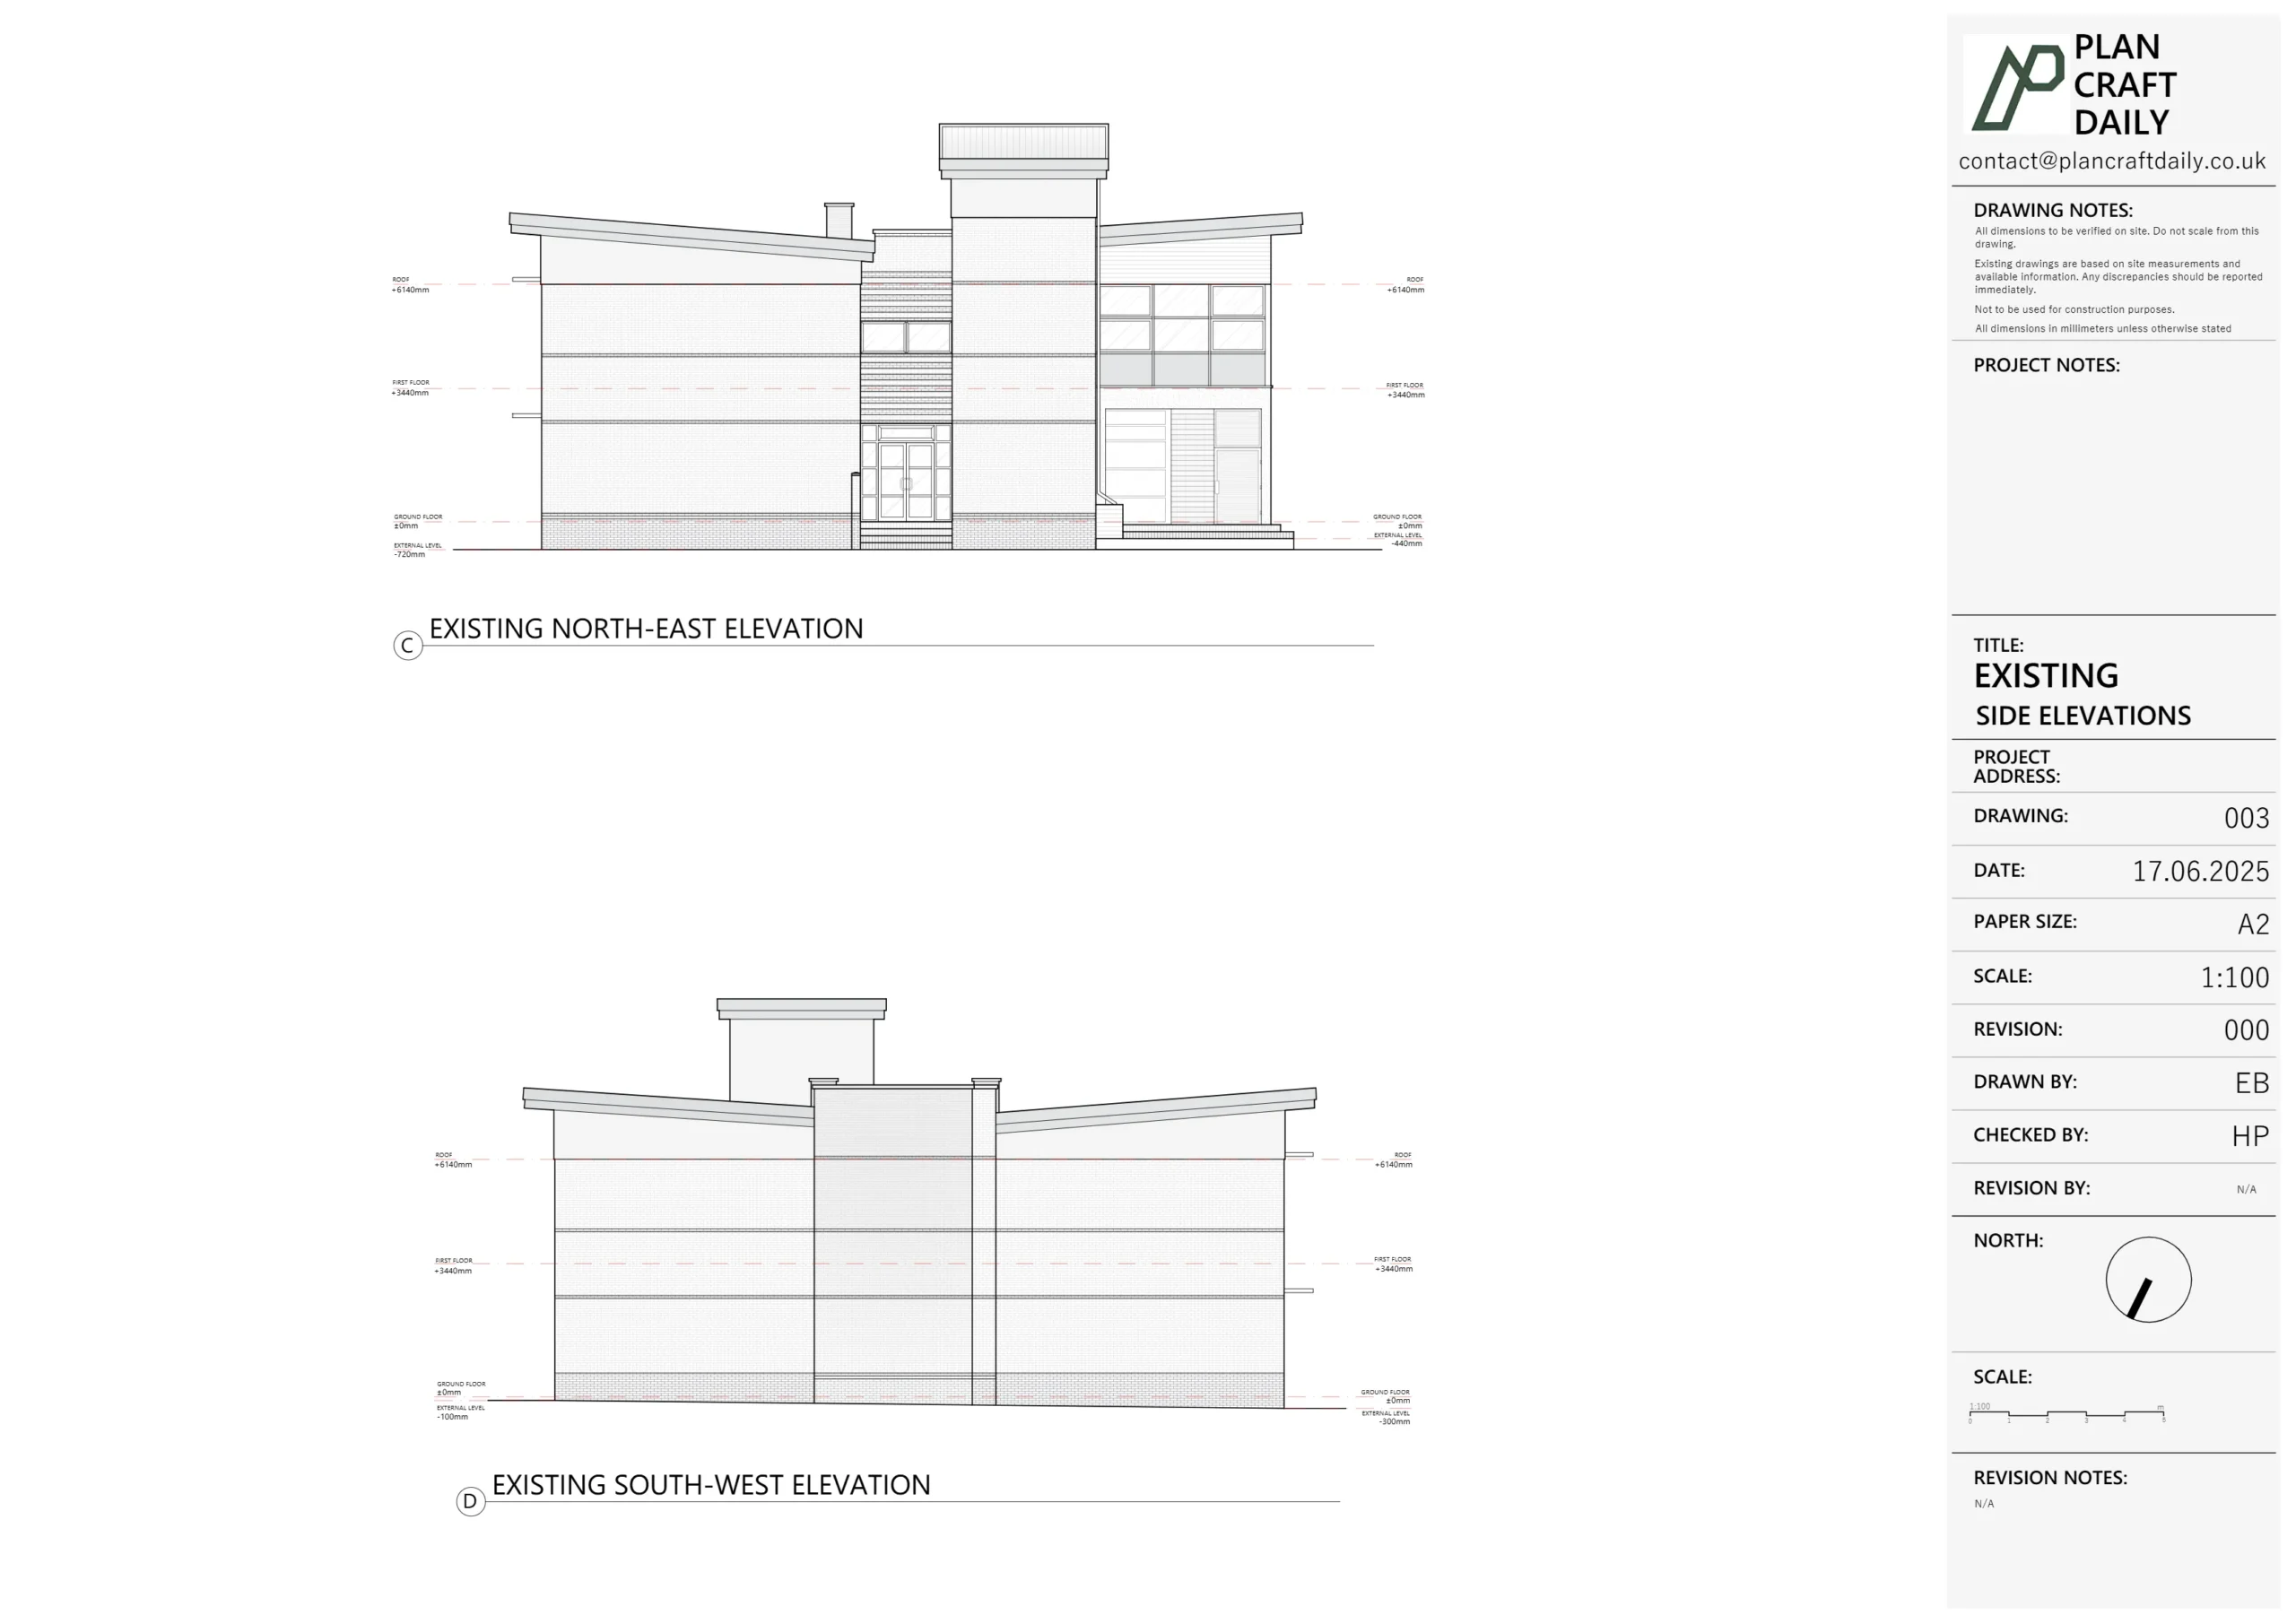
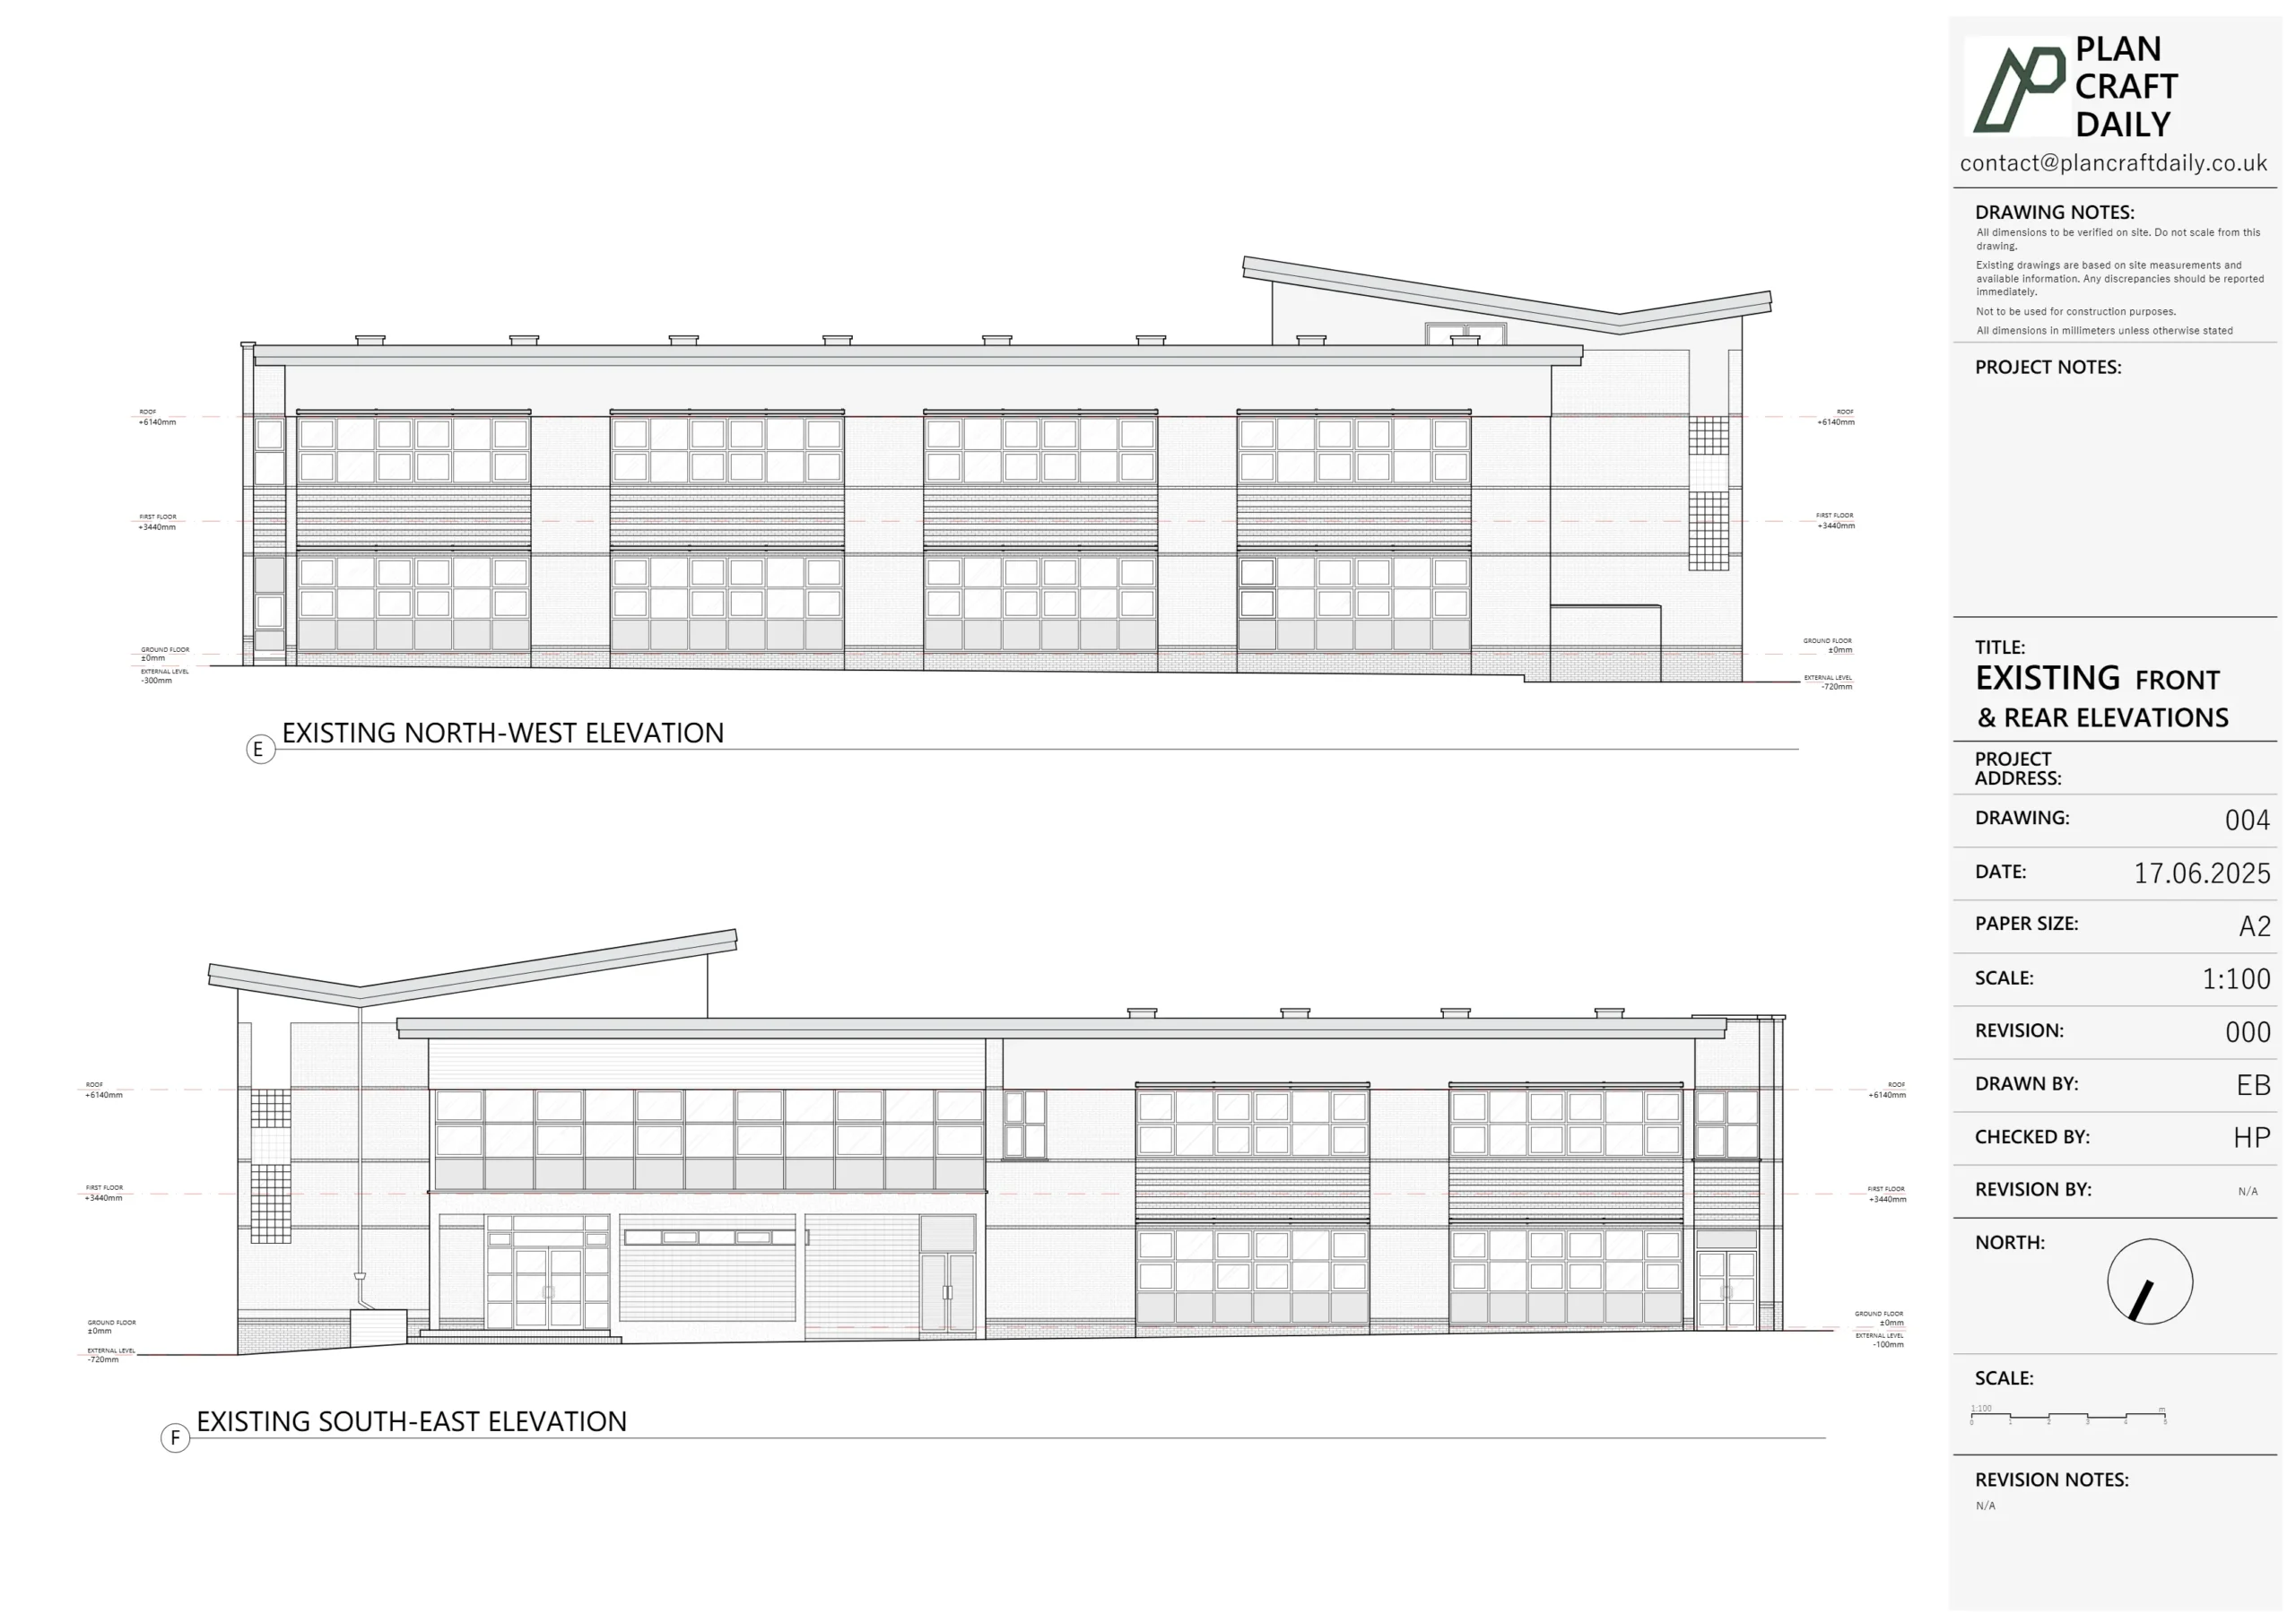
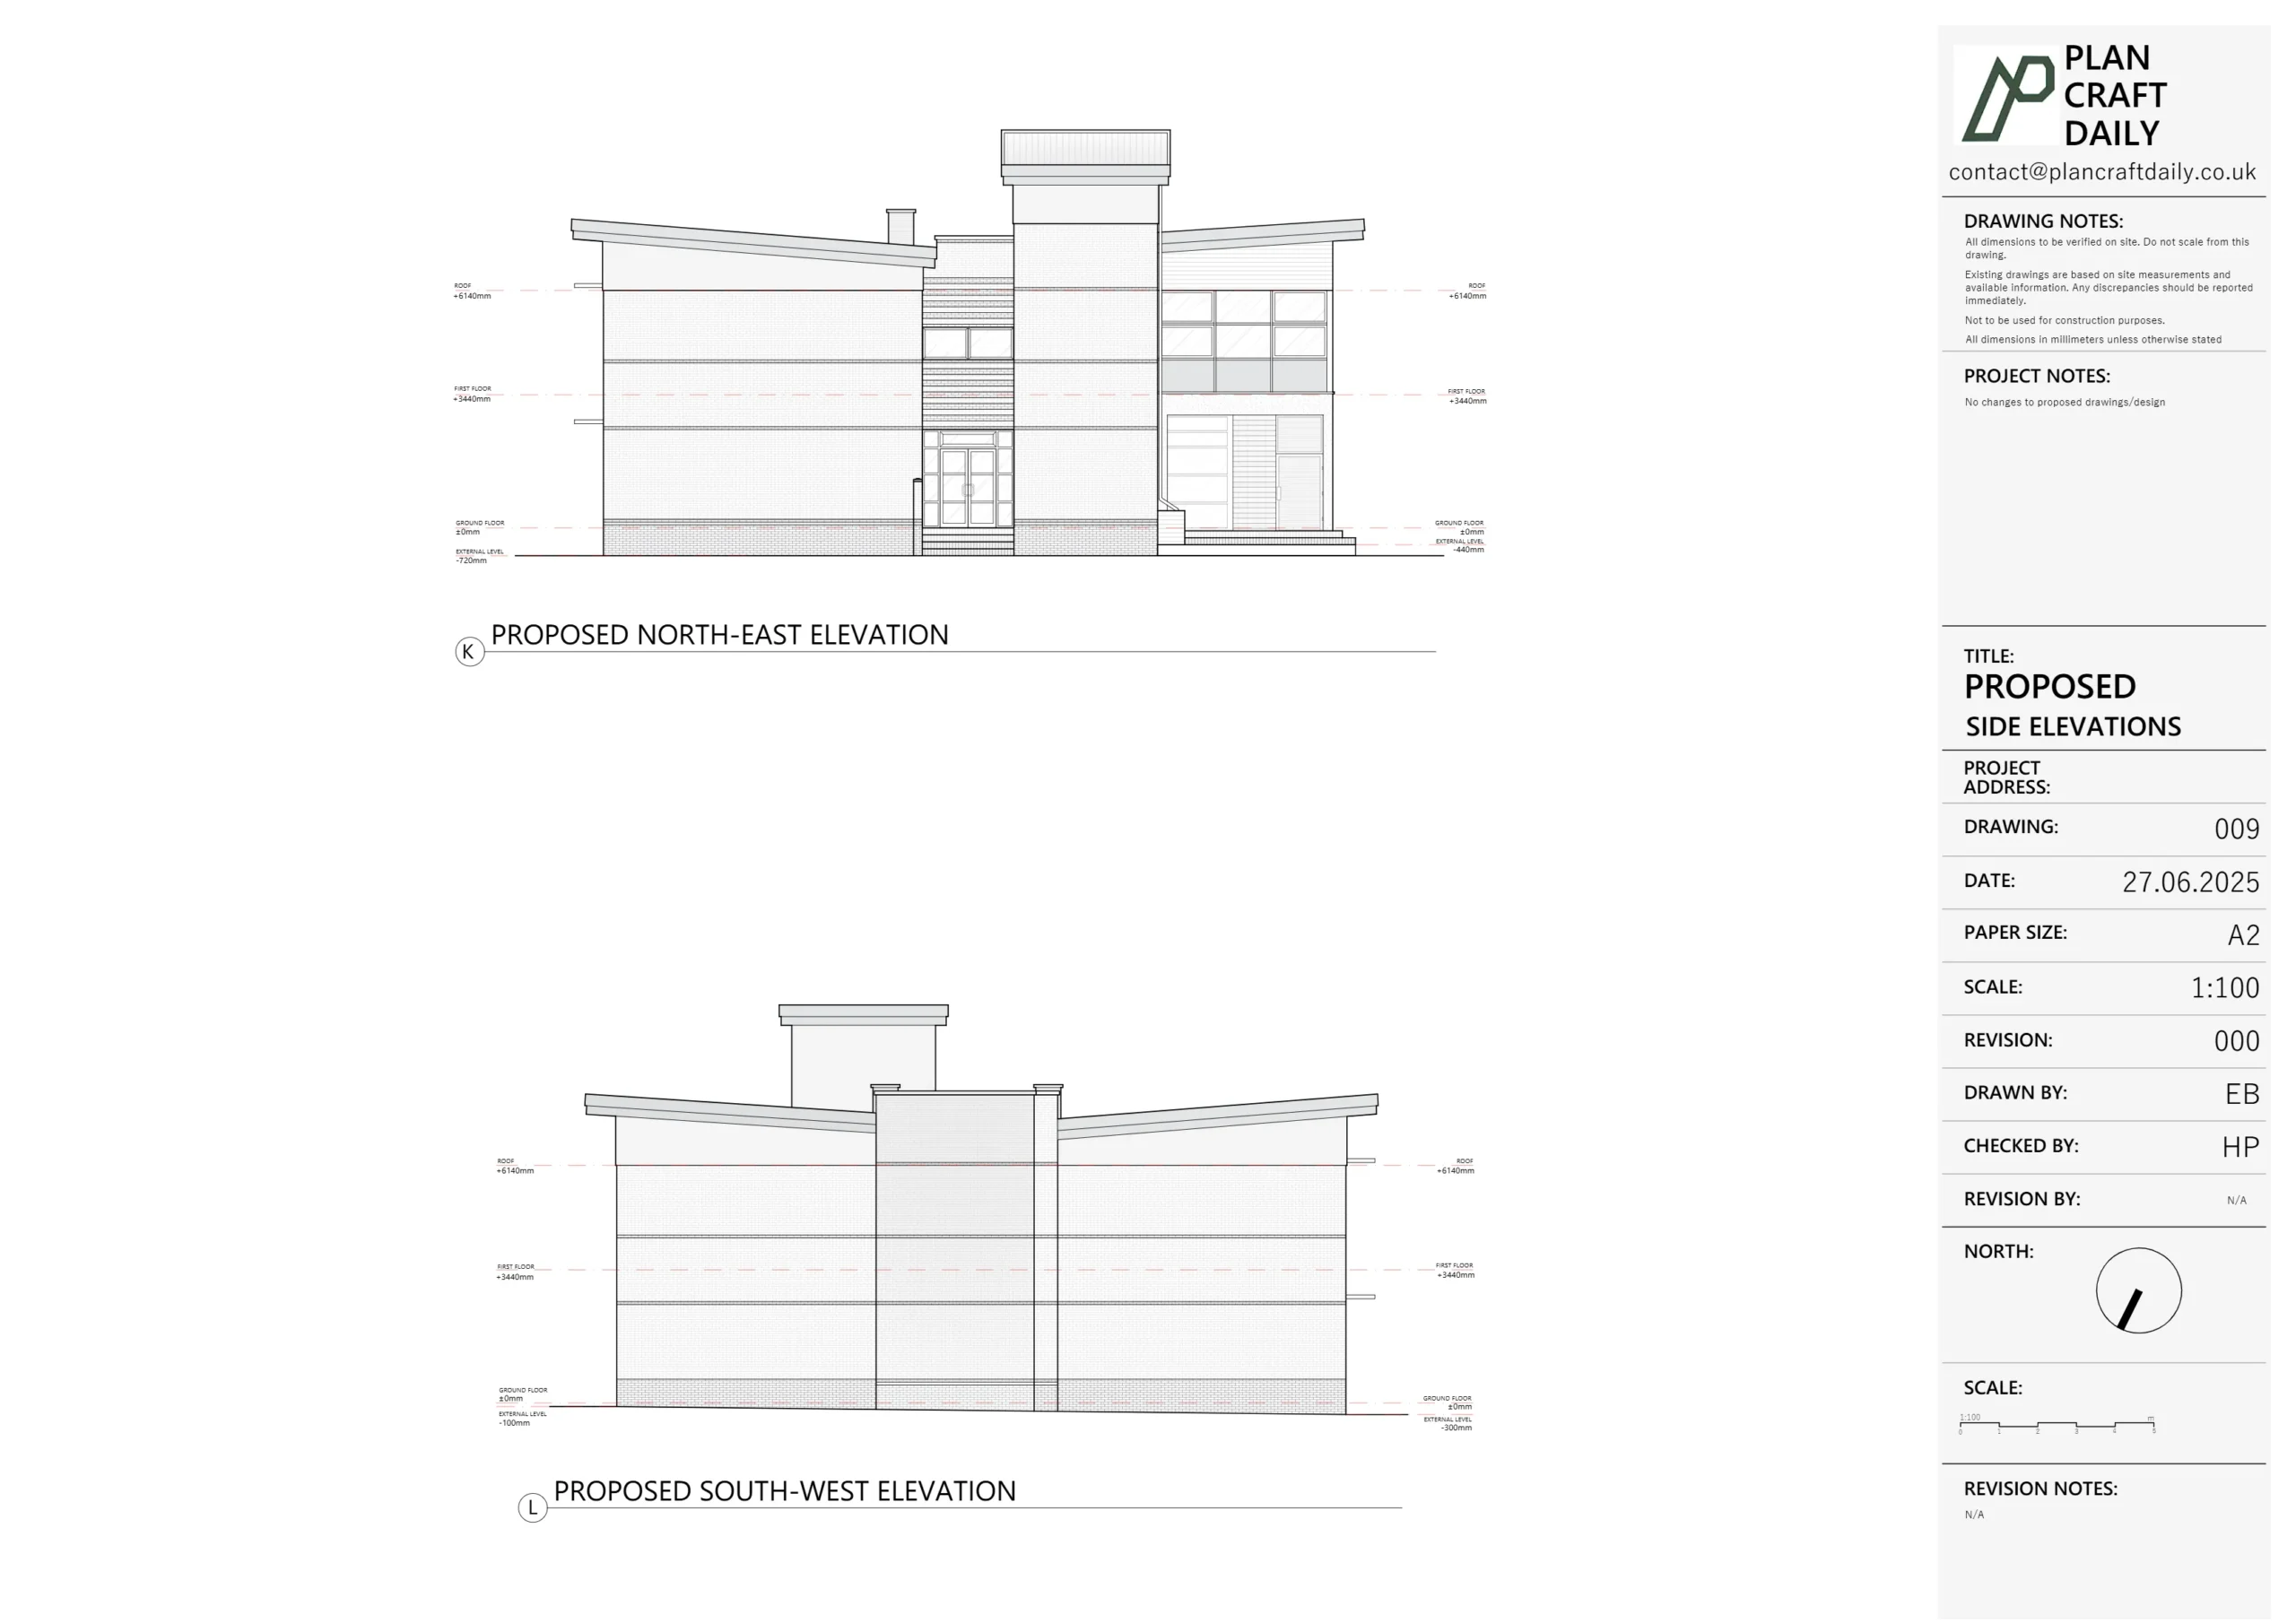
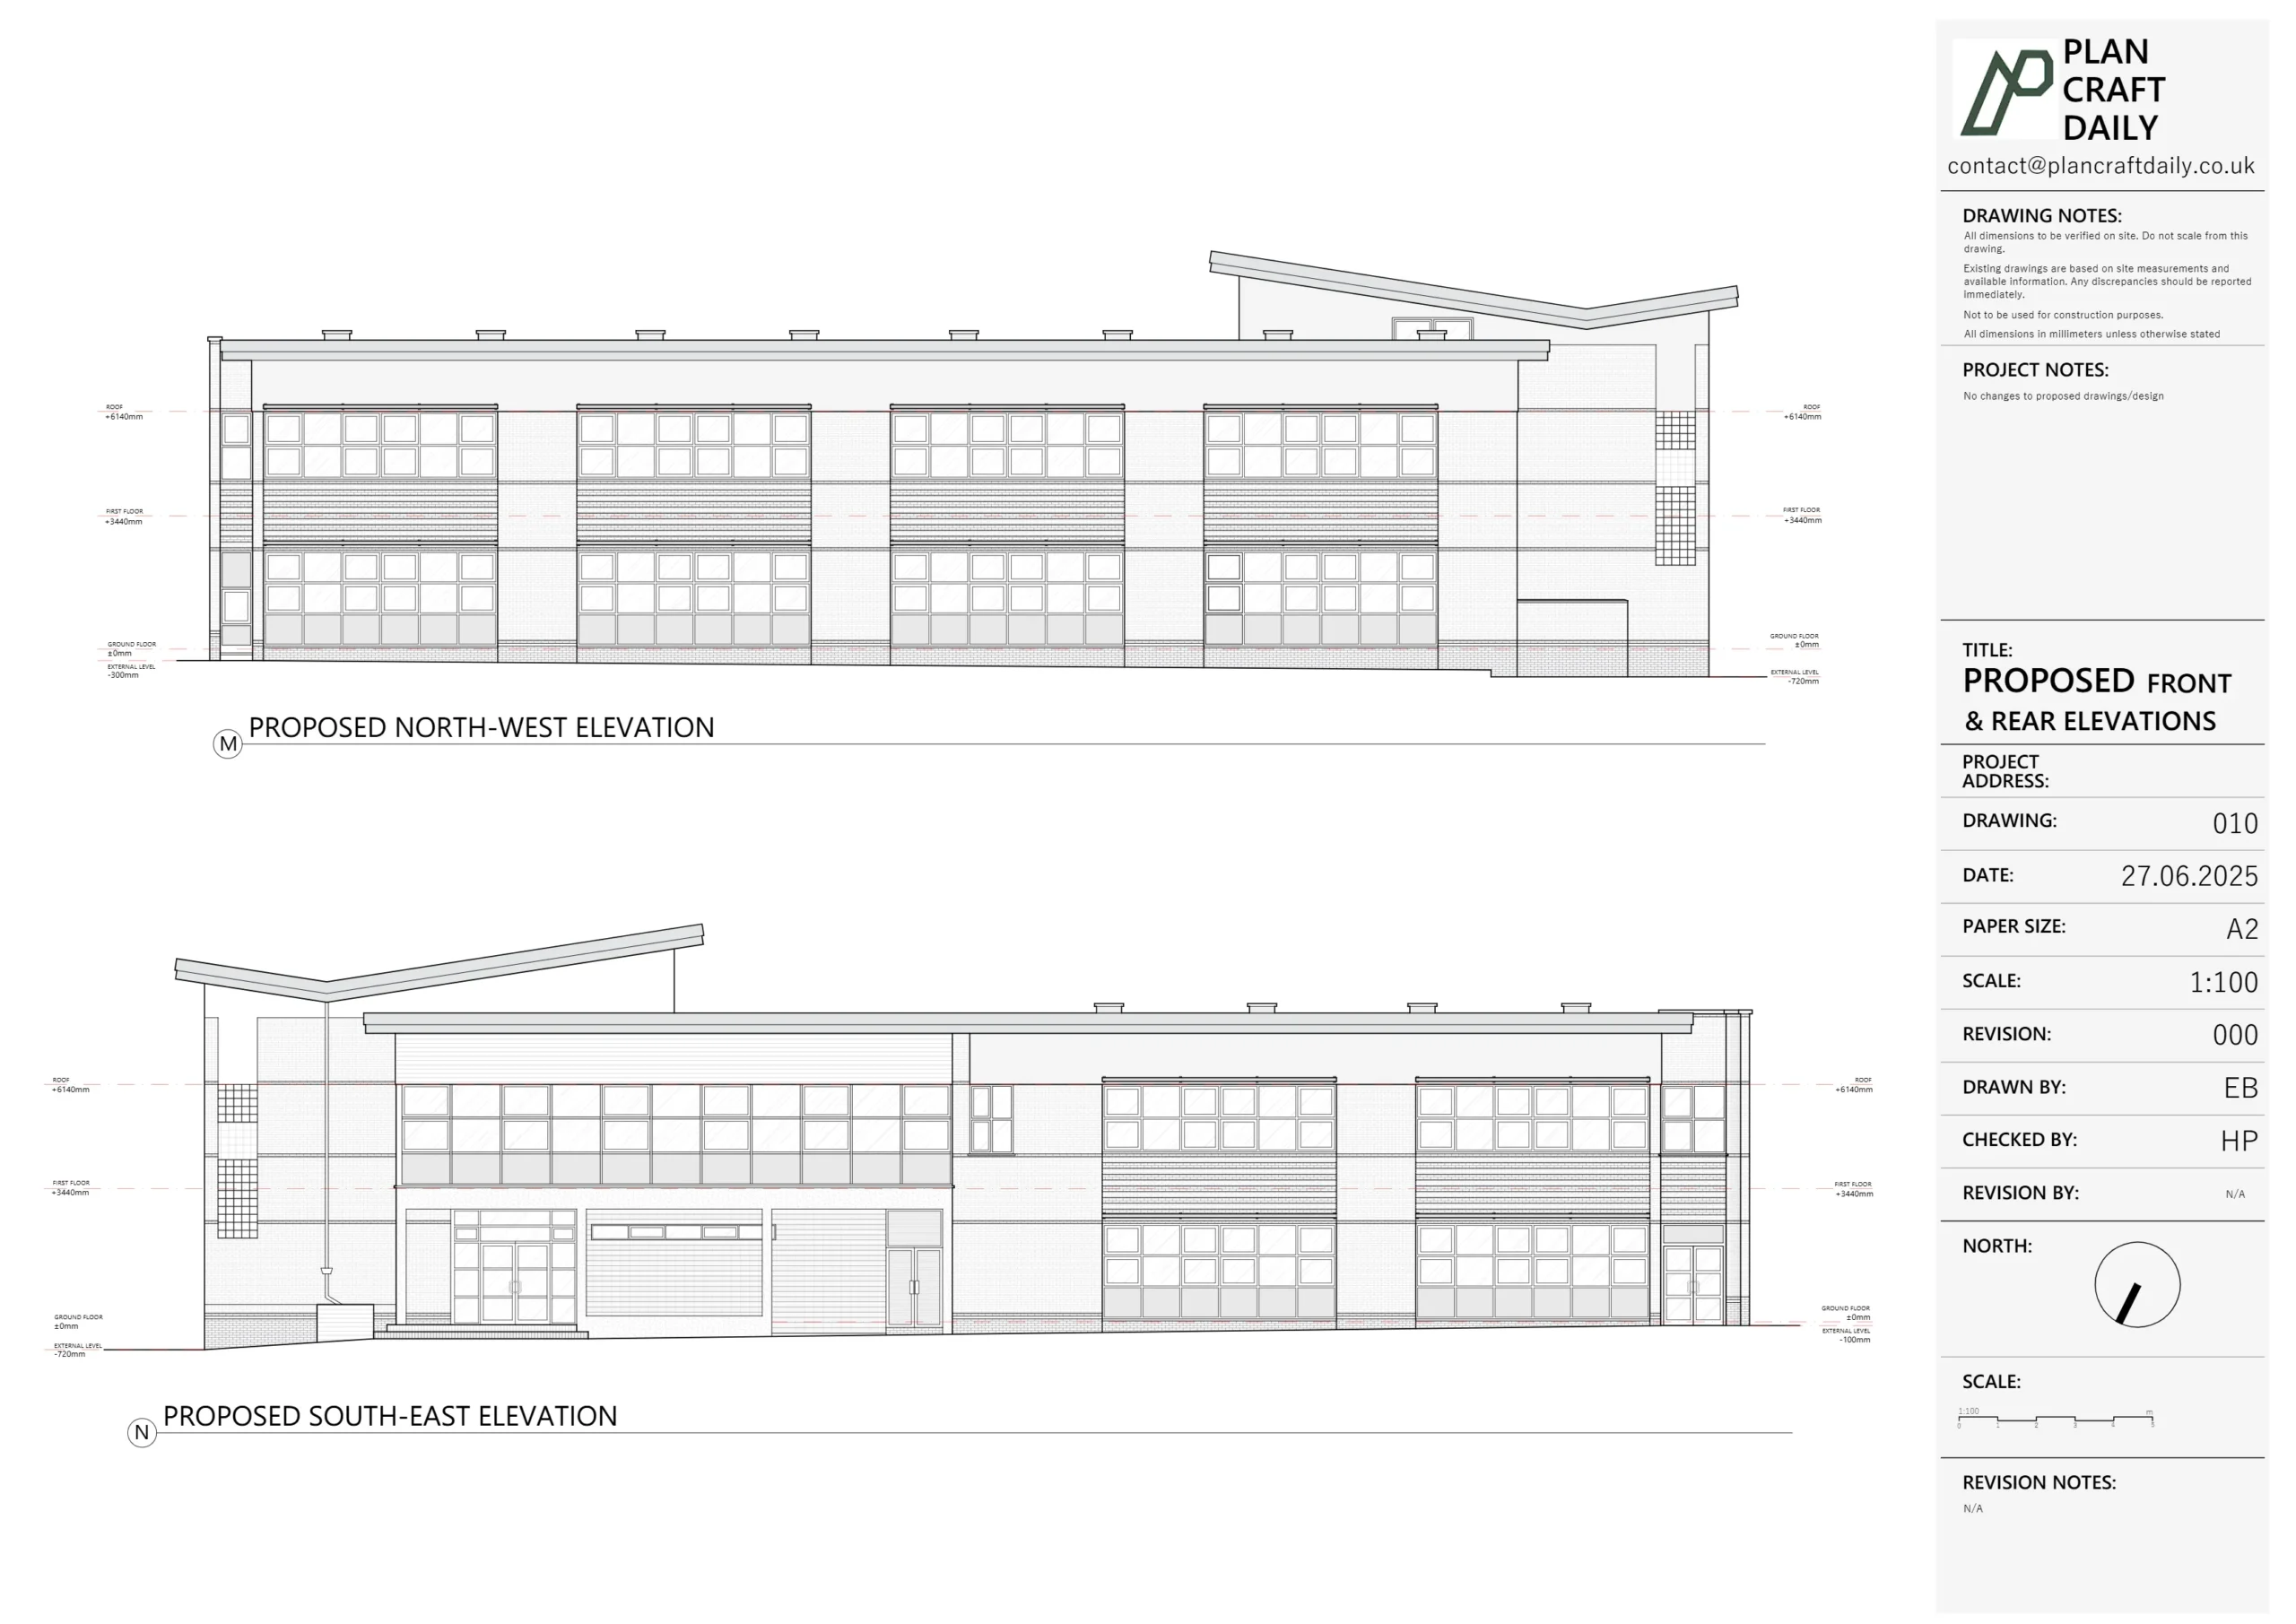
- Front and rear elevations (including a sliver of the neighbours either side)
- One long section
- Everything to scale in DWG, suitable for design and planning work.
Rosie also shared a lease/agent plan and asked if that meant a new survey wasn’t necessary. We reviewed it and explained that:
- The PDF provided wasn’t to scale,
- So it couldn’t safely be used as a basis for accurate CAD drawings.
We therefore recommended a full measured survey to avoid problems later in the design and planning stages.
Scoping, quotation & access planning
We issued a clear quotation covering:
- A measured survey of the flat
- Plans, elevations and section in DWG and PDF
- A realistic turnaround window of 5–6 working days from the survey
Once Marco and Rosie confirmed they were happy, we moved to scheduling:
- We initially suggested a Saturday or Monday survey, but that was too short notice for tenants.
- We then proposed Thursday afternoon, with a 2:00–2:30 pm arrival window – matching a slot when Rosie and Marco would already be on site.
Because it’s a lived-in, tenanted property, we:
- Confirmed that we’re used to working in occupied homes
- Emphasised that we only need temporary access to each room and would work as unobtrusively as possible
Rosie then:
- Checked availability with the tenants
- Paid the initial survey deposit, and
- Received a payment receipt and written confirmation of the survey time and surveyor details (Ali’s name and mobile).
Carrying out the survey – working around tenants & tight access
On the day:
- Traffic delays meant arrival times shifted slightly, and there was some coordination over text and phone.
- Tenants were scheduled to be out from 2–3 pm, giving Rosie and Marco time to walk through options, then return after 3 pm.
- Key access had to be managed via a hidden key “under the basket by the front door”, so our surveyor could let himself in if needed.
Our surveyor Ali carried out the measured survey using:
- A laser distance meter for quick, accurate internal dimensions
- A tablet-based floor plan template so rooms, doors, and windows were captured consistently
- A steel tape for cross-checks and tight or irregular spaces
- External checks from the street and rear to tie elevations back to the floor plans
Despite the constraints of an occupied, compact flat, we were able to capture:
- Ground and first floor layouts
- The relevant roof geometry
- Front and rear elevations, including a slice of the neighbouring façades
- Enough information for the requested long section
Rosie and Marco confirmed afterwards that everything had gone smoothly on site.
Turning the survey into drawings
Back at the studio, our CAD team translated the raw survey data into a clean, layered DWG model:
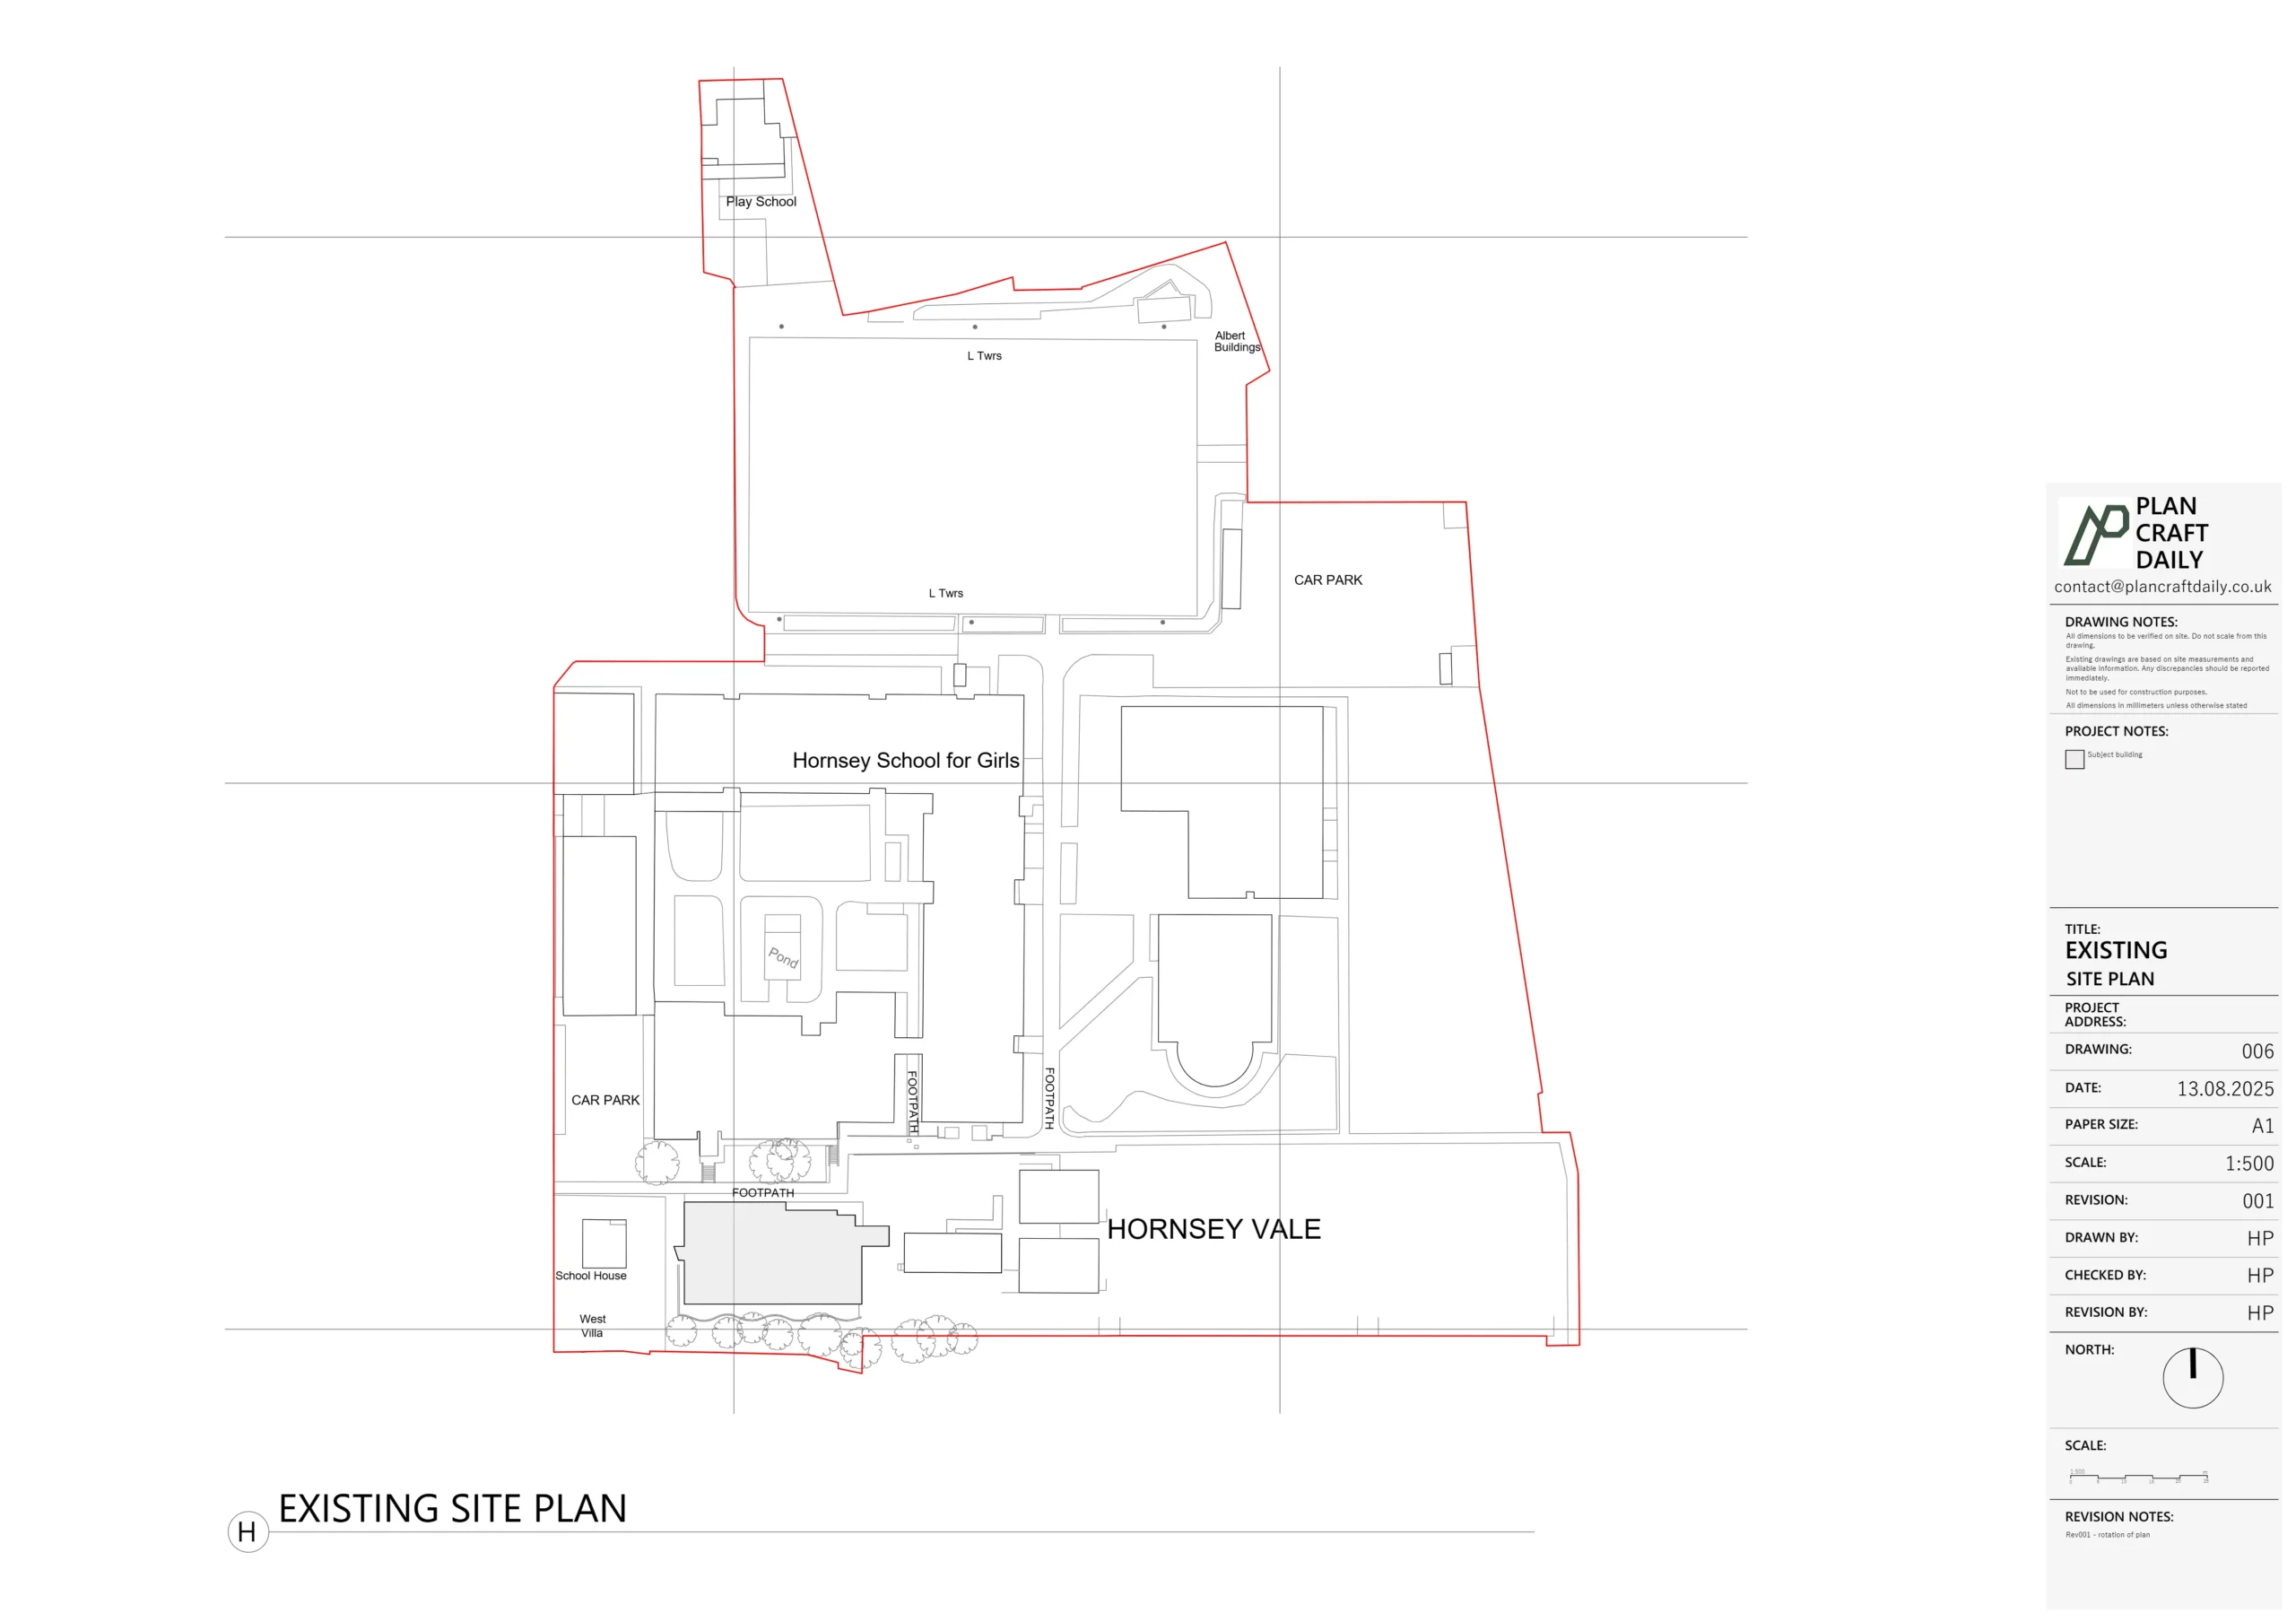
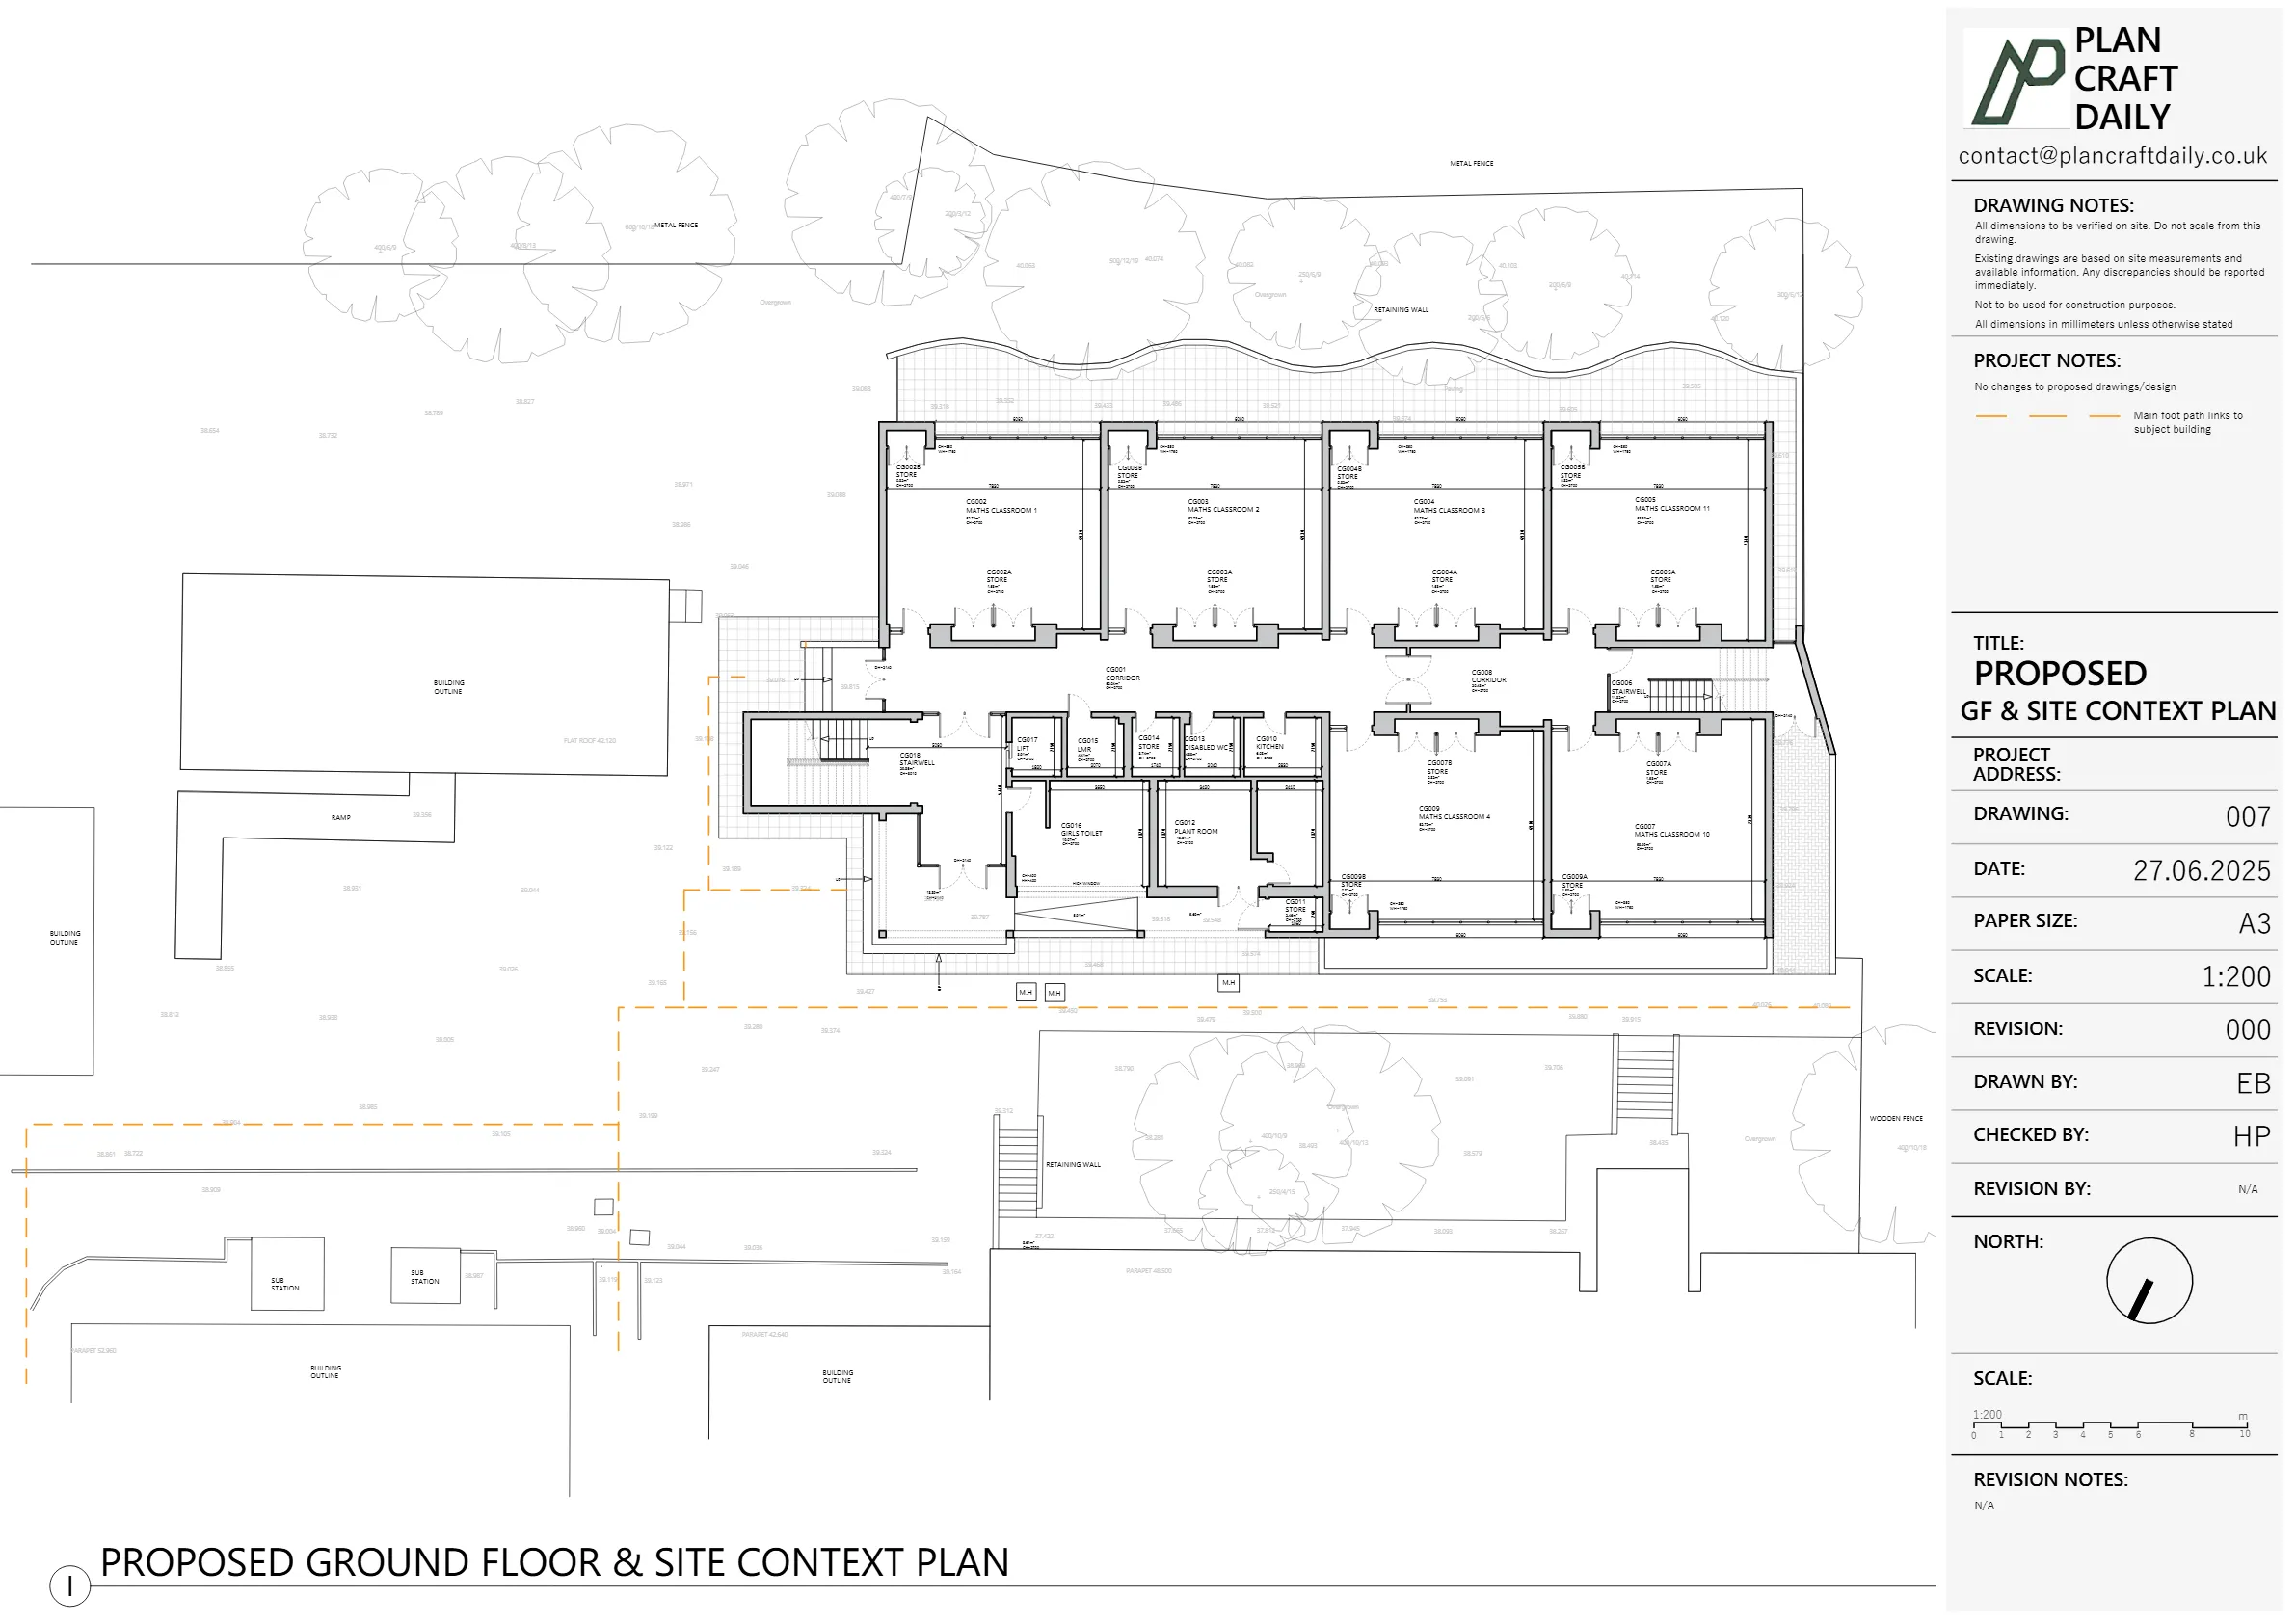
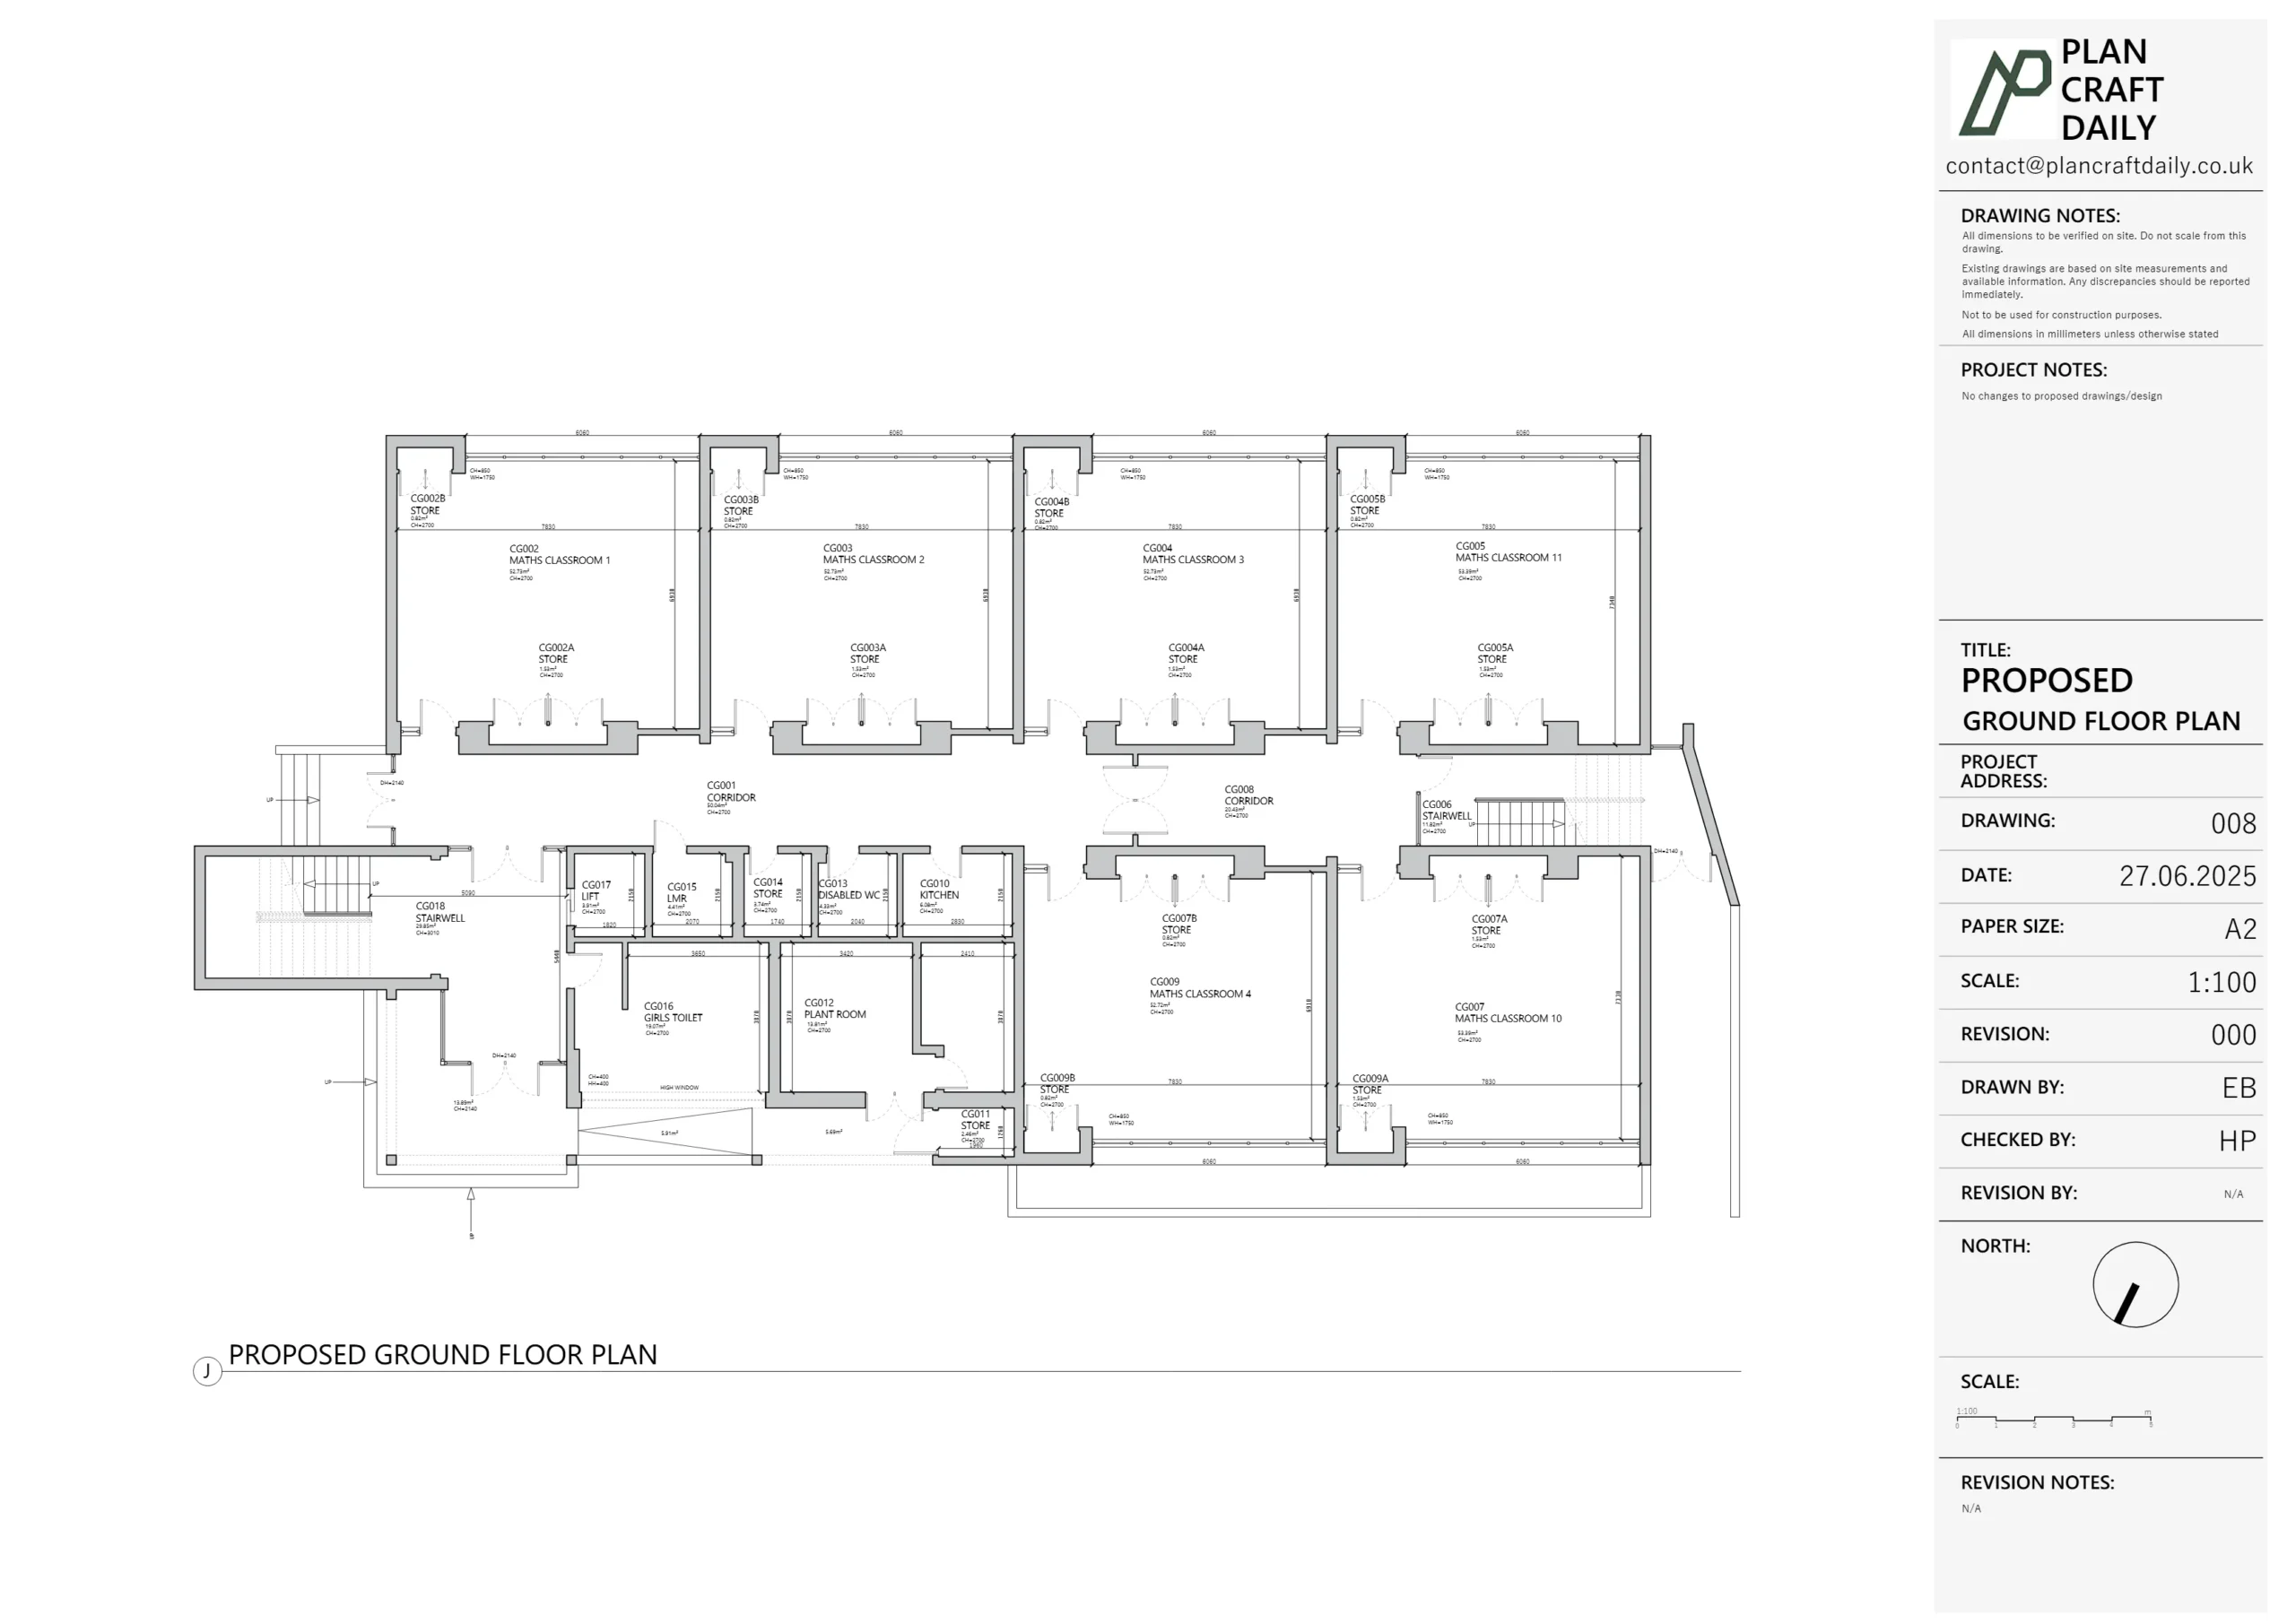
- Existing floor plans (ground and first) suitable for planning and detailed design
- A roof plan tied correctly into the elevations and section
- Front and rear elevations showing adjoining properties as requested
- One long section through the building
We kept Marco updated on timing:
- When he followed up, we confirmed the drawings were in our internal QA phase
- That quality check focuses on closing dimensions, levels and alignment between plans, elevations and sections
Once the QA was complete, we:
- Issued the draft PDF pack to Marco and Rosie
- Attached the final invoice with a reminder that once settled, we would release the DWG files, final PDFs, and photos
Marco replied that everything “looks great”, and Rosie promptly paid the outstanding balance.
Final delivery, review incentive & next steps
After the final payment:
- We confirmed receipt of funds and attached the formal payment receipt
- Shared a secure link to all final drawings and related files for the project (DWGs + PDFs)
- Closed out the card as Completed
As a small thank-you, we then followed up with:
- A polite request for a review,
- Linked to a 10% discount on their next project with us – reflecting how much we value clients who return and refer us on.
By the end of the project:
We laid the foundations for an ongoing relationship – they’ve already started talking to us about the next terraced house project on Boundary Road.
Rosie, as a first-time client for this kind of work, had a clear, guided experience from first email through to final DWG.
Marco received accurate, CAD-ready existing drawings in the format he needed, on the promised turnaround.
Project Details
| Service Type | Measured survey, existing drawings (plans, elevations, section) in DWG & PDF |
| Time Taken | 1–2 weeks |
| Budget | £450–£550 |
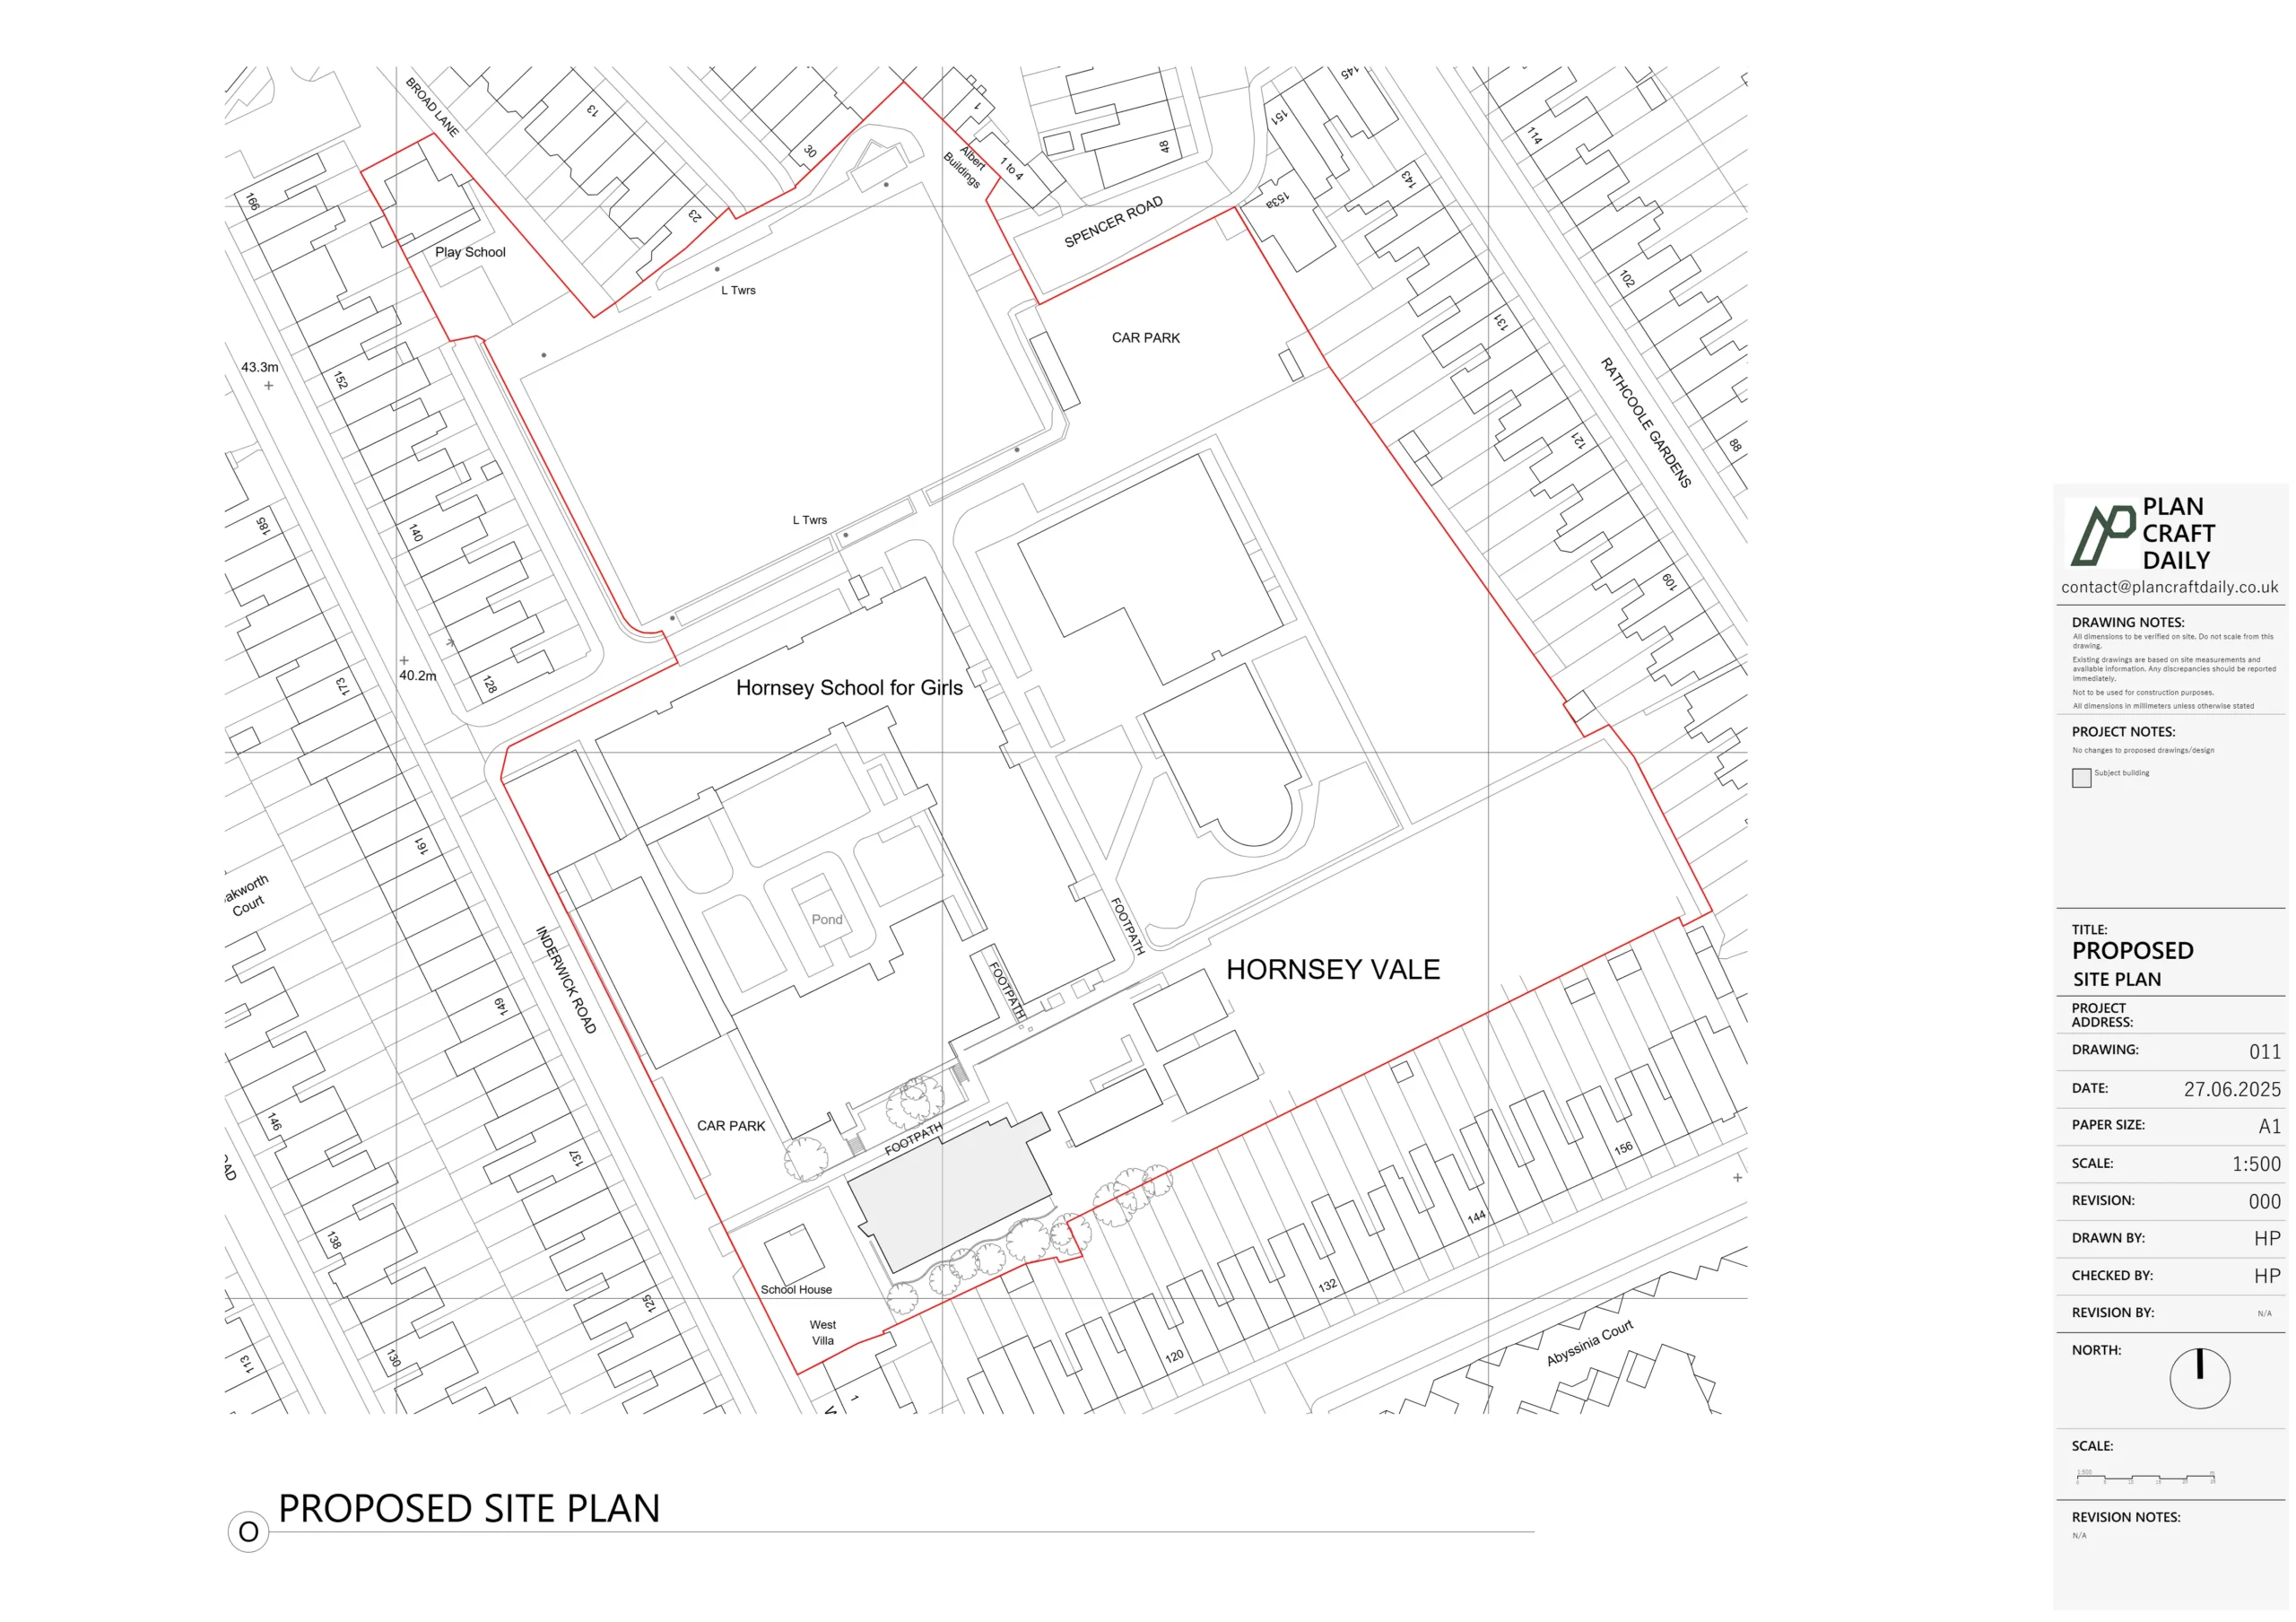
| Location | Durban Road, Norwood, South London |