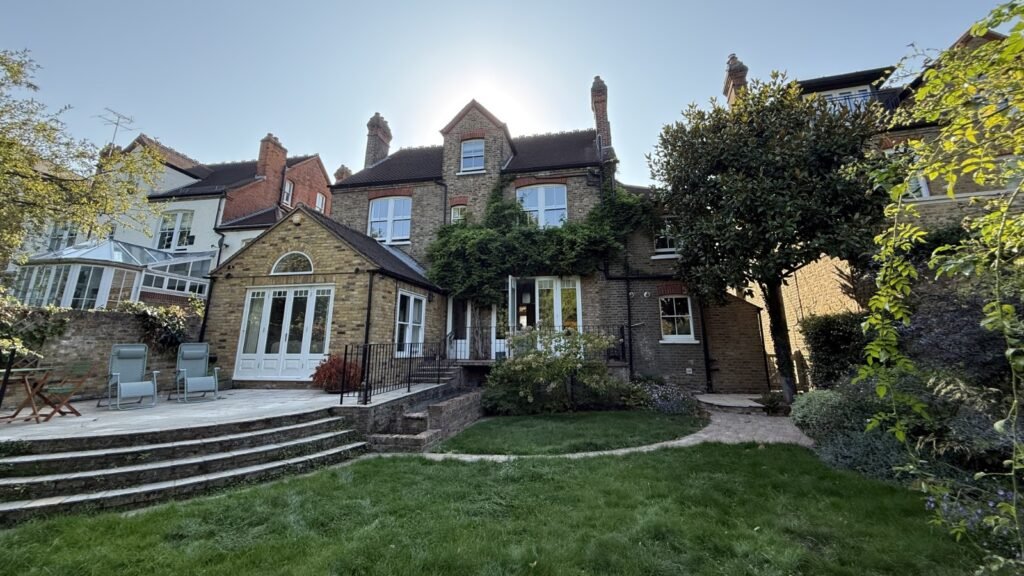
Anna came back to us after a previous project, needing a very detailed survey for a large house in Twickenham. Her client wanted full plans, one main section, and internal elevations laid out “360°” around the floor plan, ready for design work.
Because this job was more detailed than the last one we did for her (extra ceiling plans, more joinery and lighting information), we first:
- Talked through what she used and didn’t use last time
- Confirmed she wanted all sockets, switches and radiators shown
- Agreed that she didn’t need our sheeted elevations, just clean DWG files
- Explained why the fee would be higher than the Putney job, and where we might still bring it down
Once the quote was agreed and the initial payment was made, we booked a firm survey date and gave a clear arrival window so Anna’s client could plan around us.
How we carried out the survey
On the day, our surveyor completed a full internal and external measured survey. We used:
- A Disto laser for accurate room sizes, offsets and heights
- A consistent room-by-room route so no spaces were missed
- Polycam 3D scans to capture ceilings, cornices, ceiling roses and light positions where a tape or laser is hard to use
- Photo sets of each room to support the elevations later
This gave us enough data to:
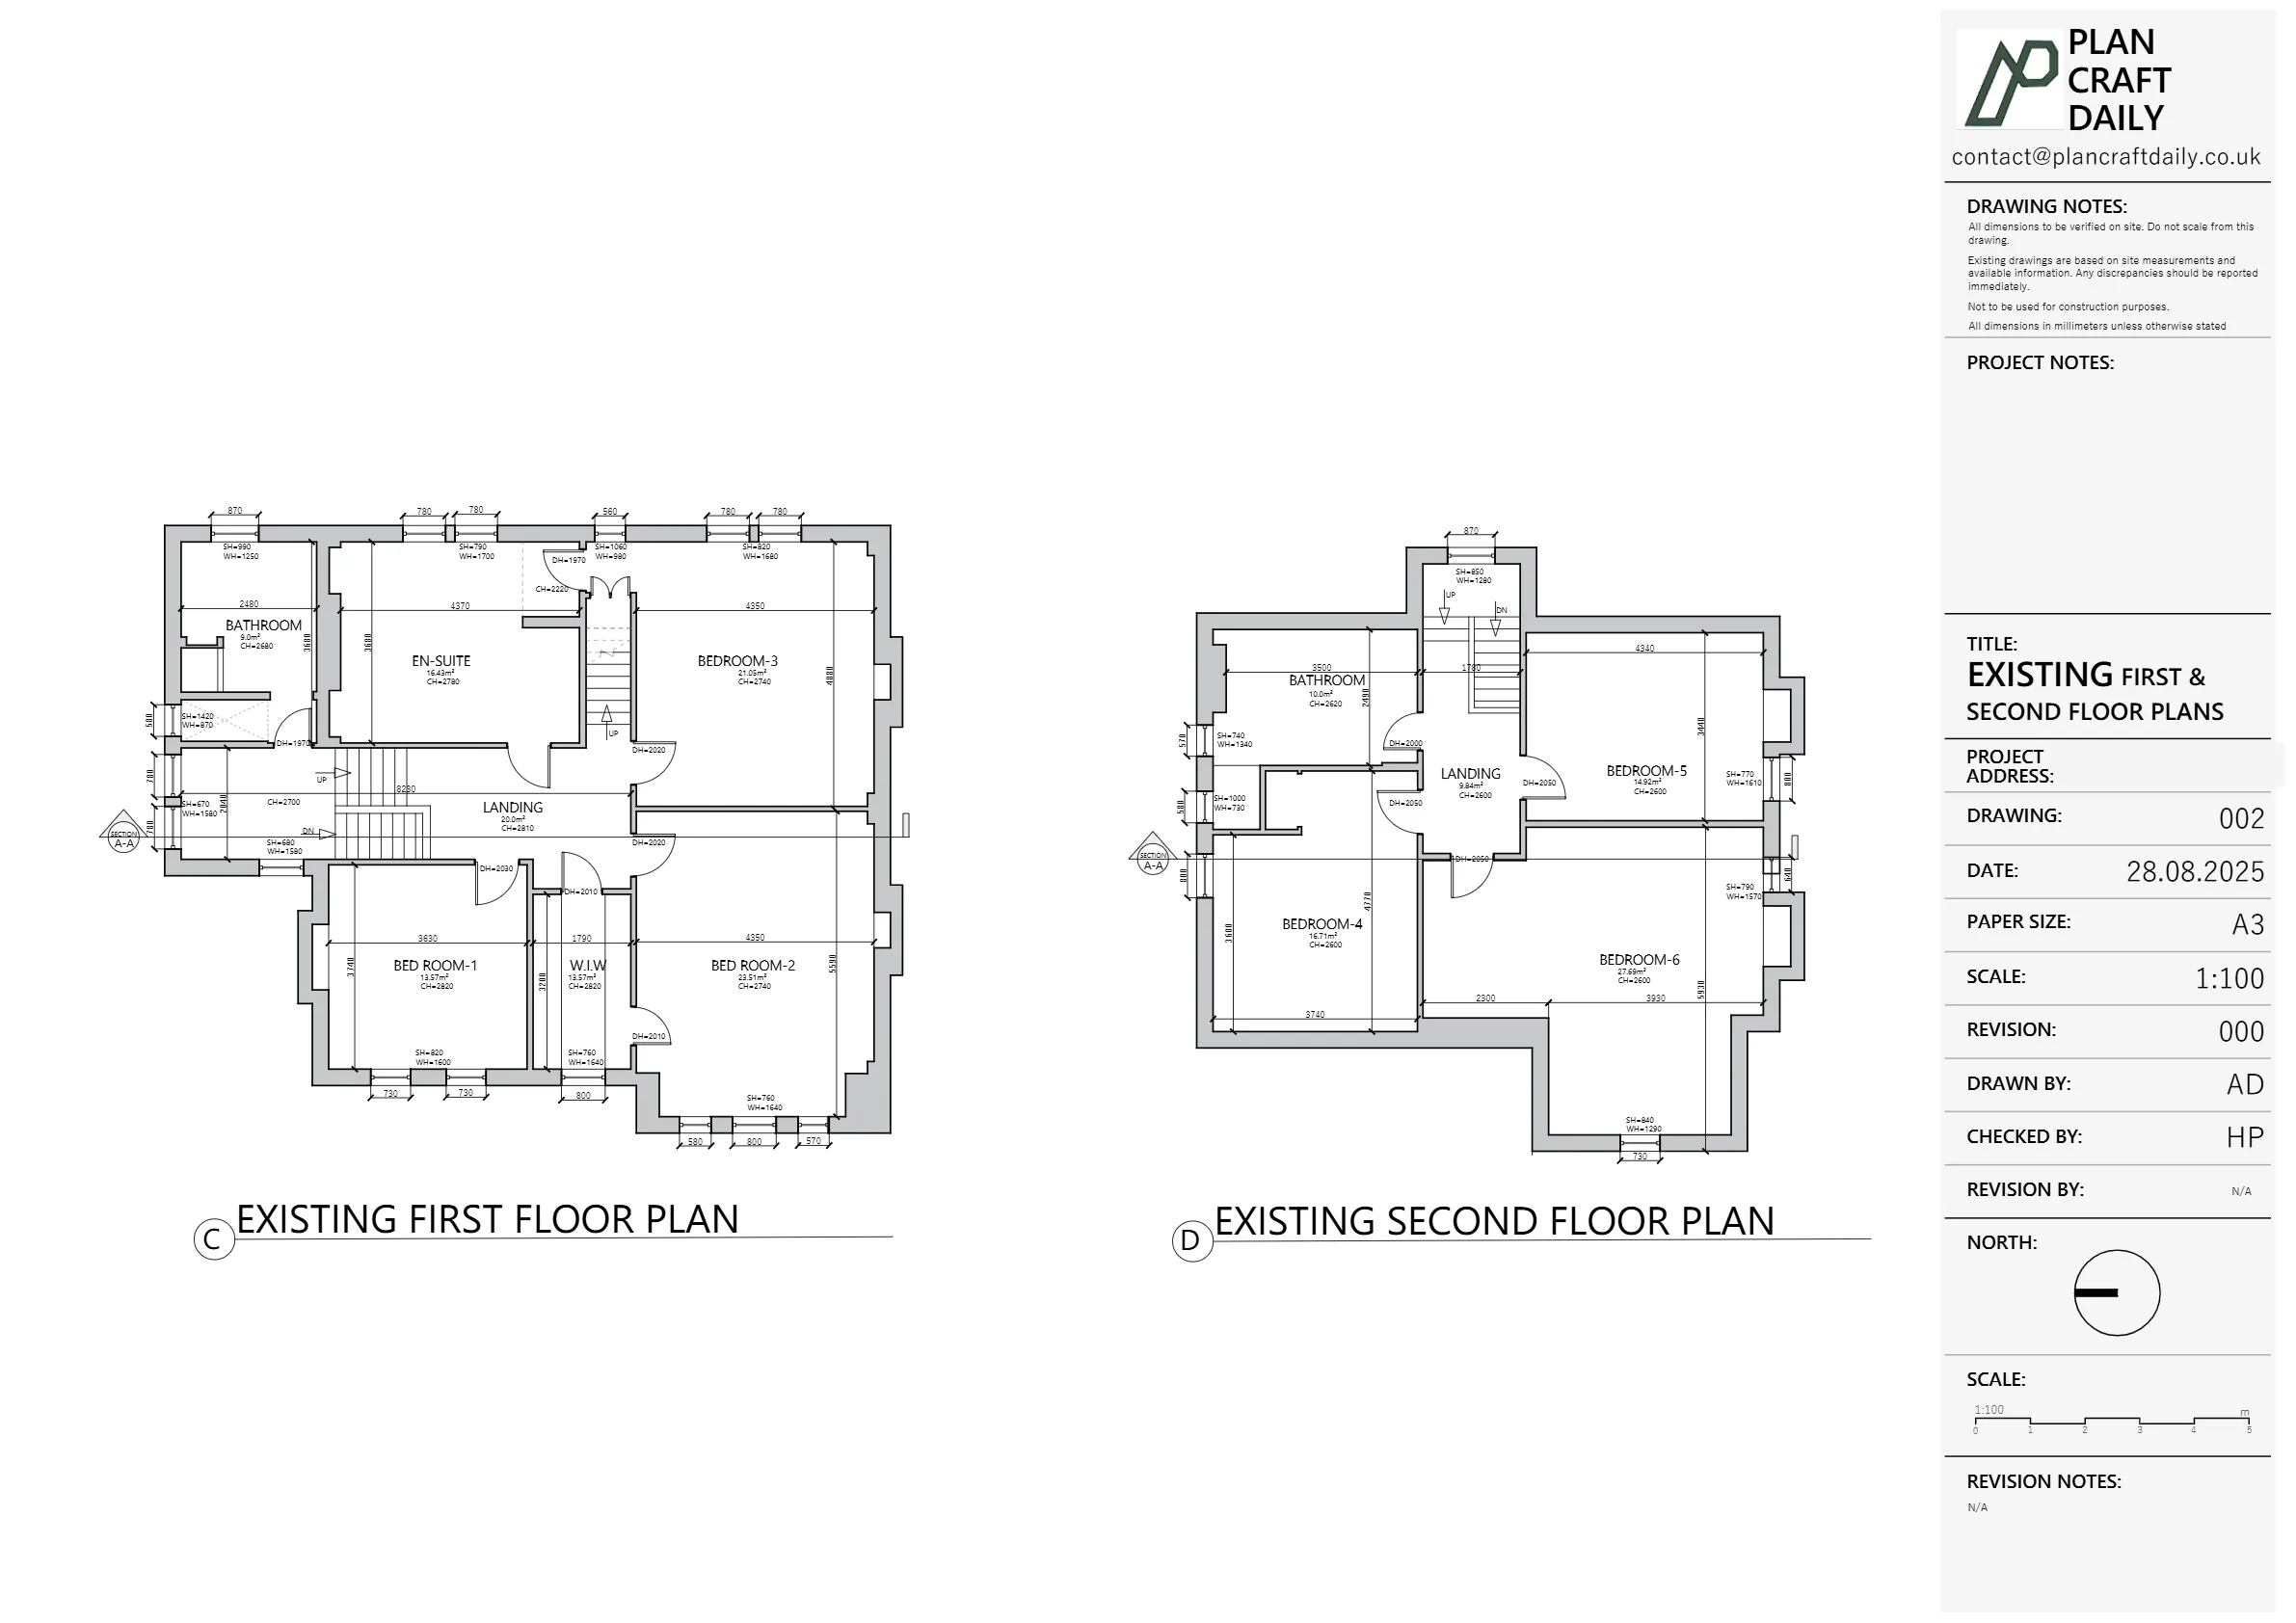
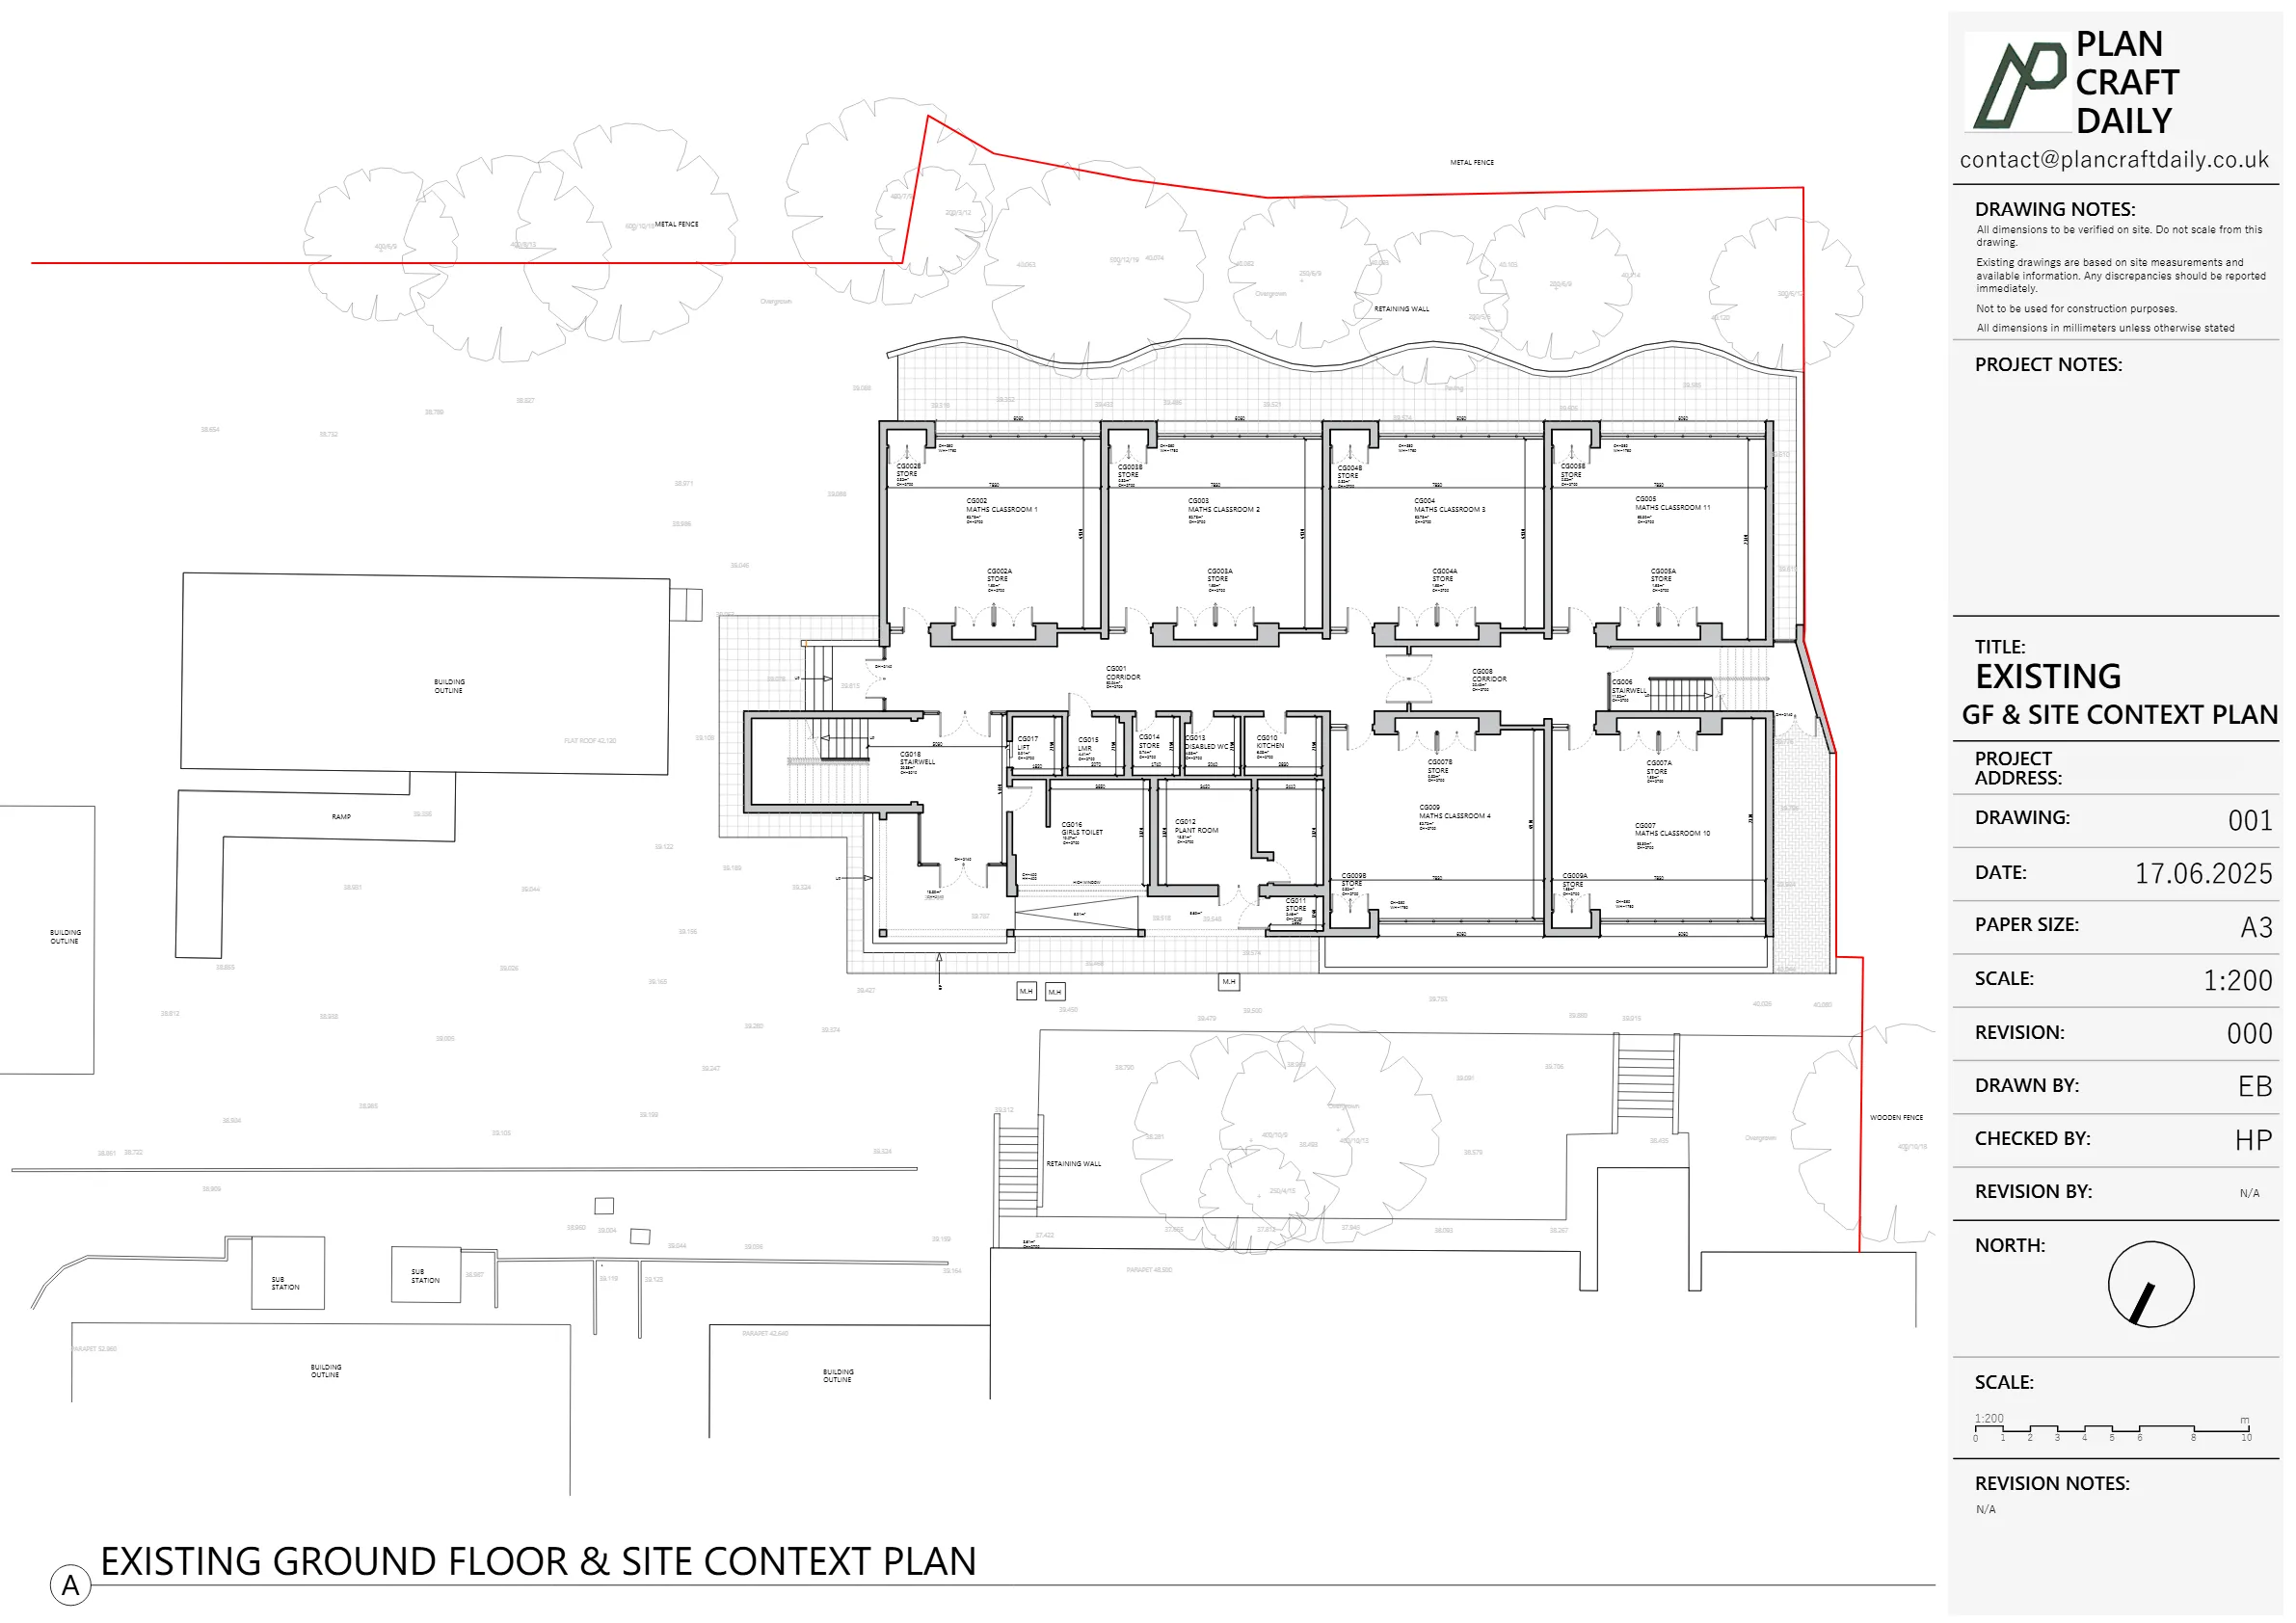
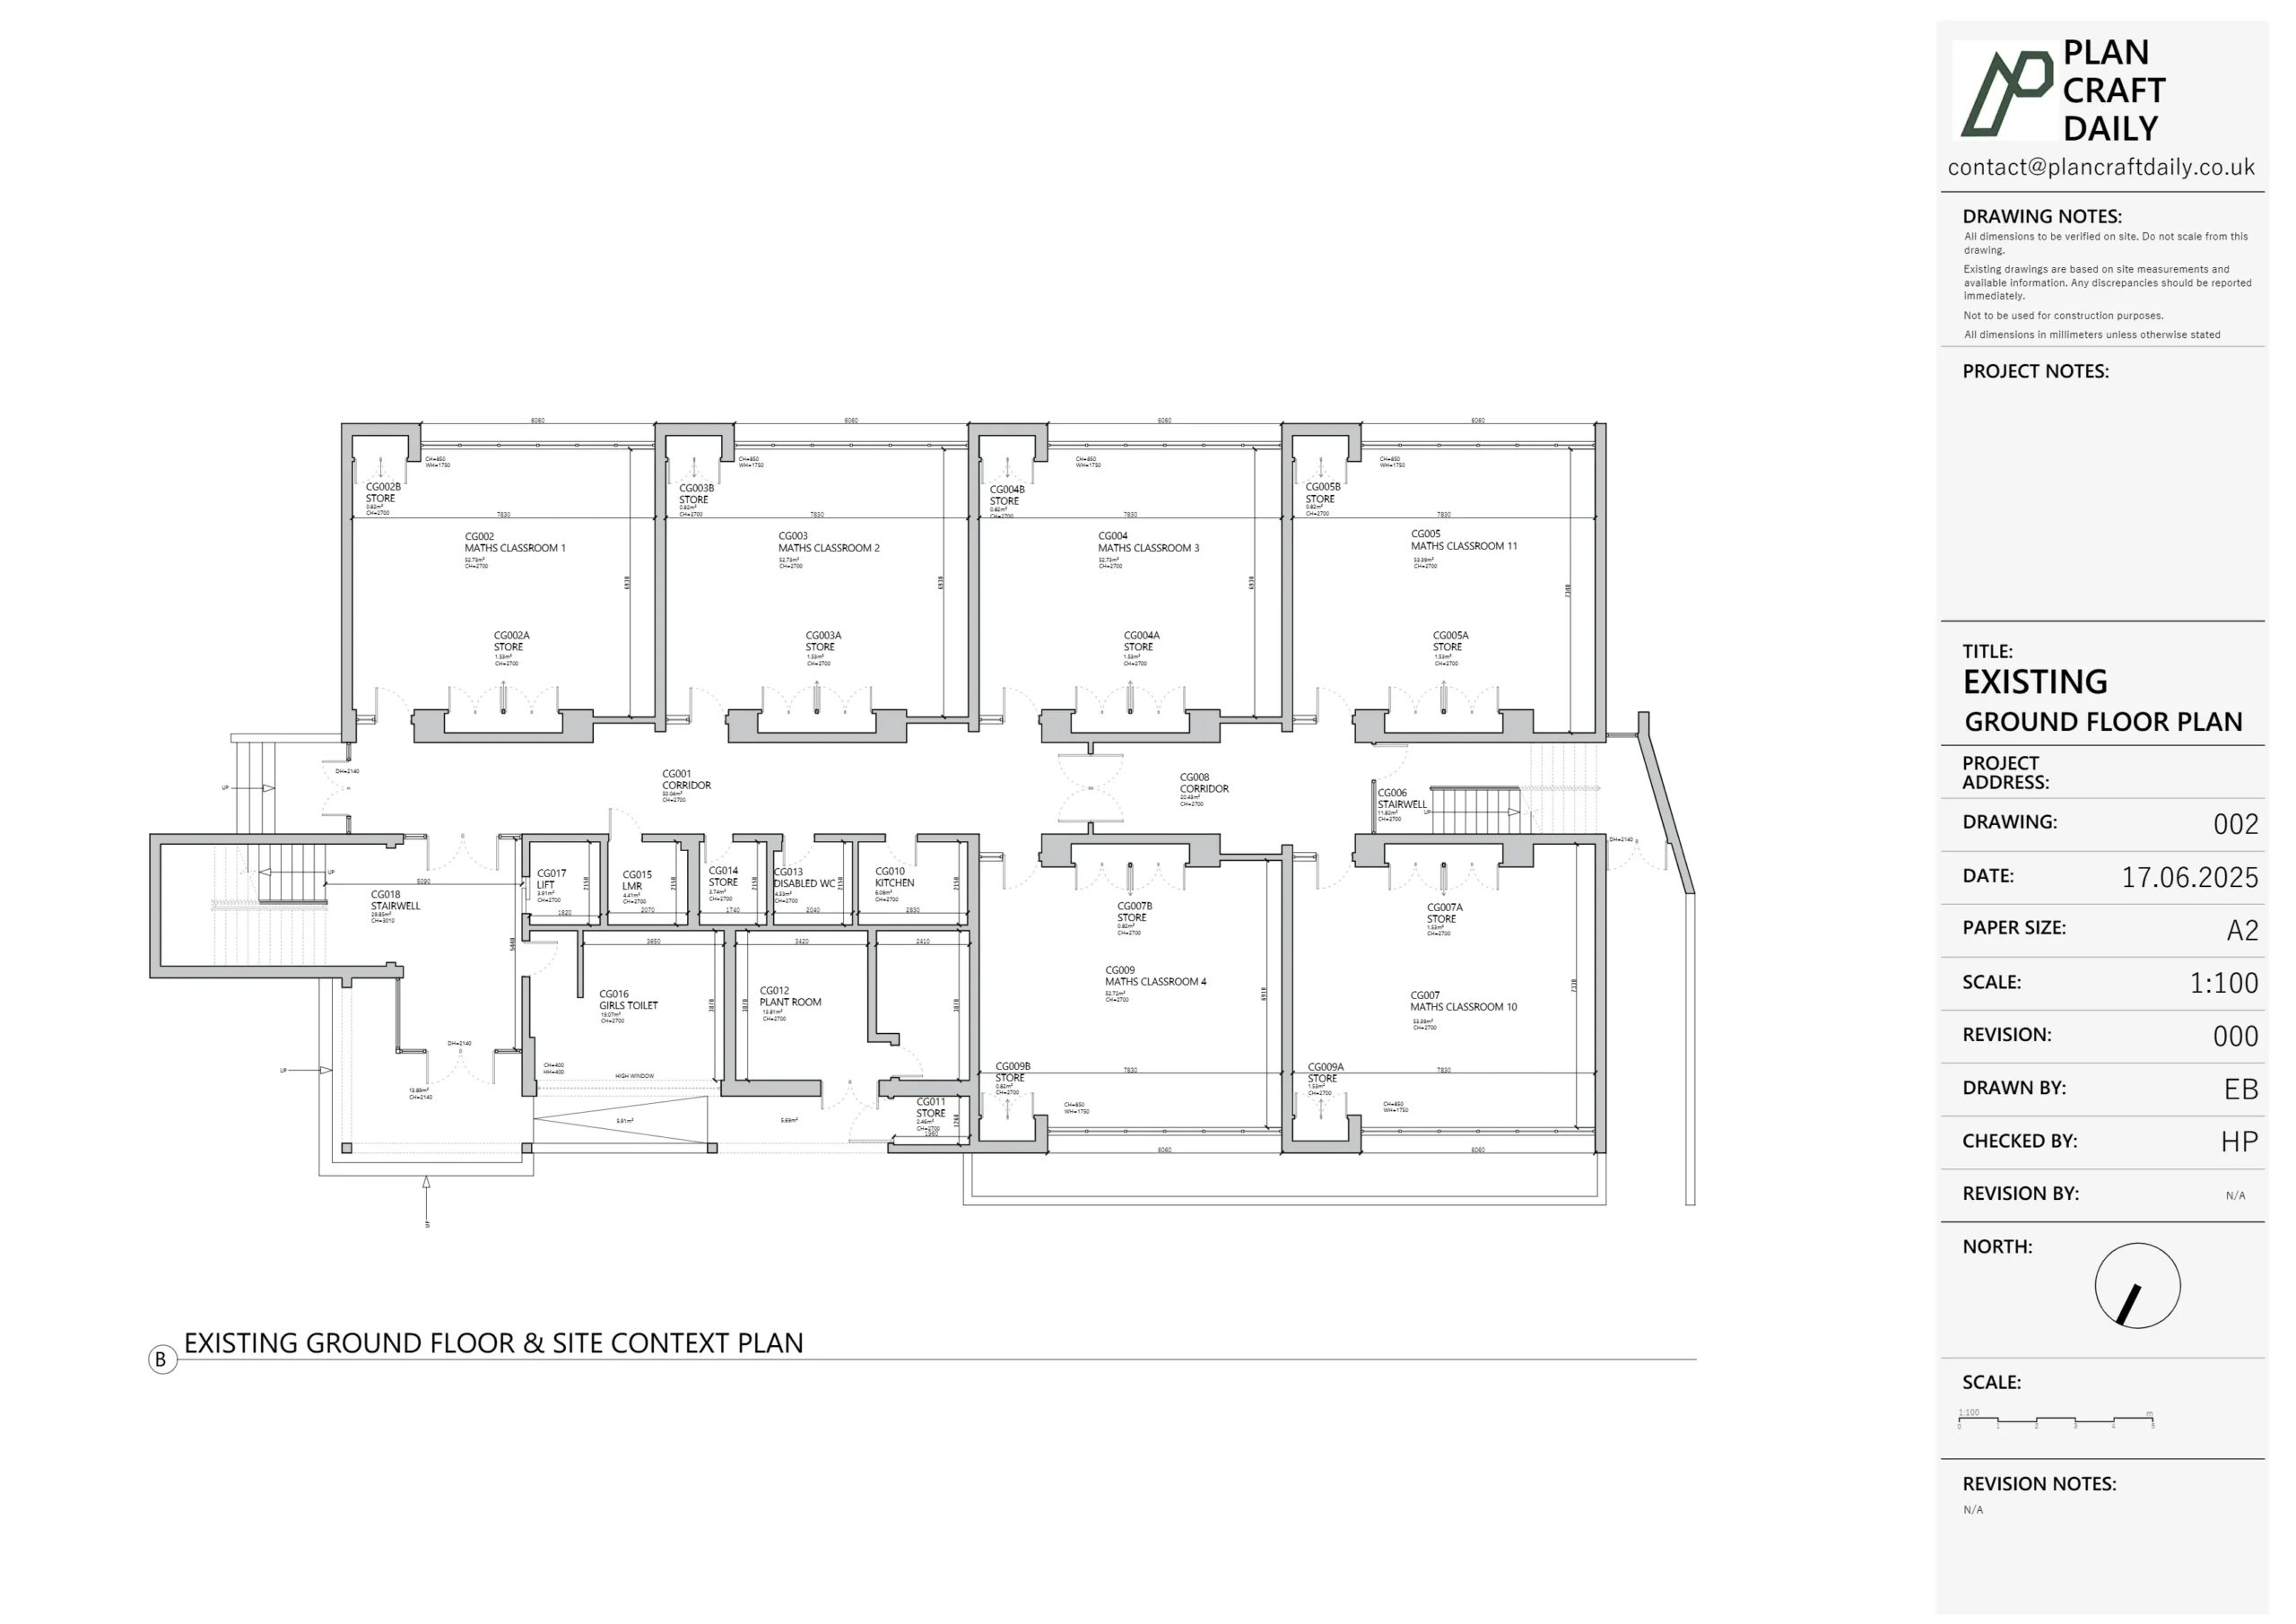
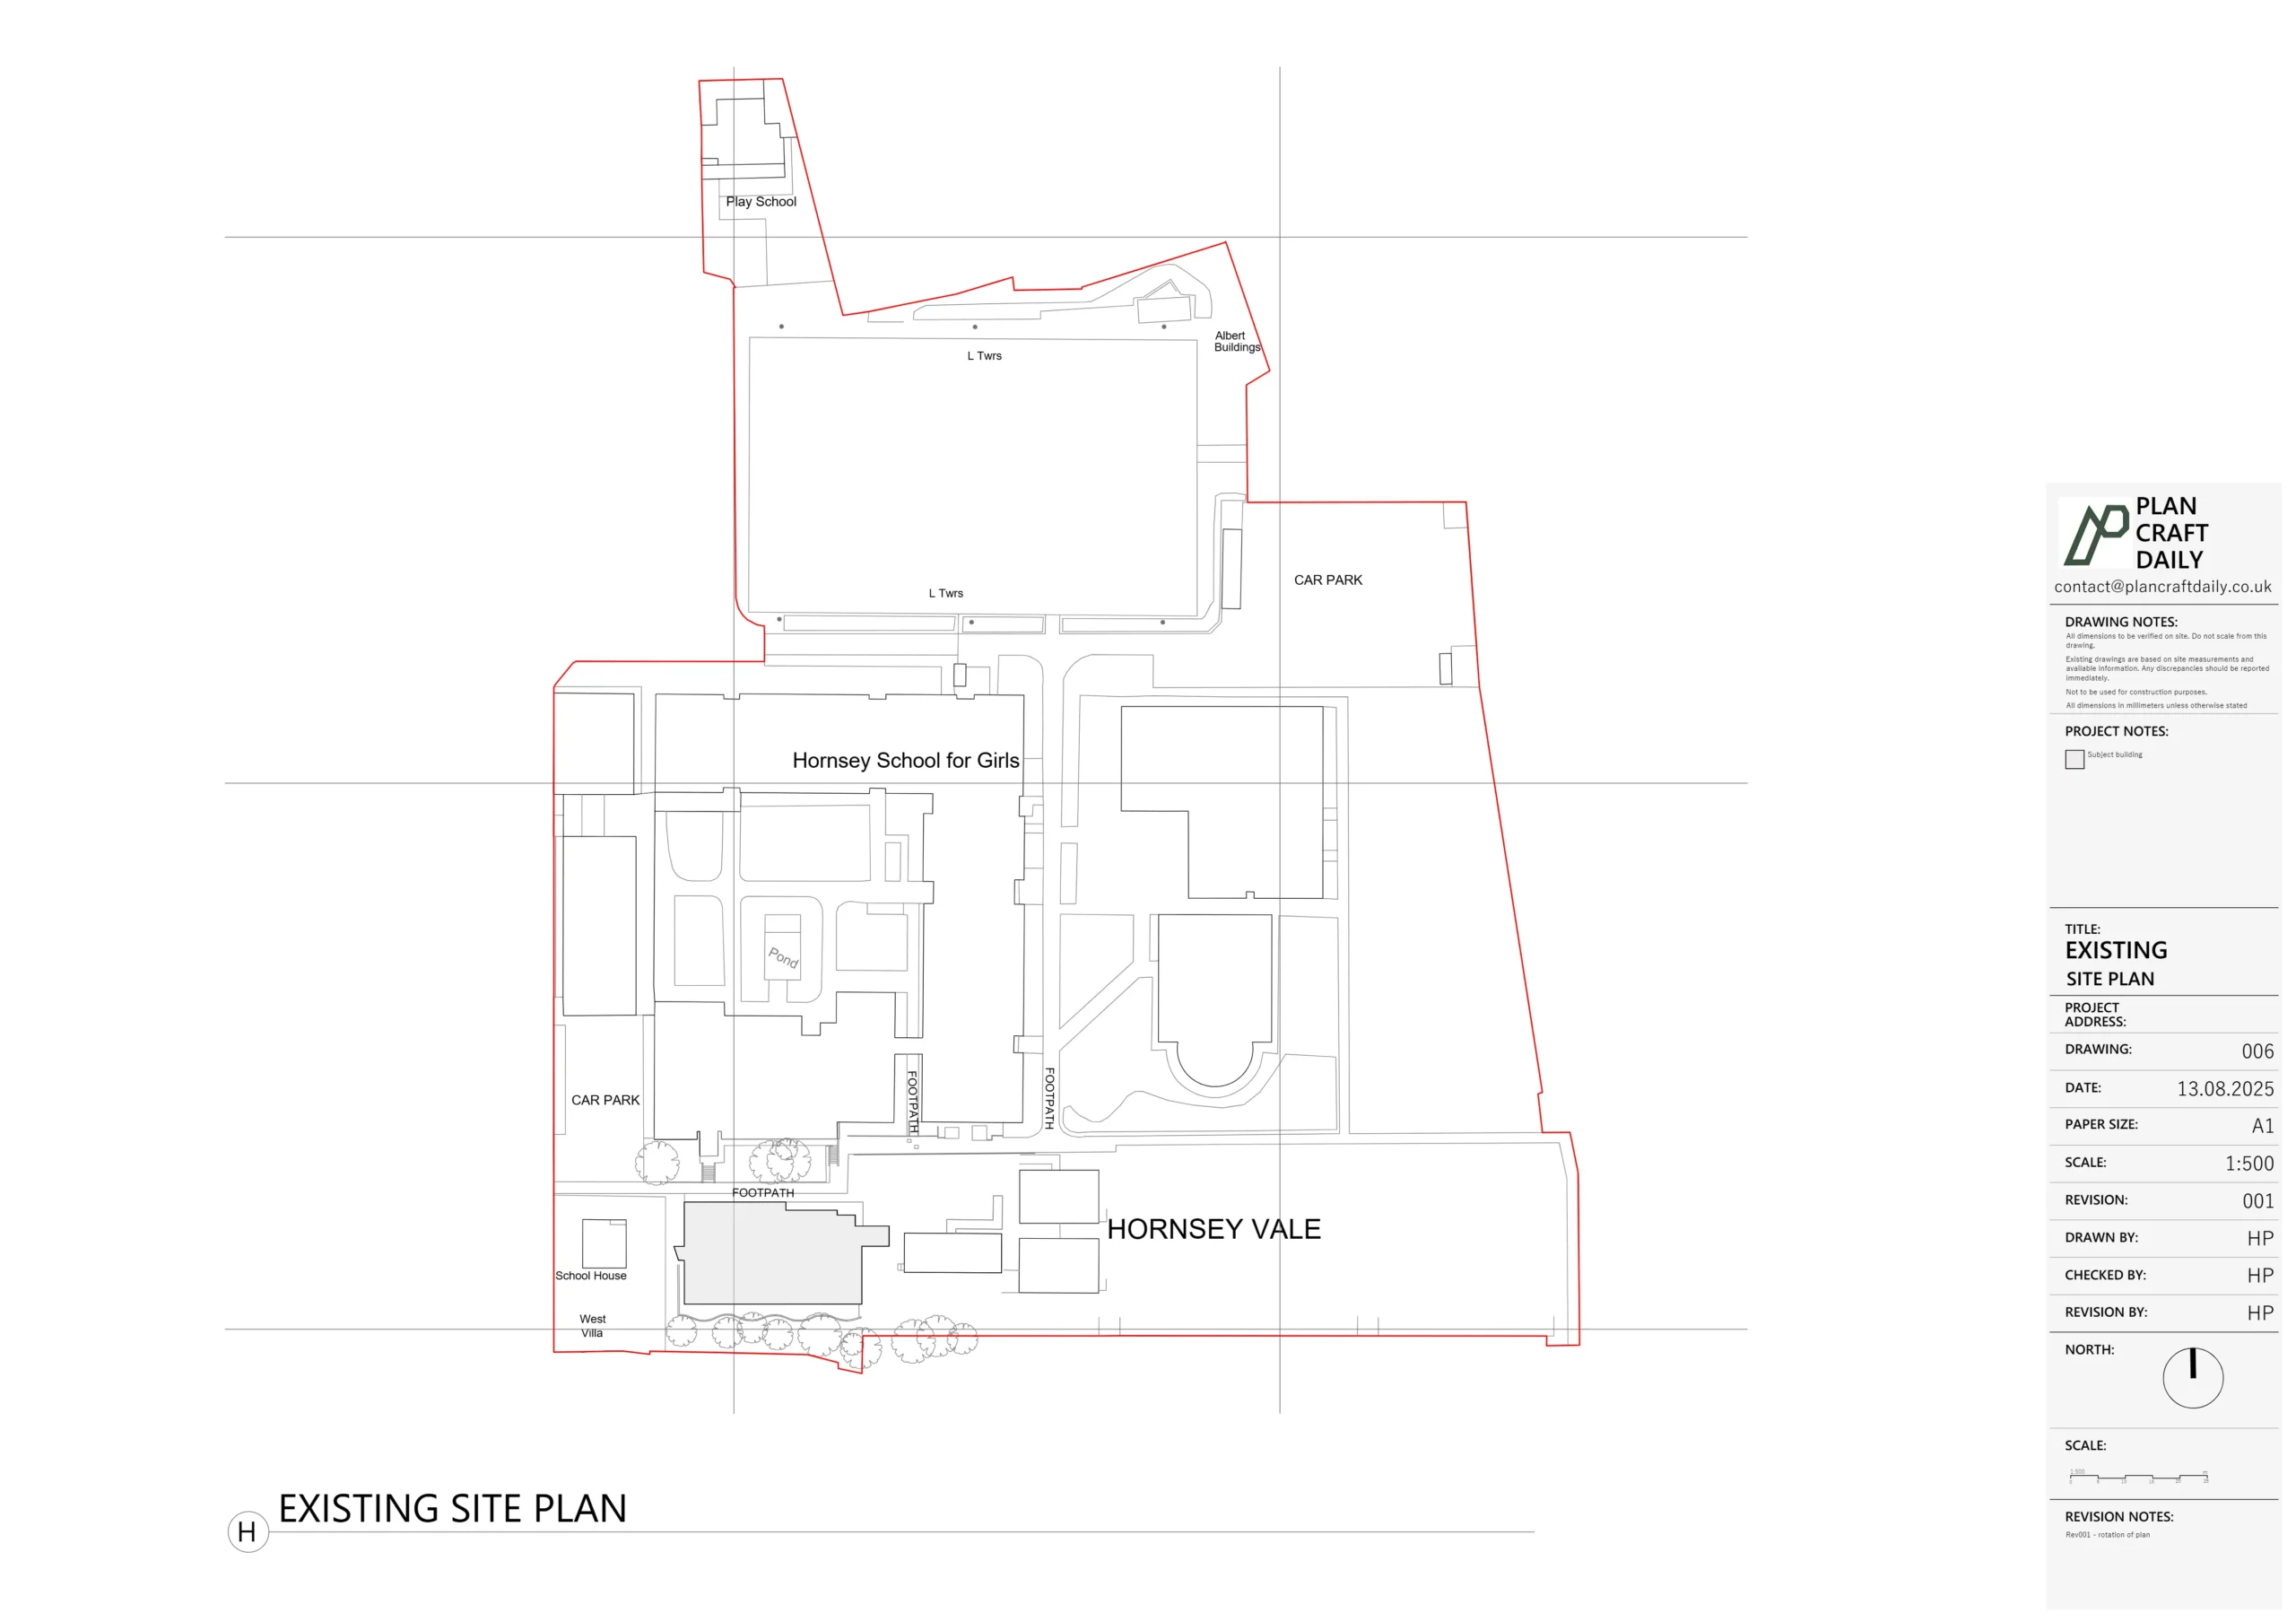
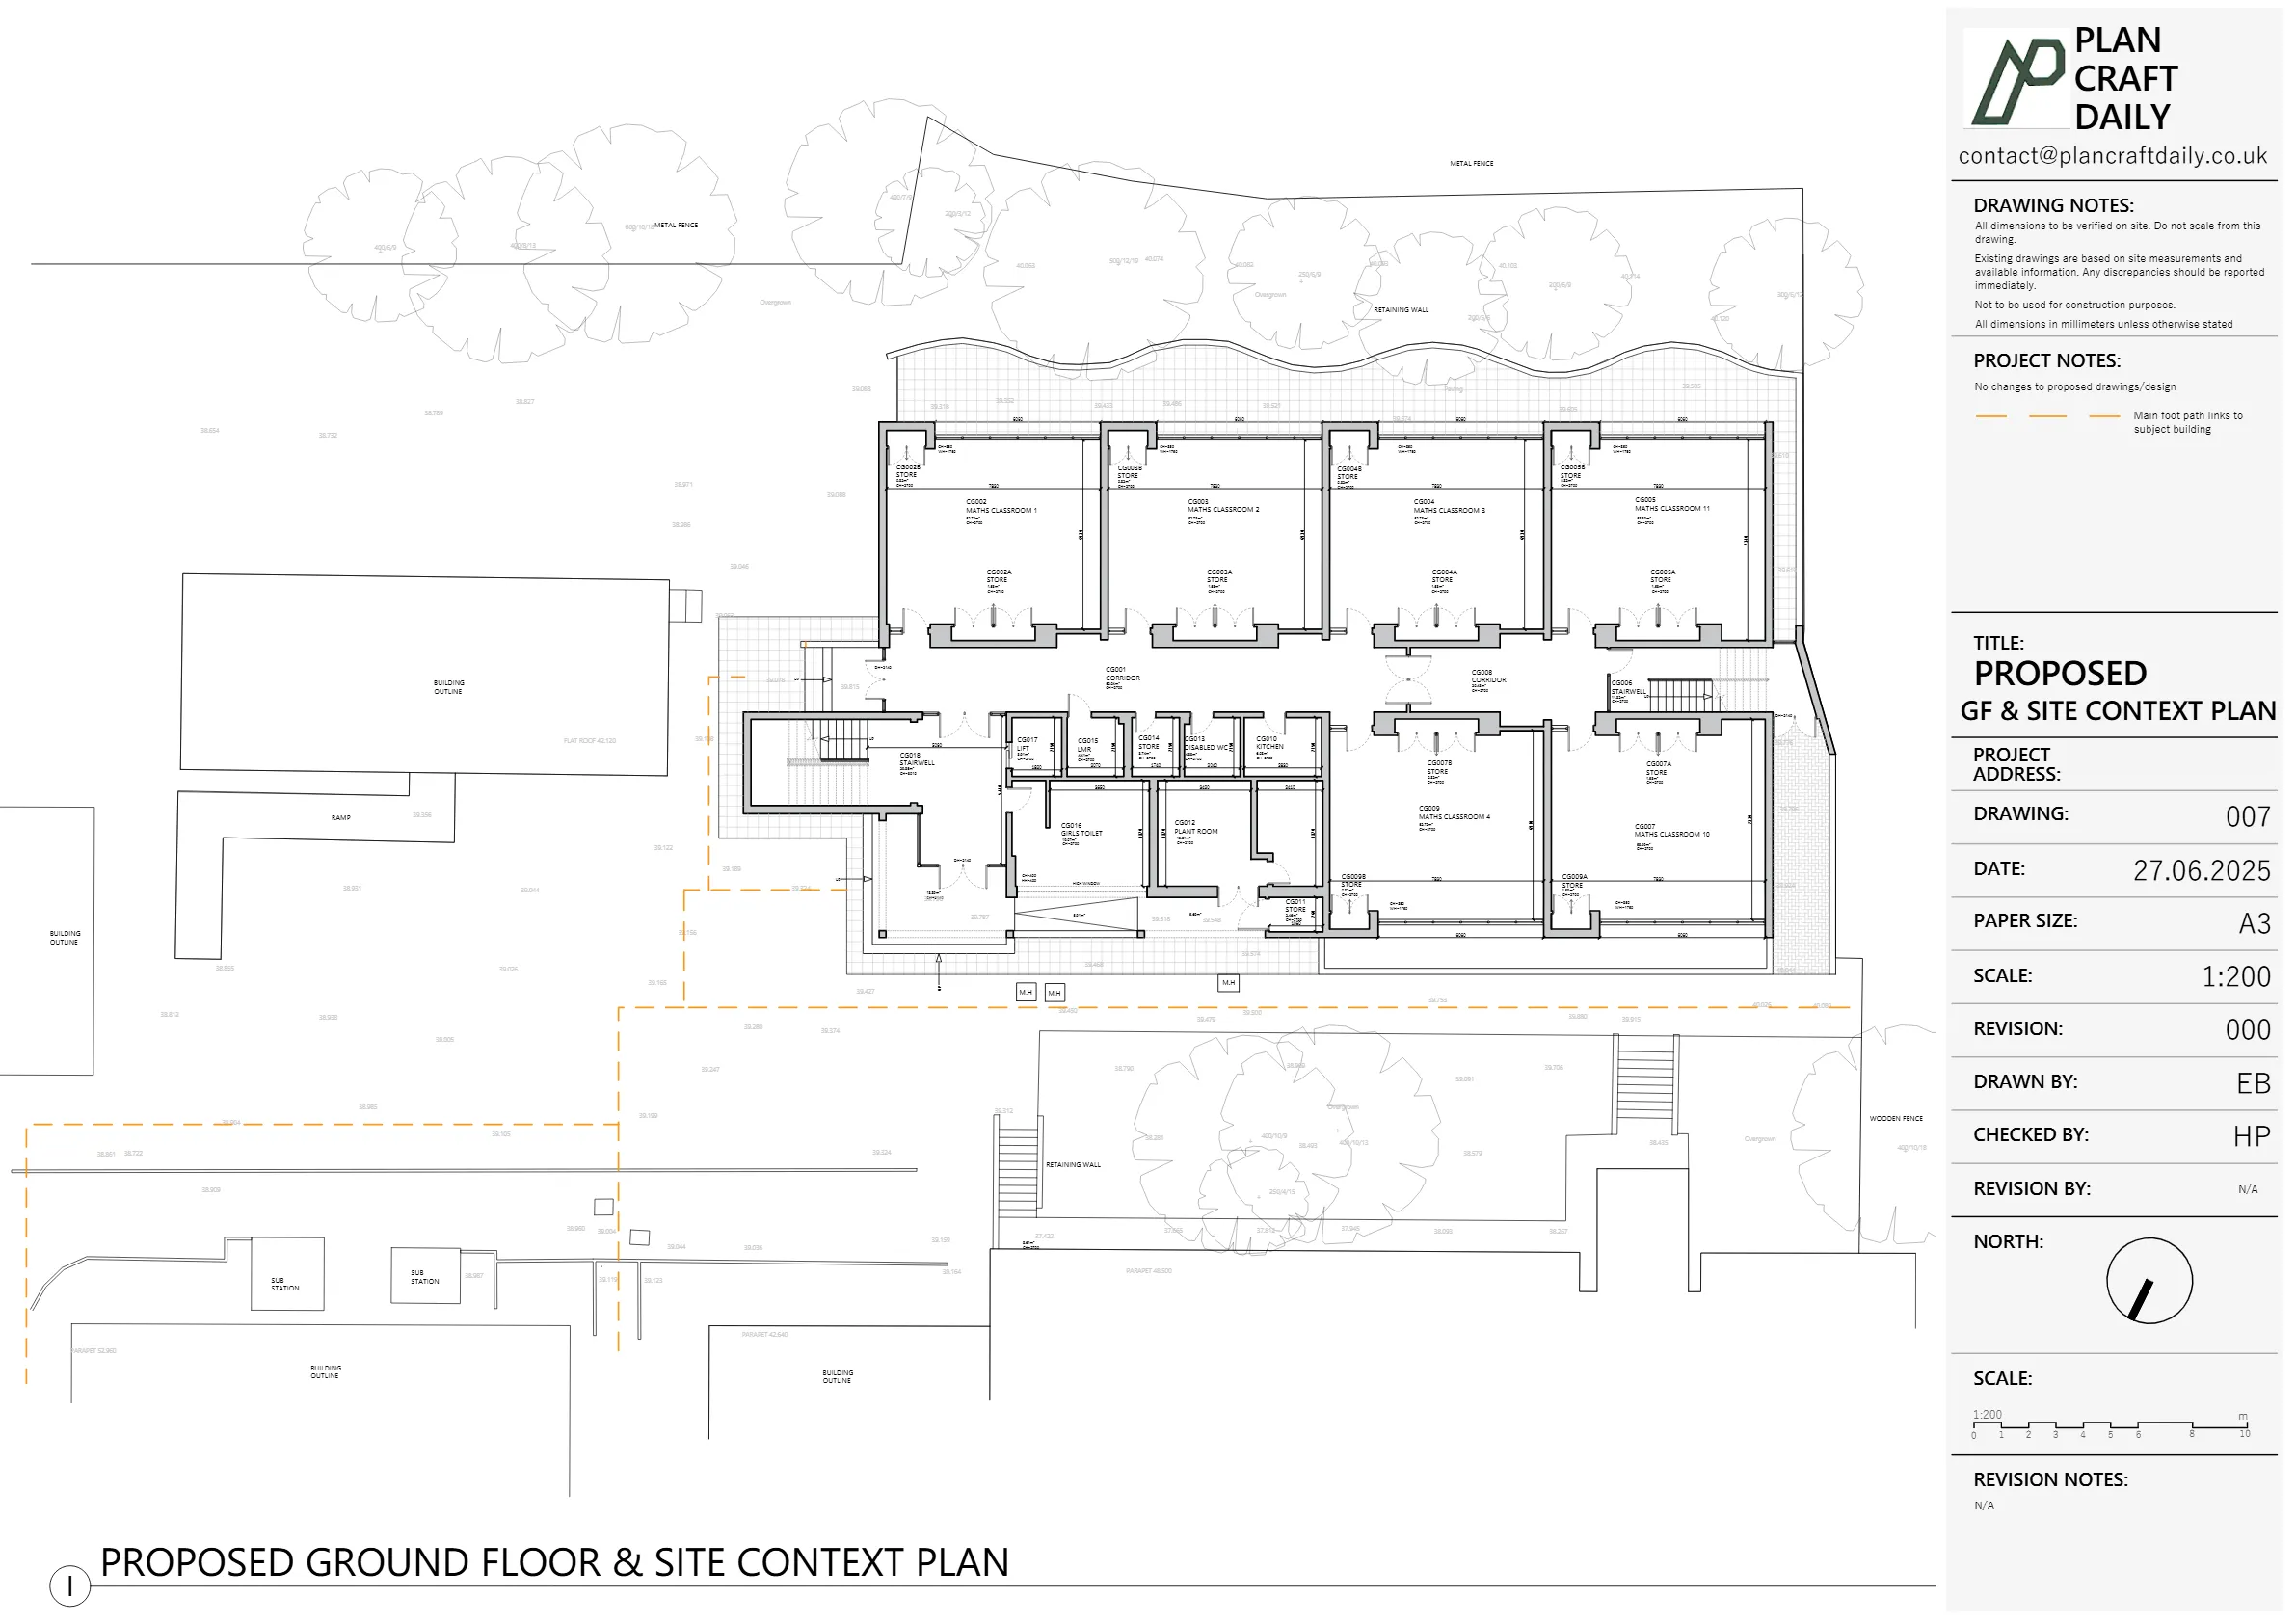
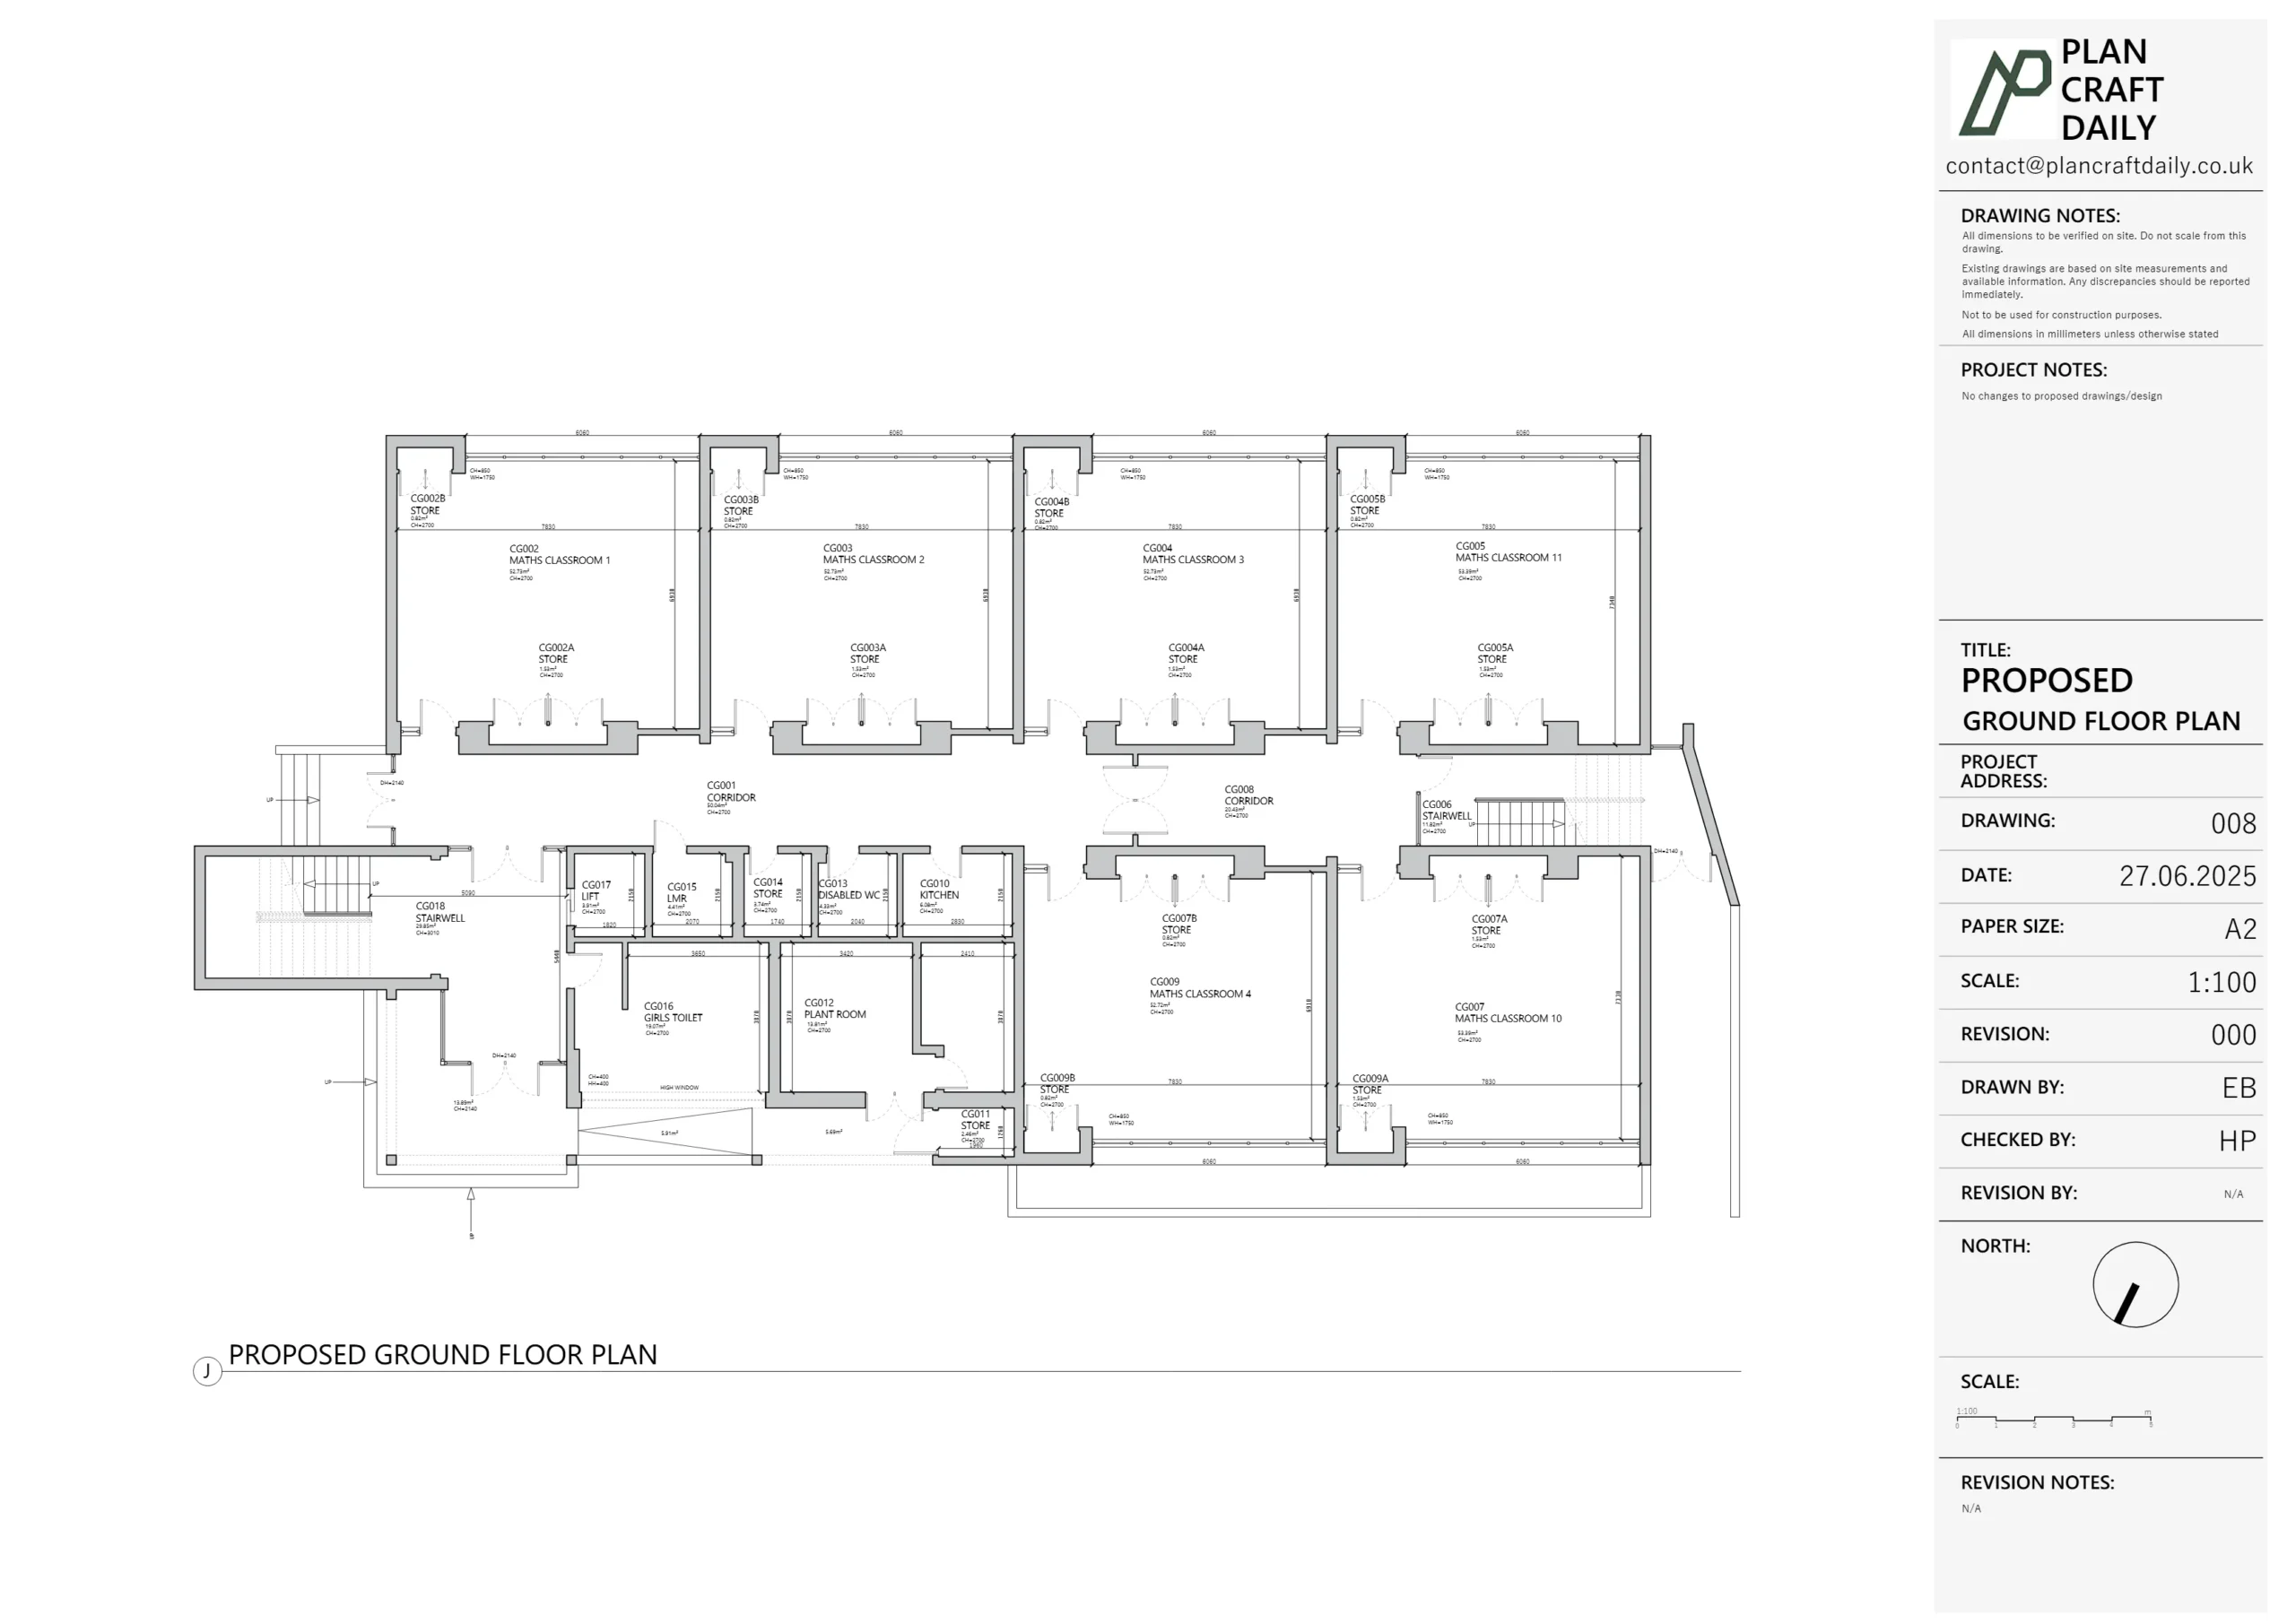
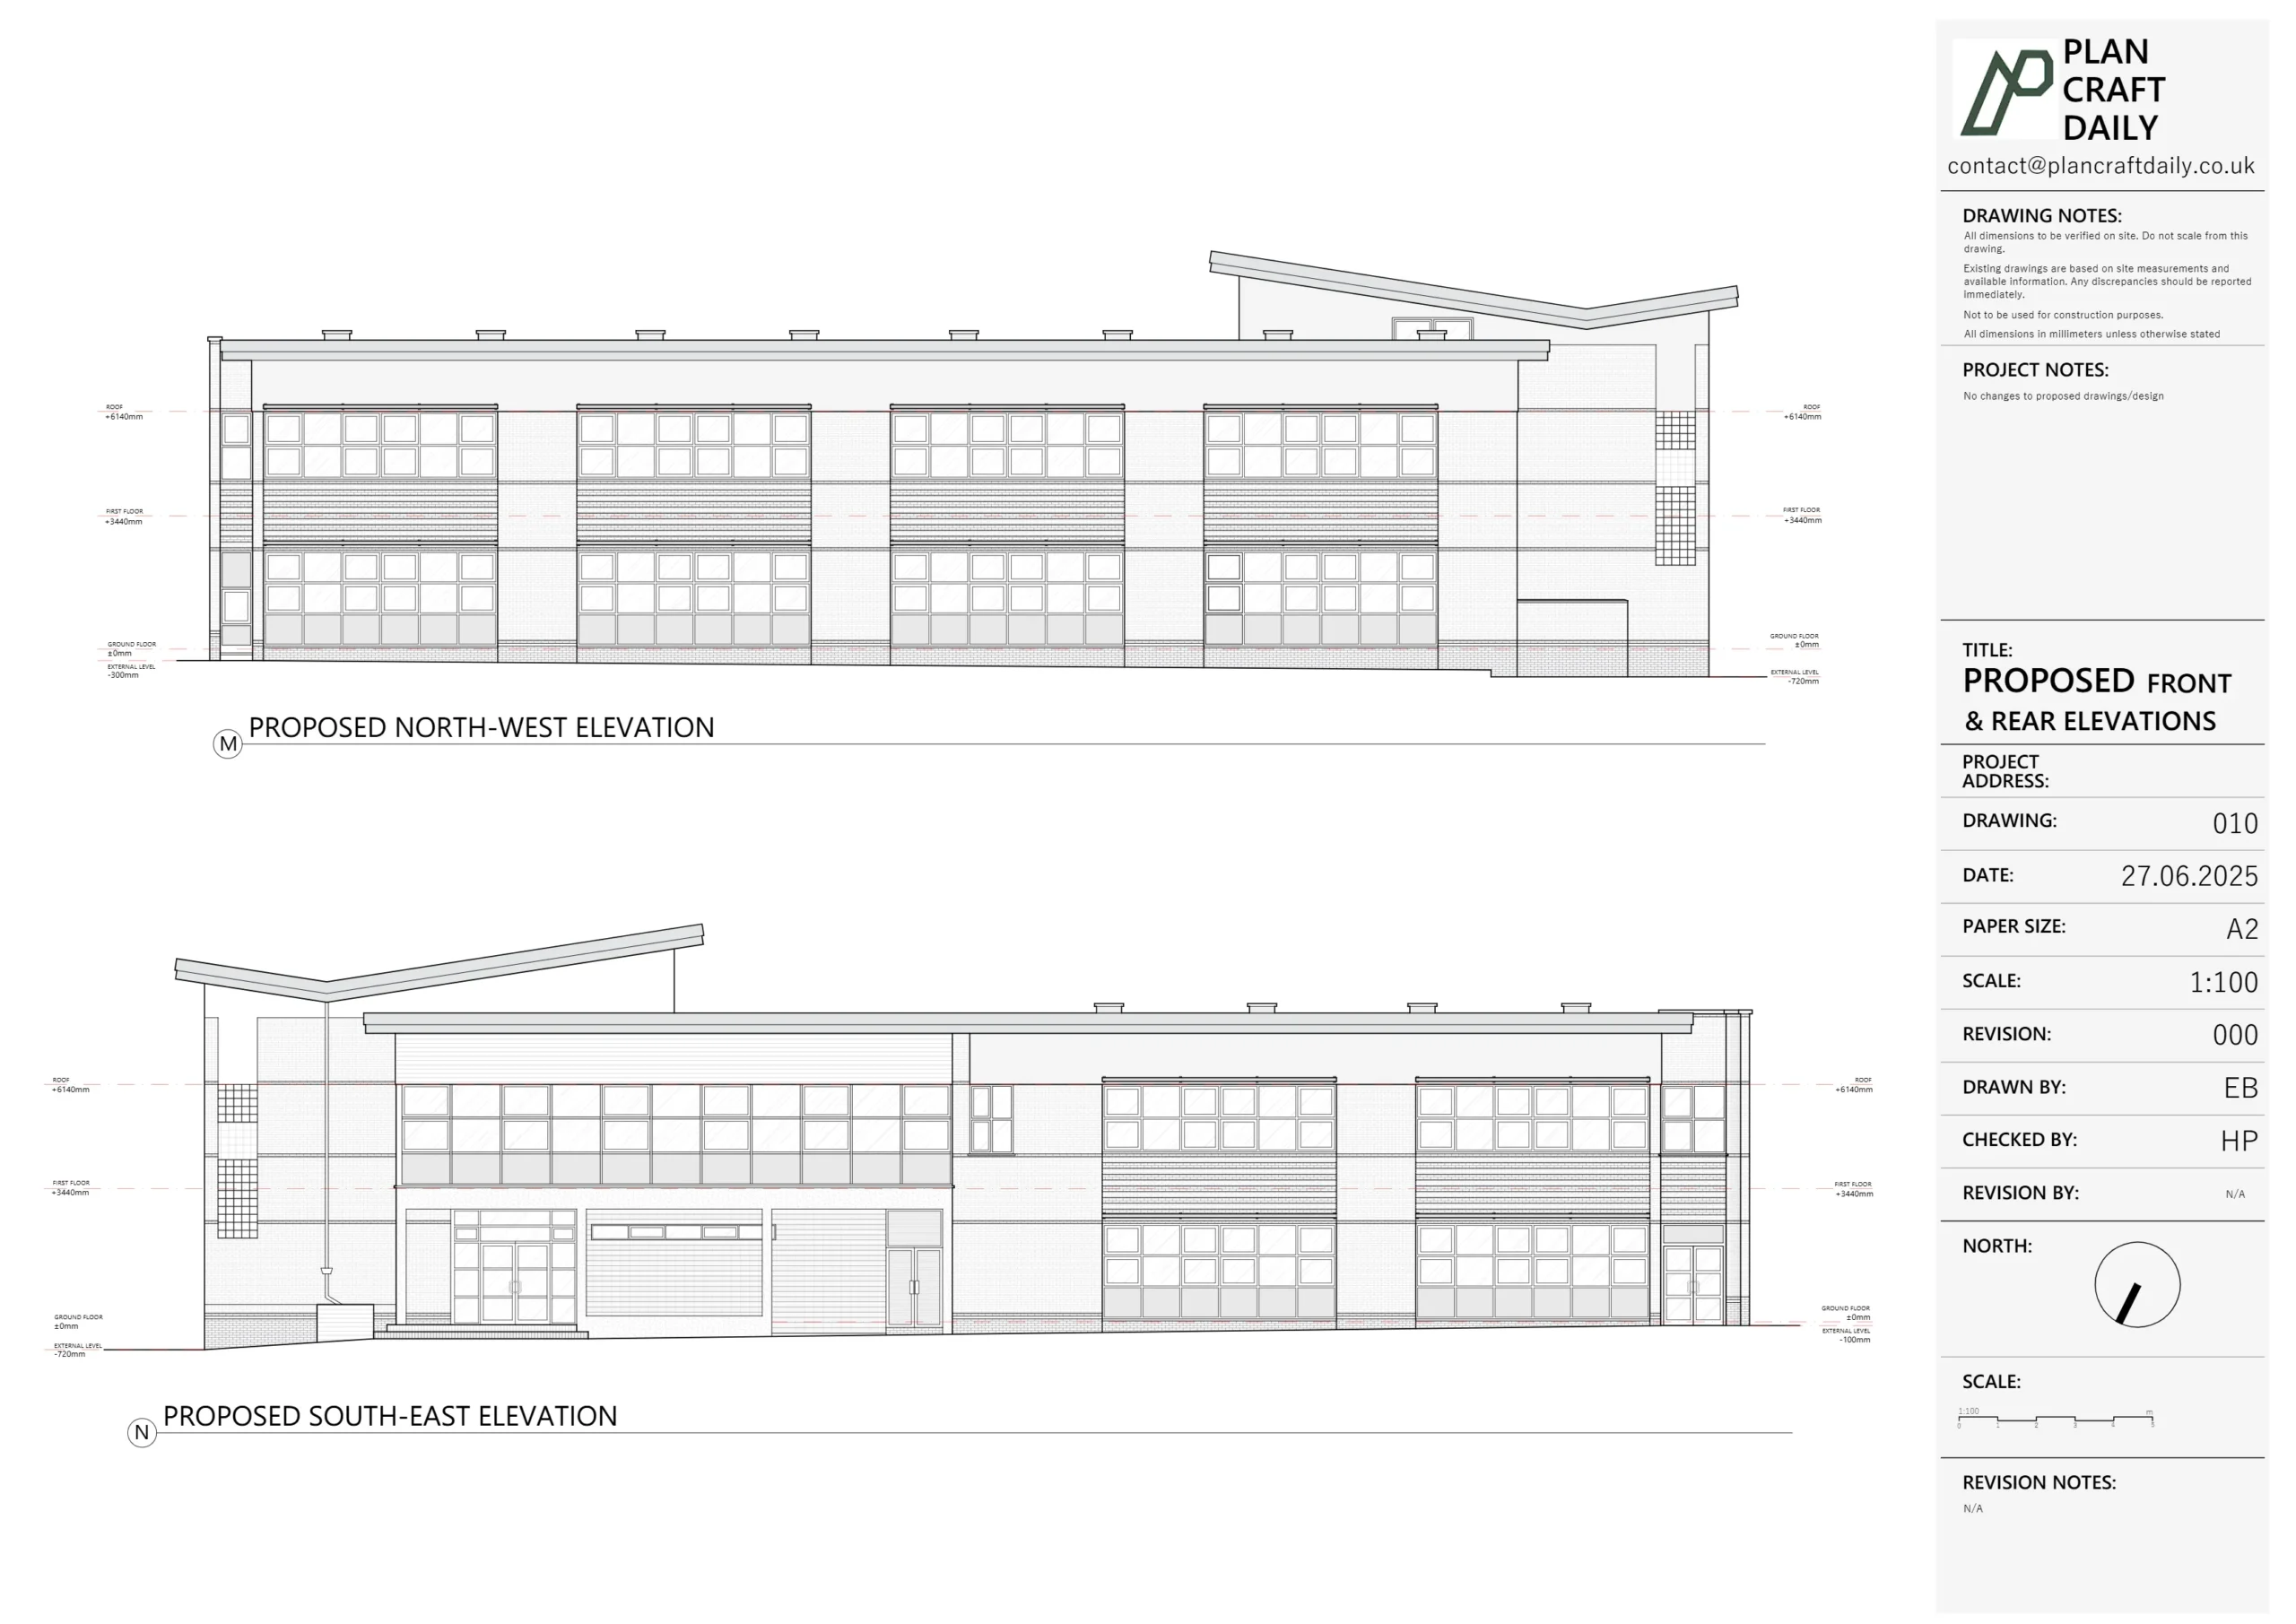
- Draw GA floor plans for all levels
- Add heating and lighting positions as requested
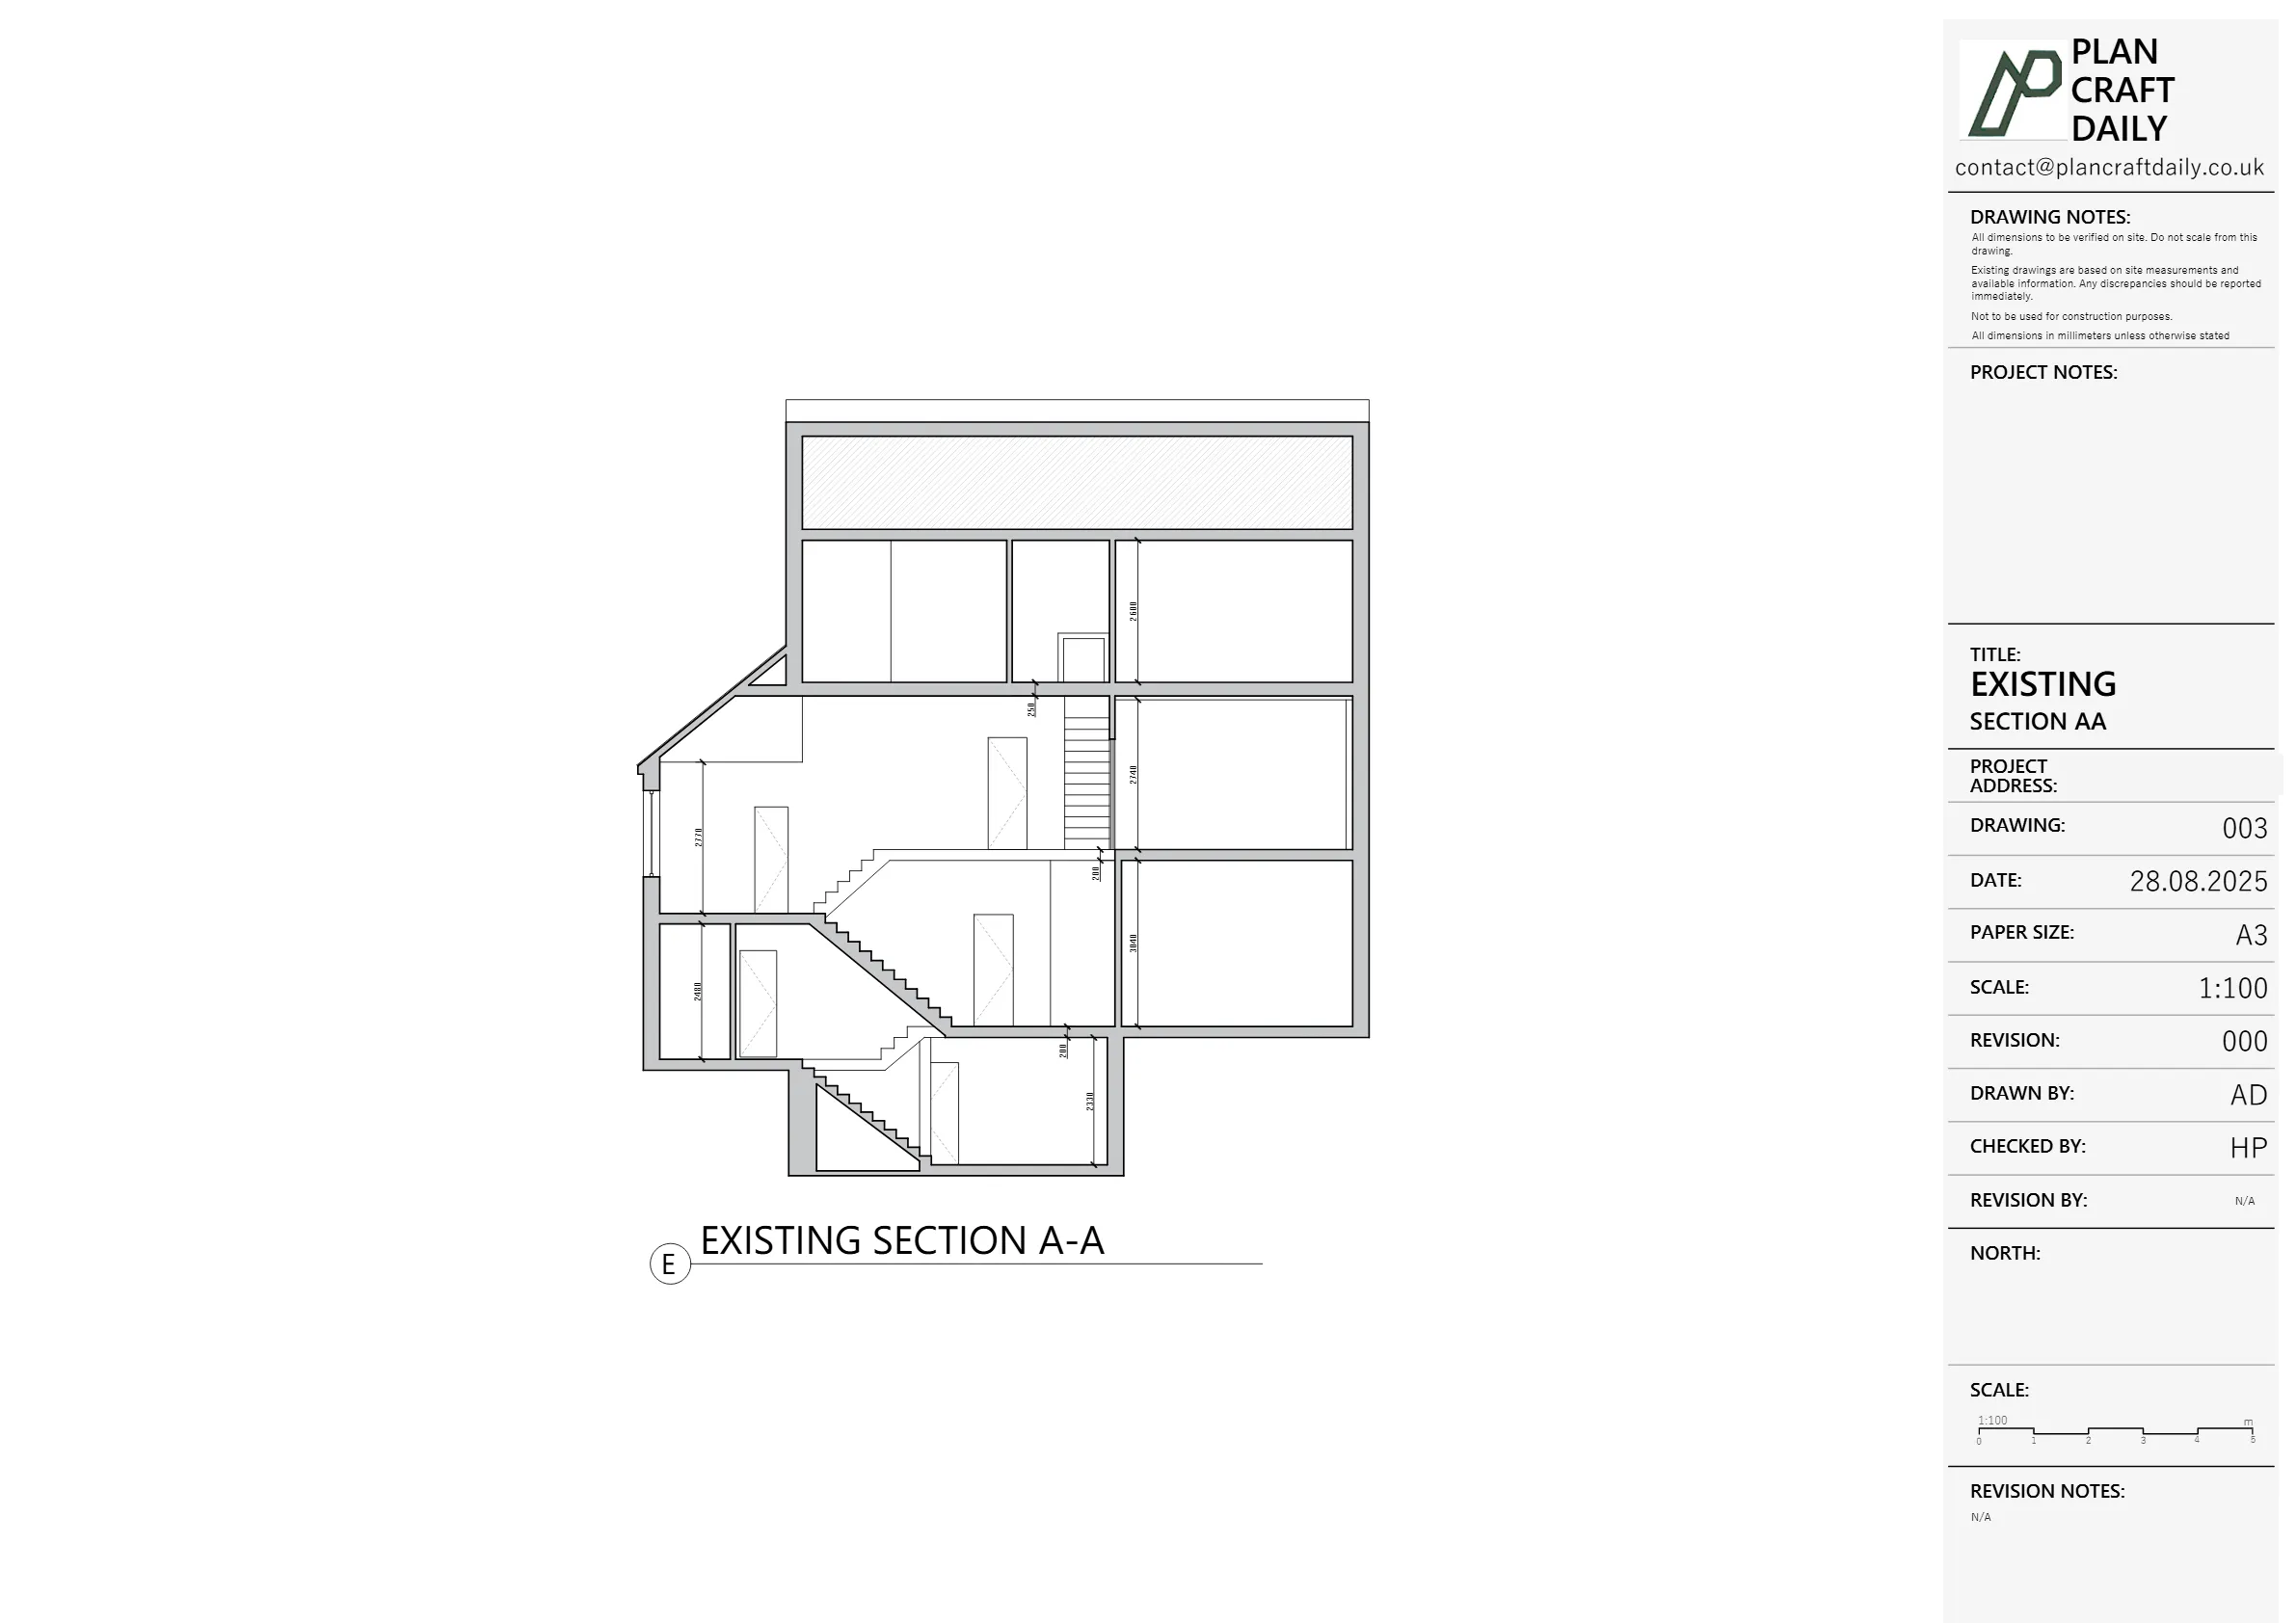
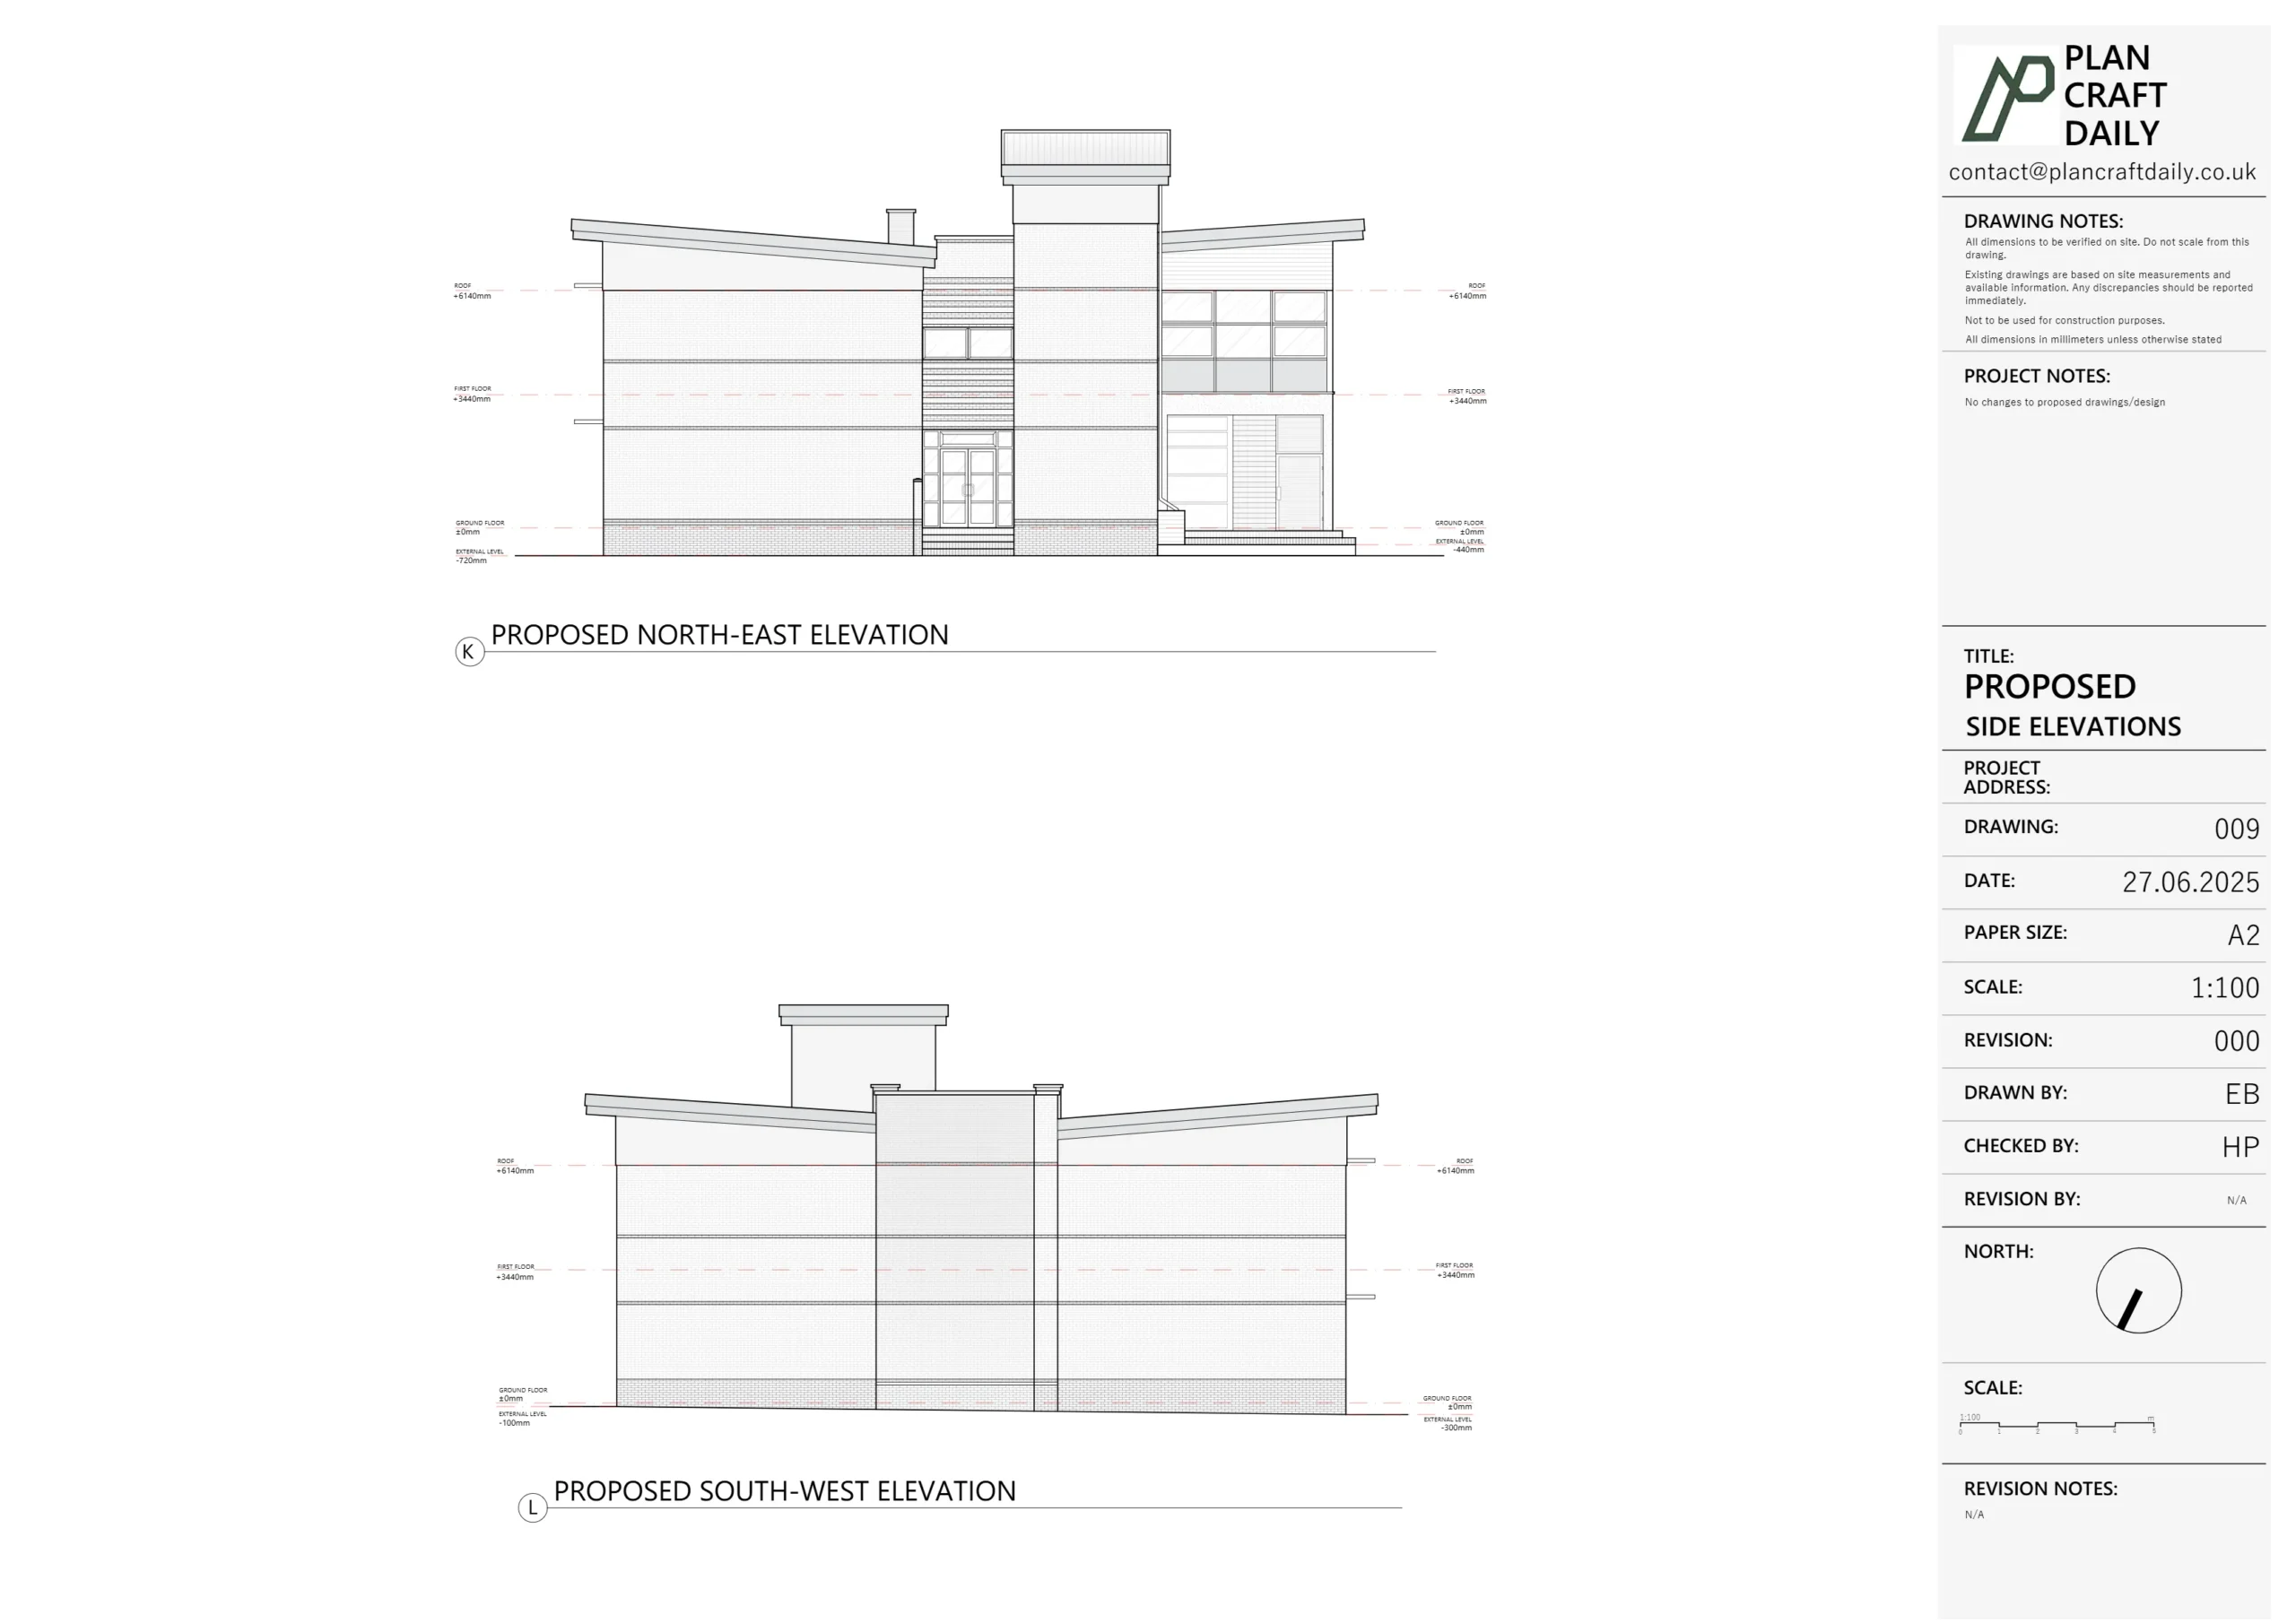
- Pick a sensible line for the main house section that shows floor build-ups
Turning the survey into drawings
Back at the office, our CAD team built the model in AutoCAD at 1:1 metric scale, then:
- Set up floor plans so they read cleanly for design and client presentations
- Cut one main section to show floor thickness, ceiling heights and key structure
- Started working through internal elevations for each room, using the photos and Polycam scans to place skirting, dados, cornices, kitchen units and other joinery
Because Anna needed to move quickly, we didn’t wait for everything to be perfect before sharing. Instead, we:
- Issued draft plans and the main section first so she could start work.
- Attached the final invoice, with the option to receive DWG files as soon as payment was made.
- Kept the more time-consuming internal elevations and ceiling plans in progress in the background.
When her client paid, we sent over the DWG plans and continued building the full elevation set in the “360° around the plan” layout she requested.
Managing changes and expectations
During the job, we kept Anna updated about:
- The survey fee being adjusted down once we had more clarity from site
- The fact that some ceiling details would be based on good-quality 3D scans rather than physical ladder measurements
- The split delivery: first plans and section, then elevations and ceiling plans
When we accidentally wrote that “all drawings” were complete, we quickly corrected this and clarified that ceiling plans were still being processed. Once those were finished, we uploaded everything to the same shared drive so Anna didn’t have to chase new links.
Final outcome
By the end of the project, Anna had:
- Final DWG and PDF floor plans
- A main section showing floor build-ups
- Detailed internal elevations laid out around the plans in the way she prefers
- Ceiling plans based on a mix of laser measurements and 3D scans
- A single drive link with all drawings and reference files in one place
This gave her a very detailed base package for design, without her team needing to redraw plans or rebuild a 360° elevation layout from scratch.
Project Details
| Service Type | Measured Survey, Existing Drawings, Internal Elevations and Ceiling Plans |
| Time Taken | 3–4 weeks (staged issue) |
| Budget | £2,200–£3,150 |
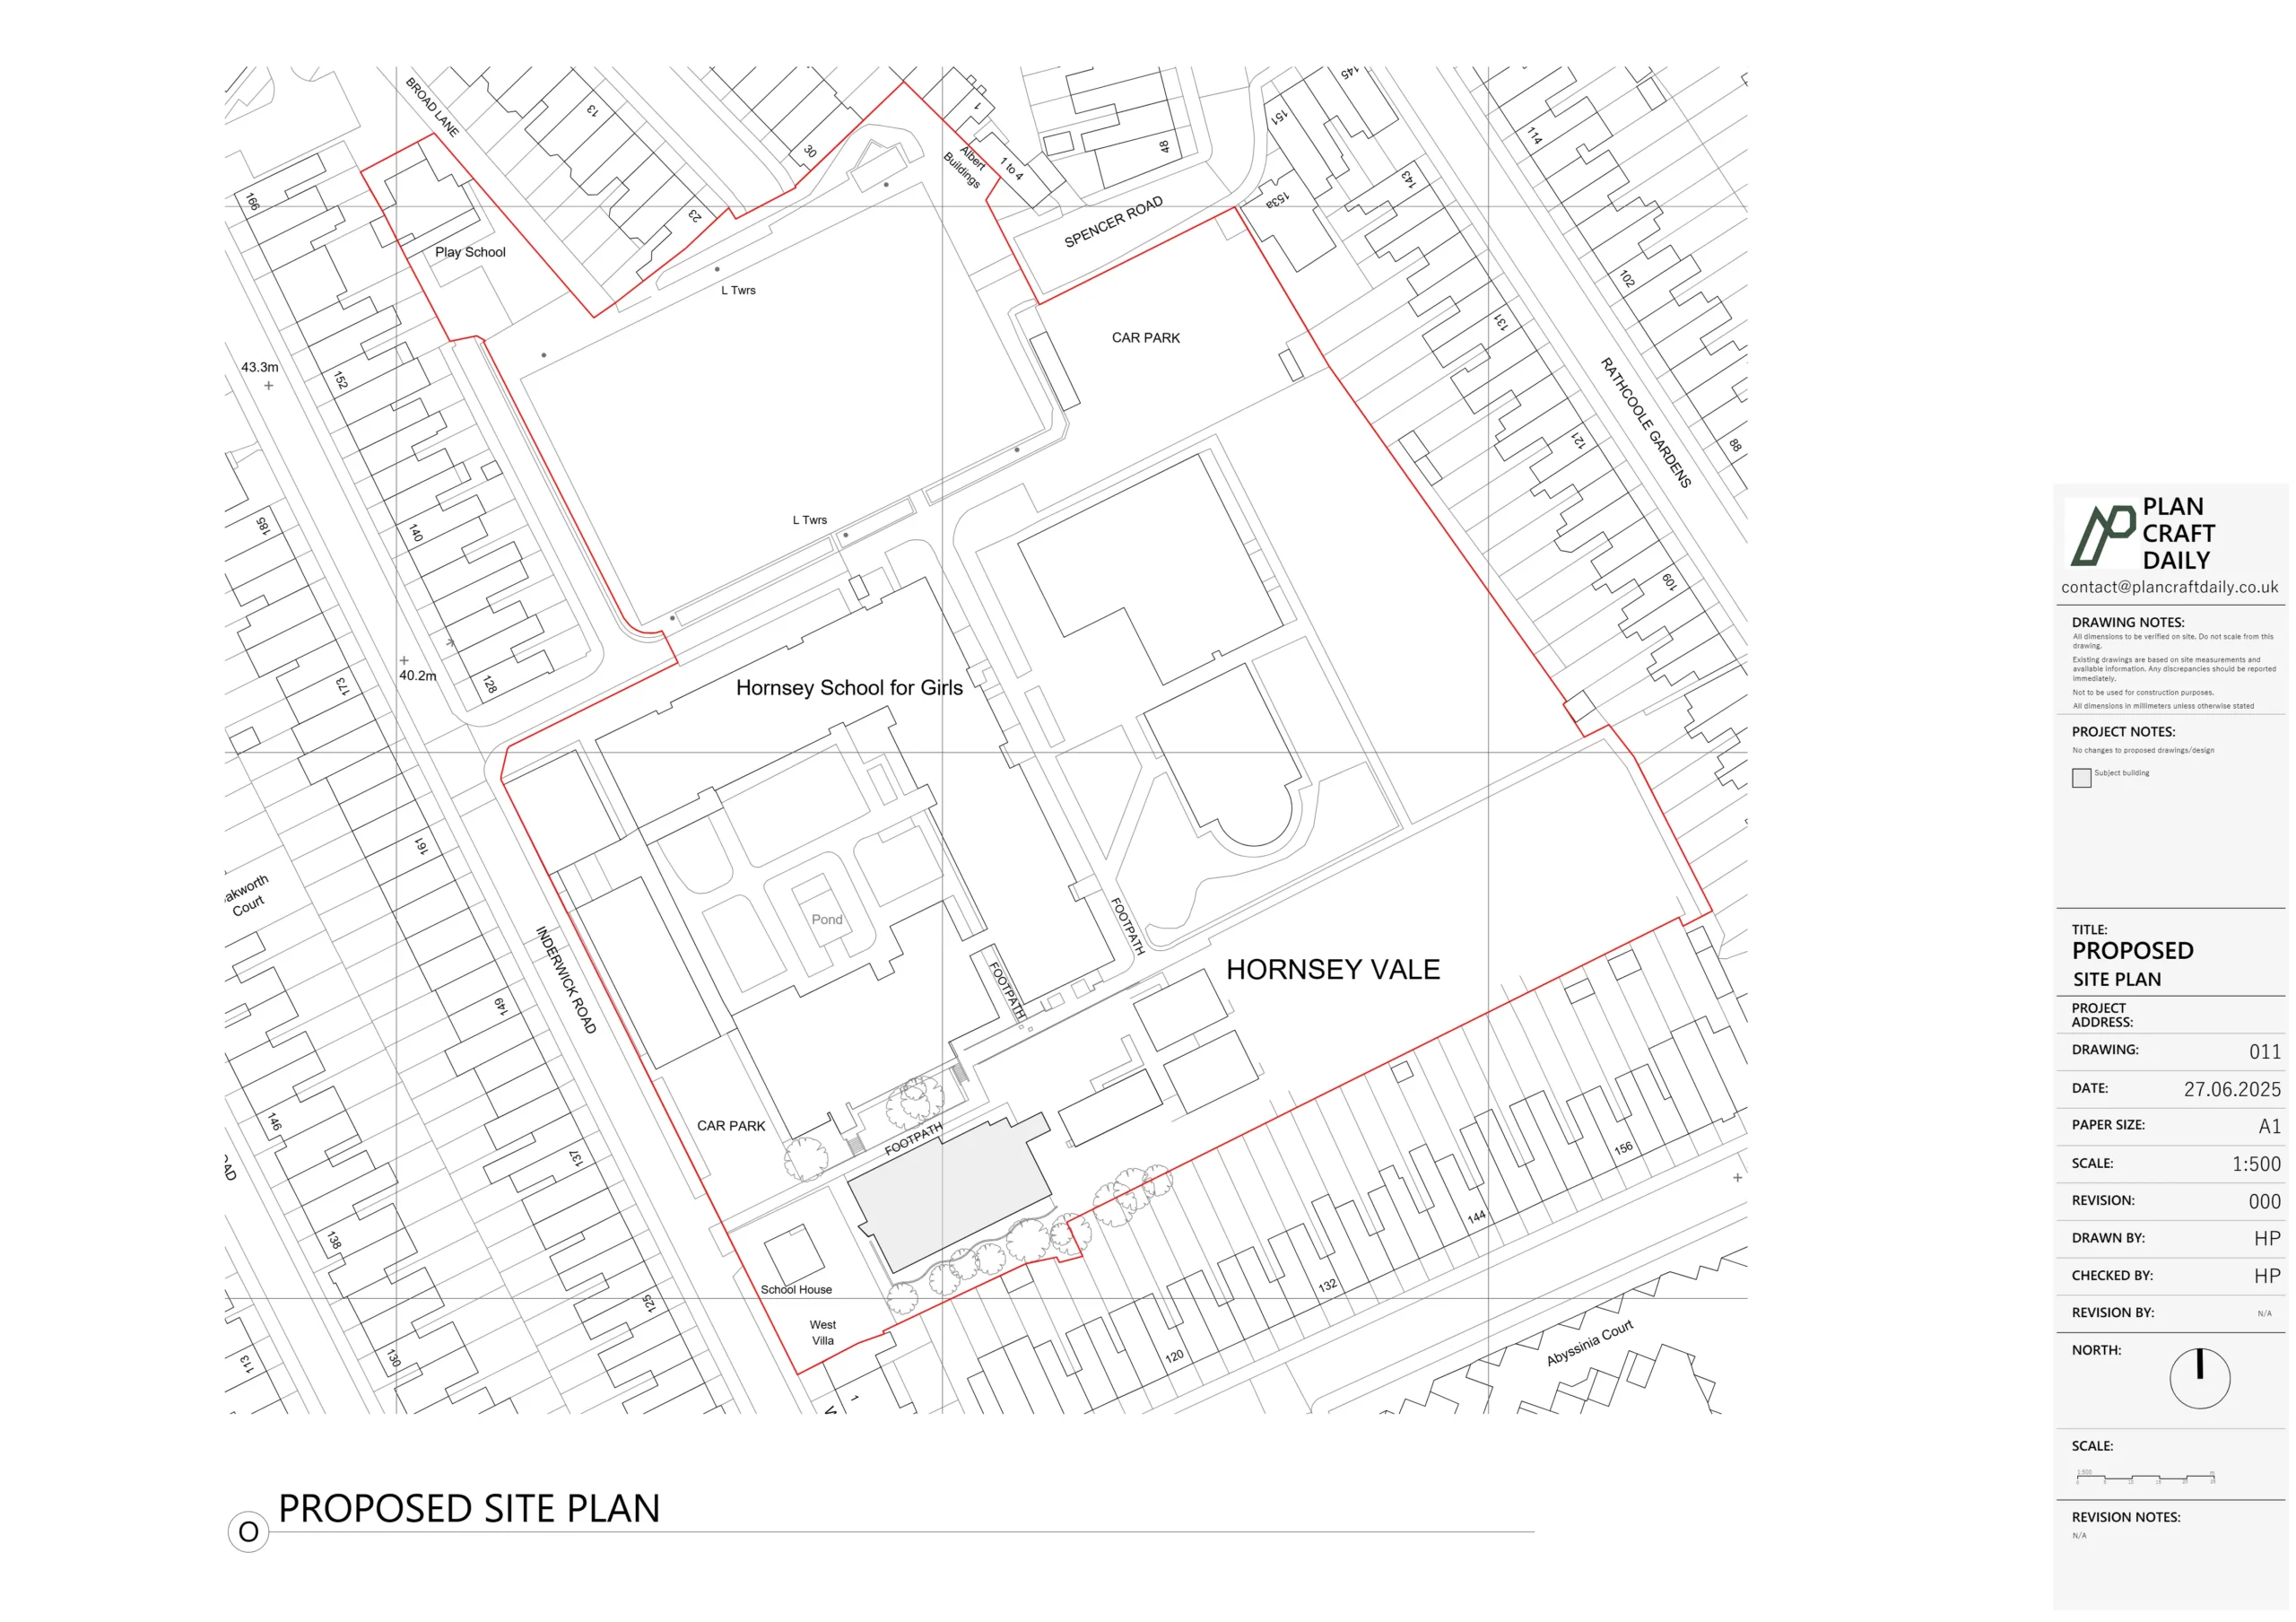
| Location | Twickenham |