Ells, one of our regular architect clients, approached us with two projects at the same time:
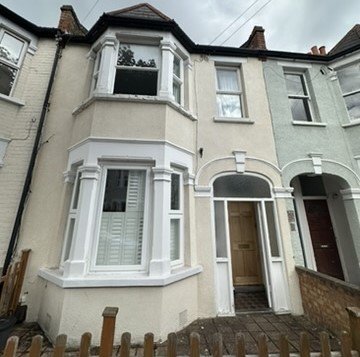
- A two-storey end-terrace home in Thames Ditton (internal reconfiguration).
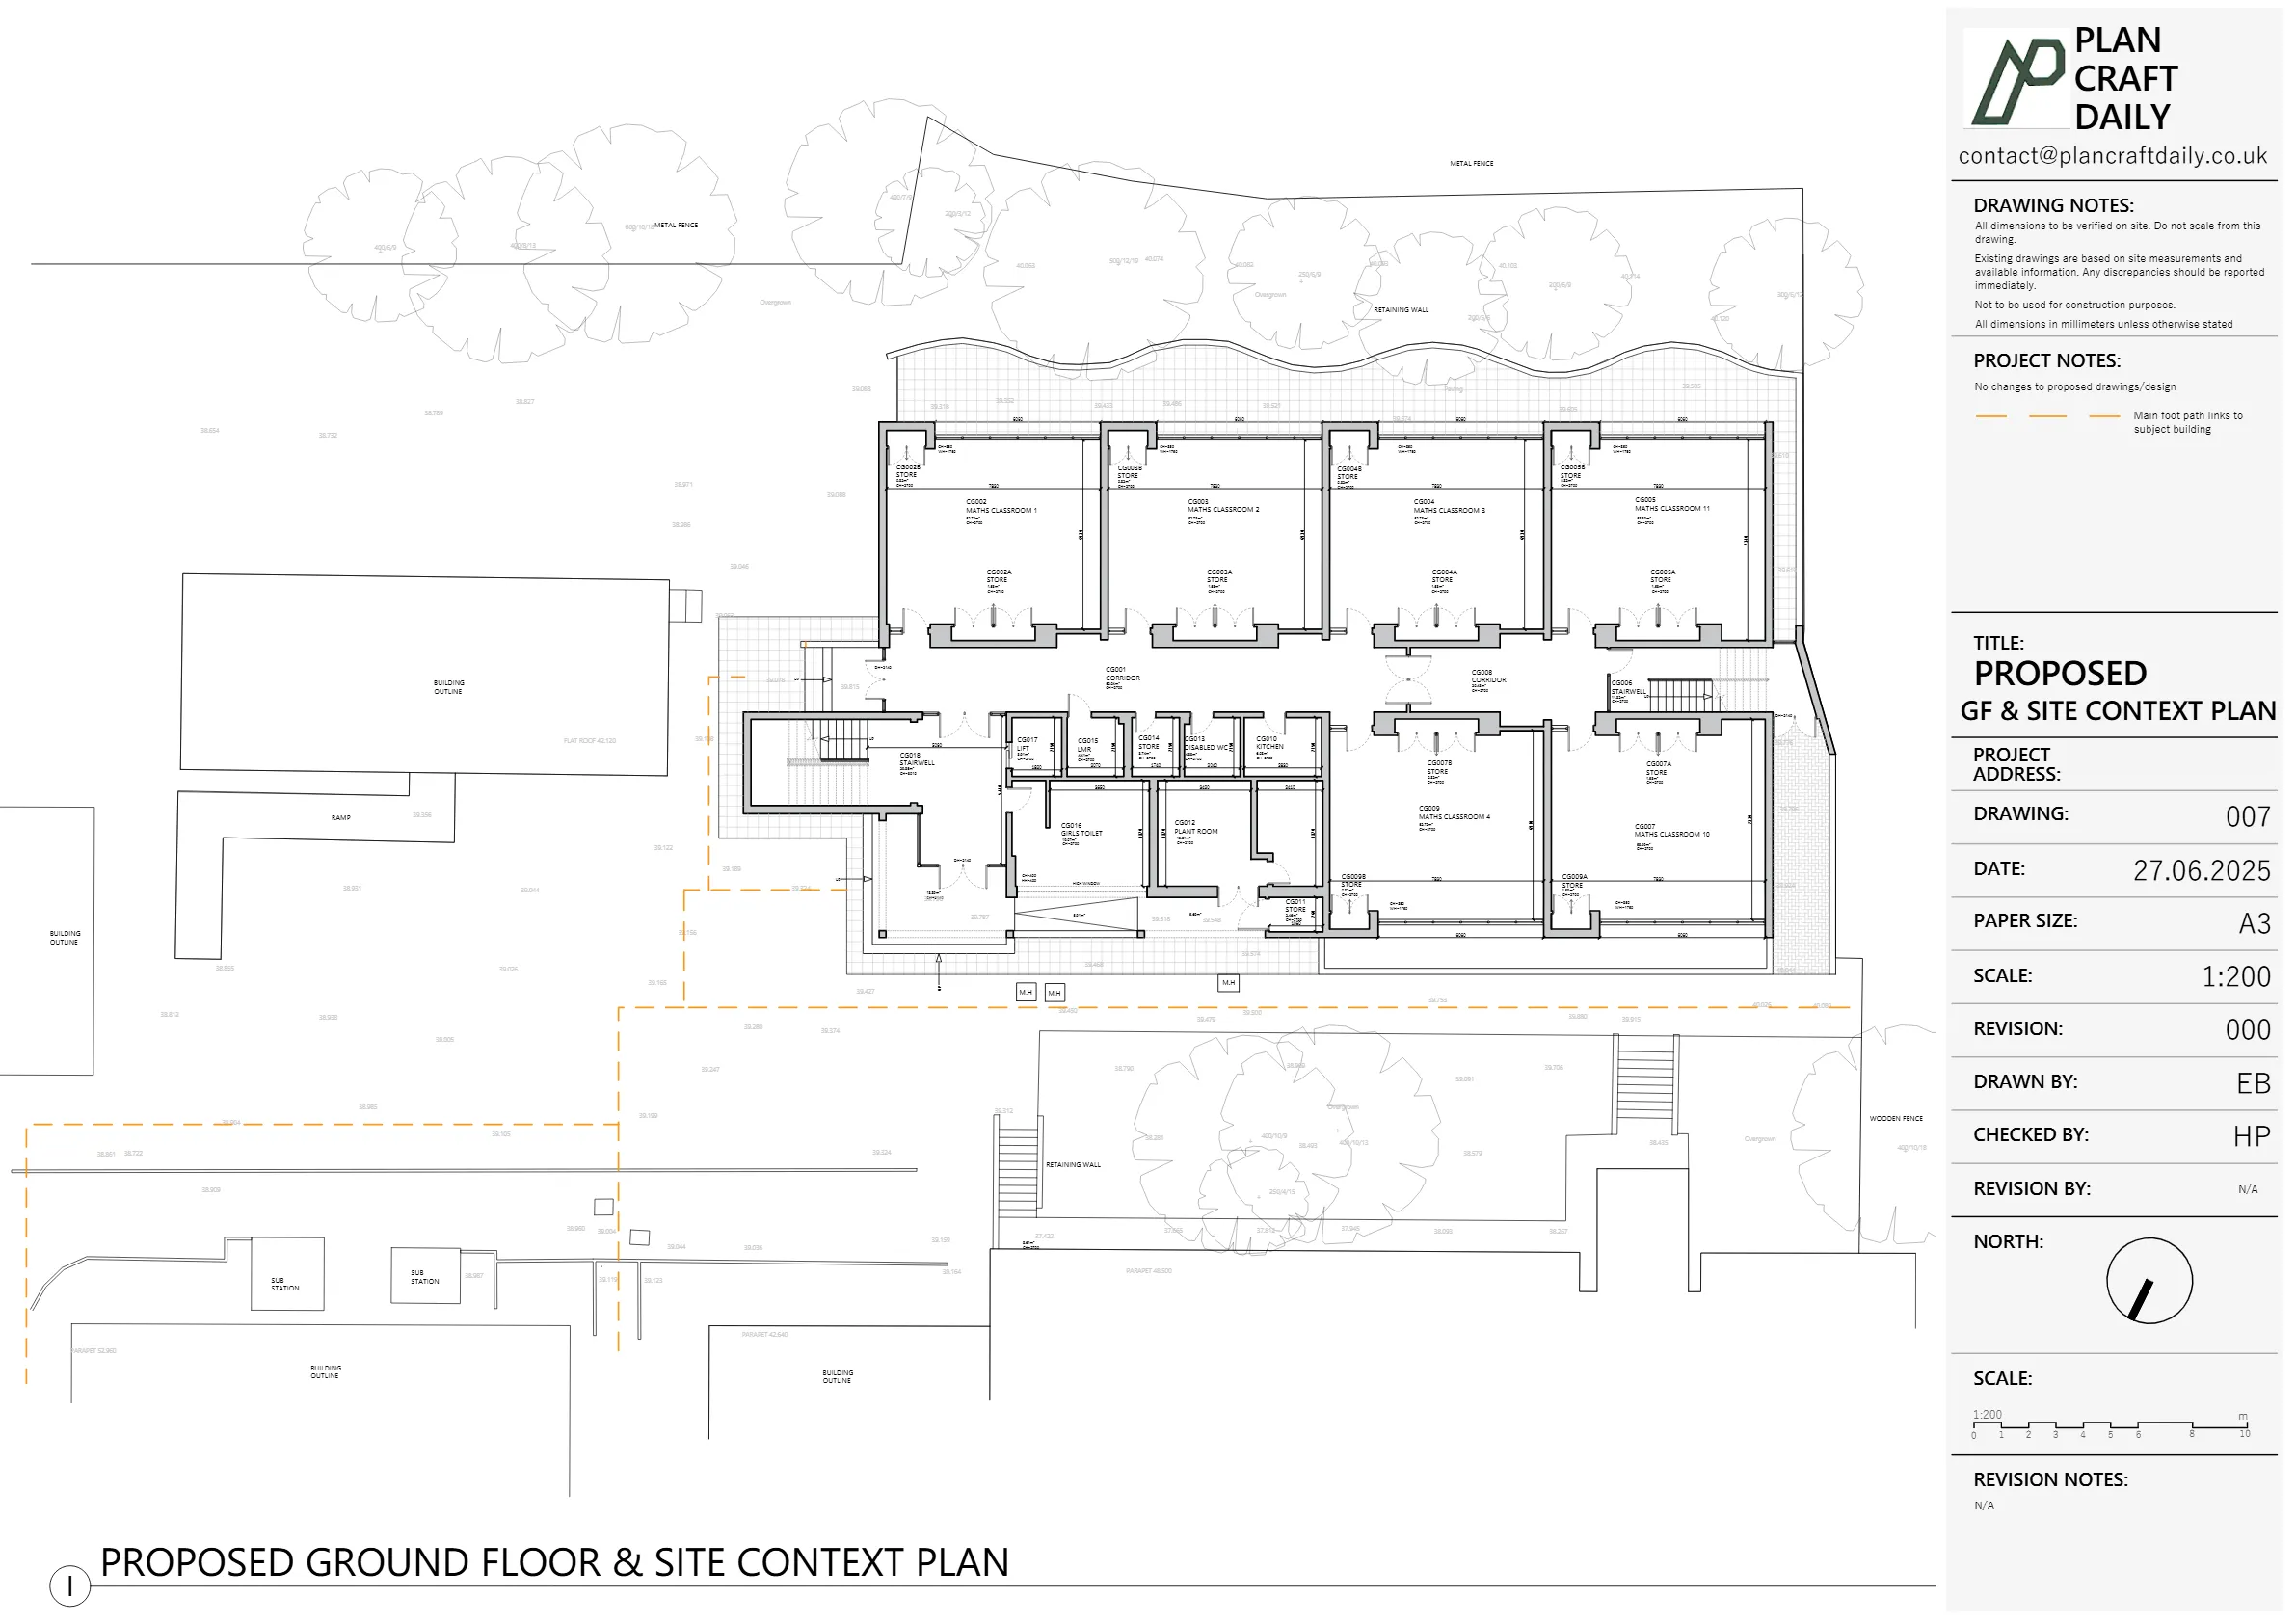
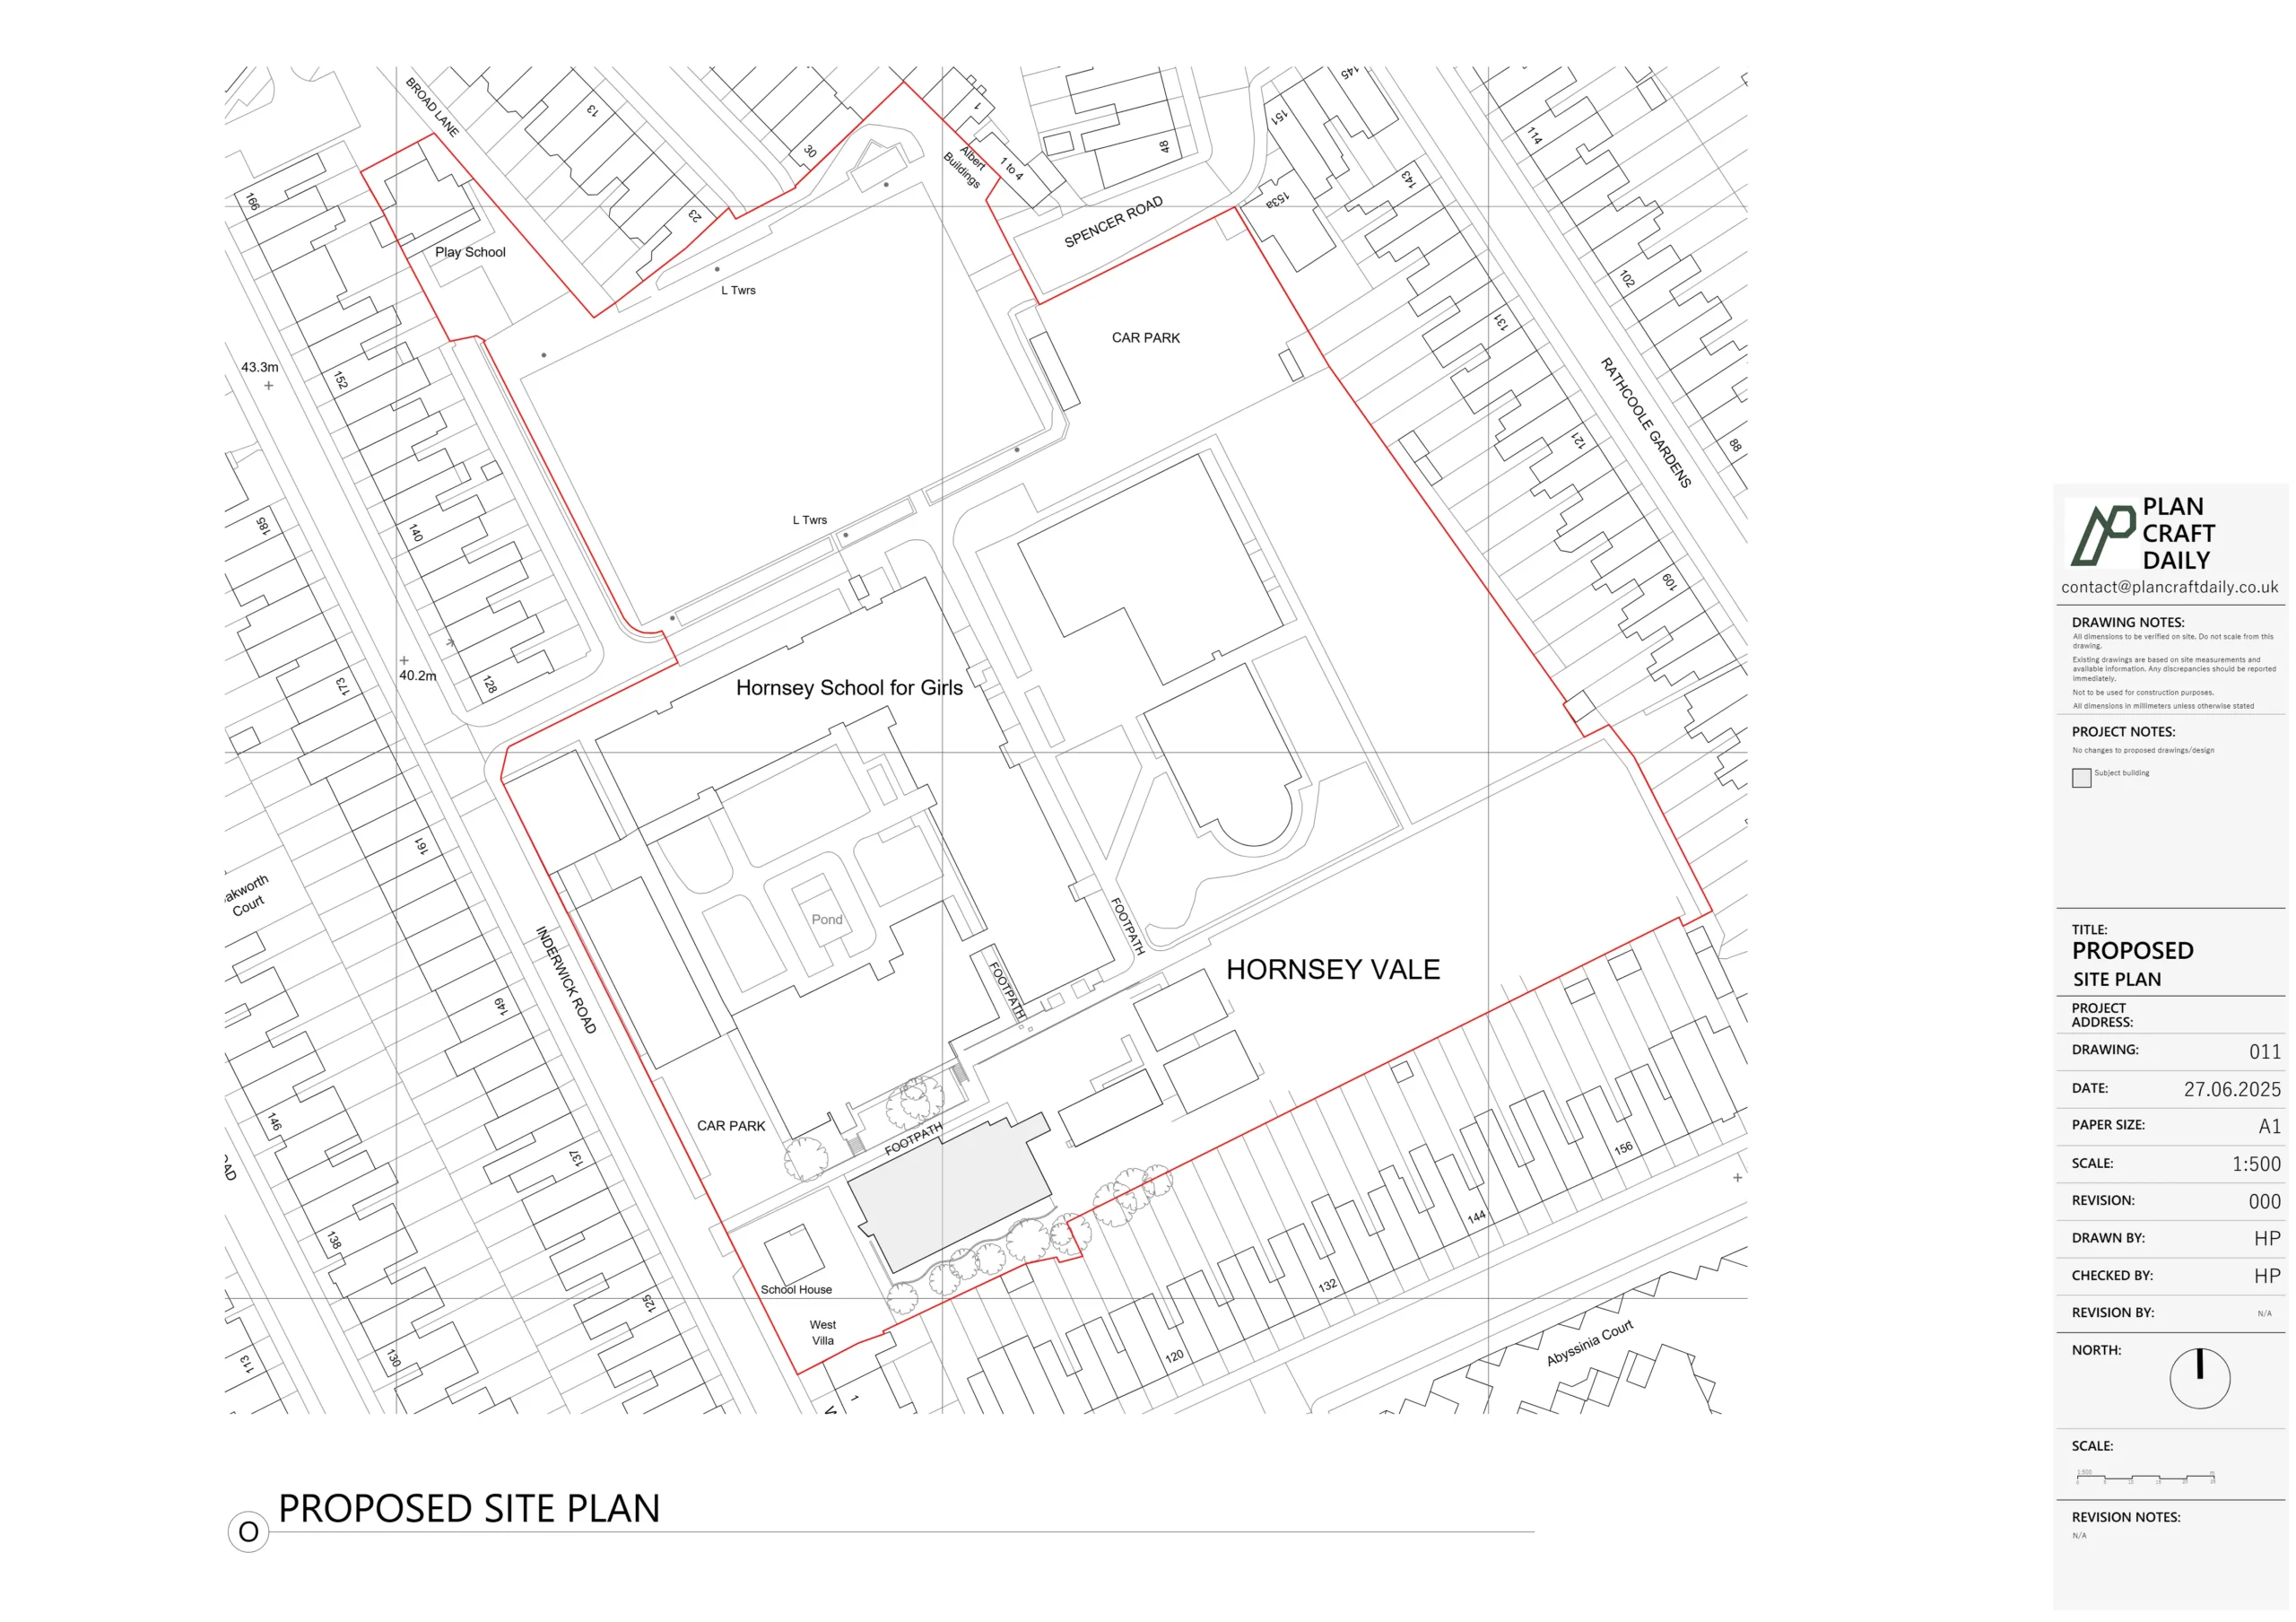
- A ground-floor maisonette in South West London, where the client was planning a single-storey wrap-around extension.
This case study focuses on the ground-floor maisonette scheme.
For this project, Ells needed:
- A full measured survey of the maisonette.
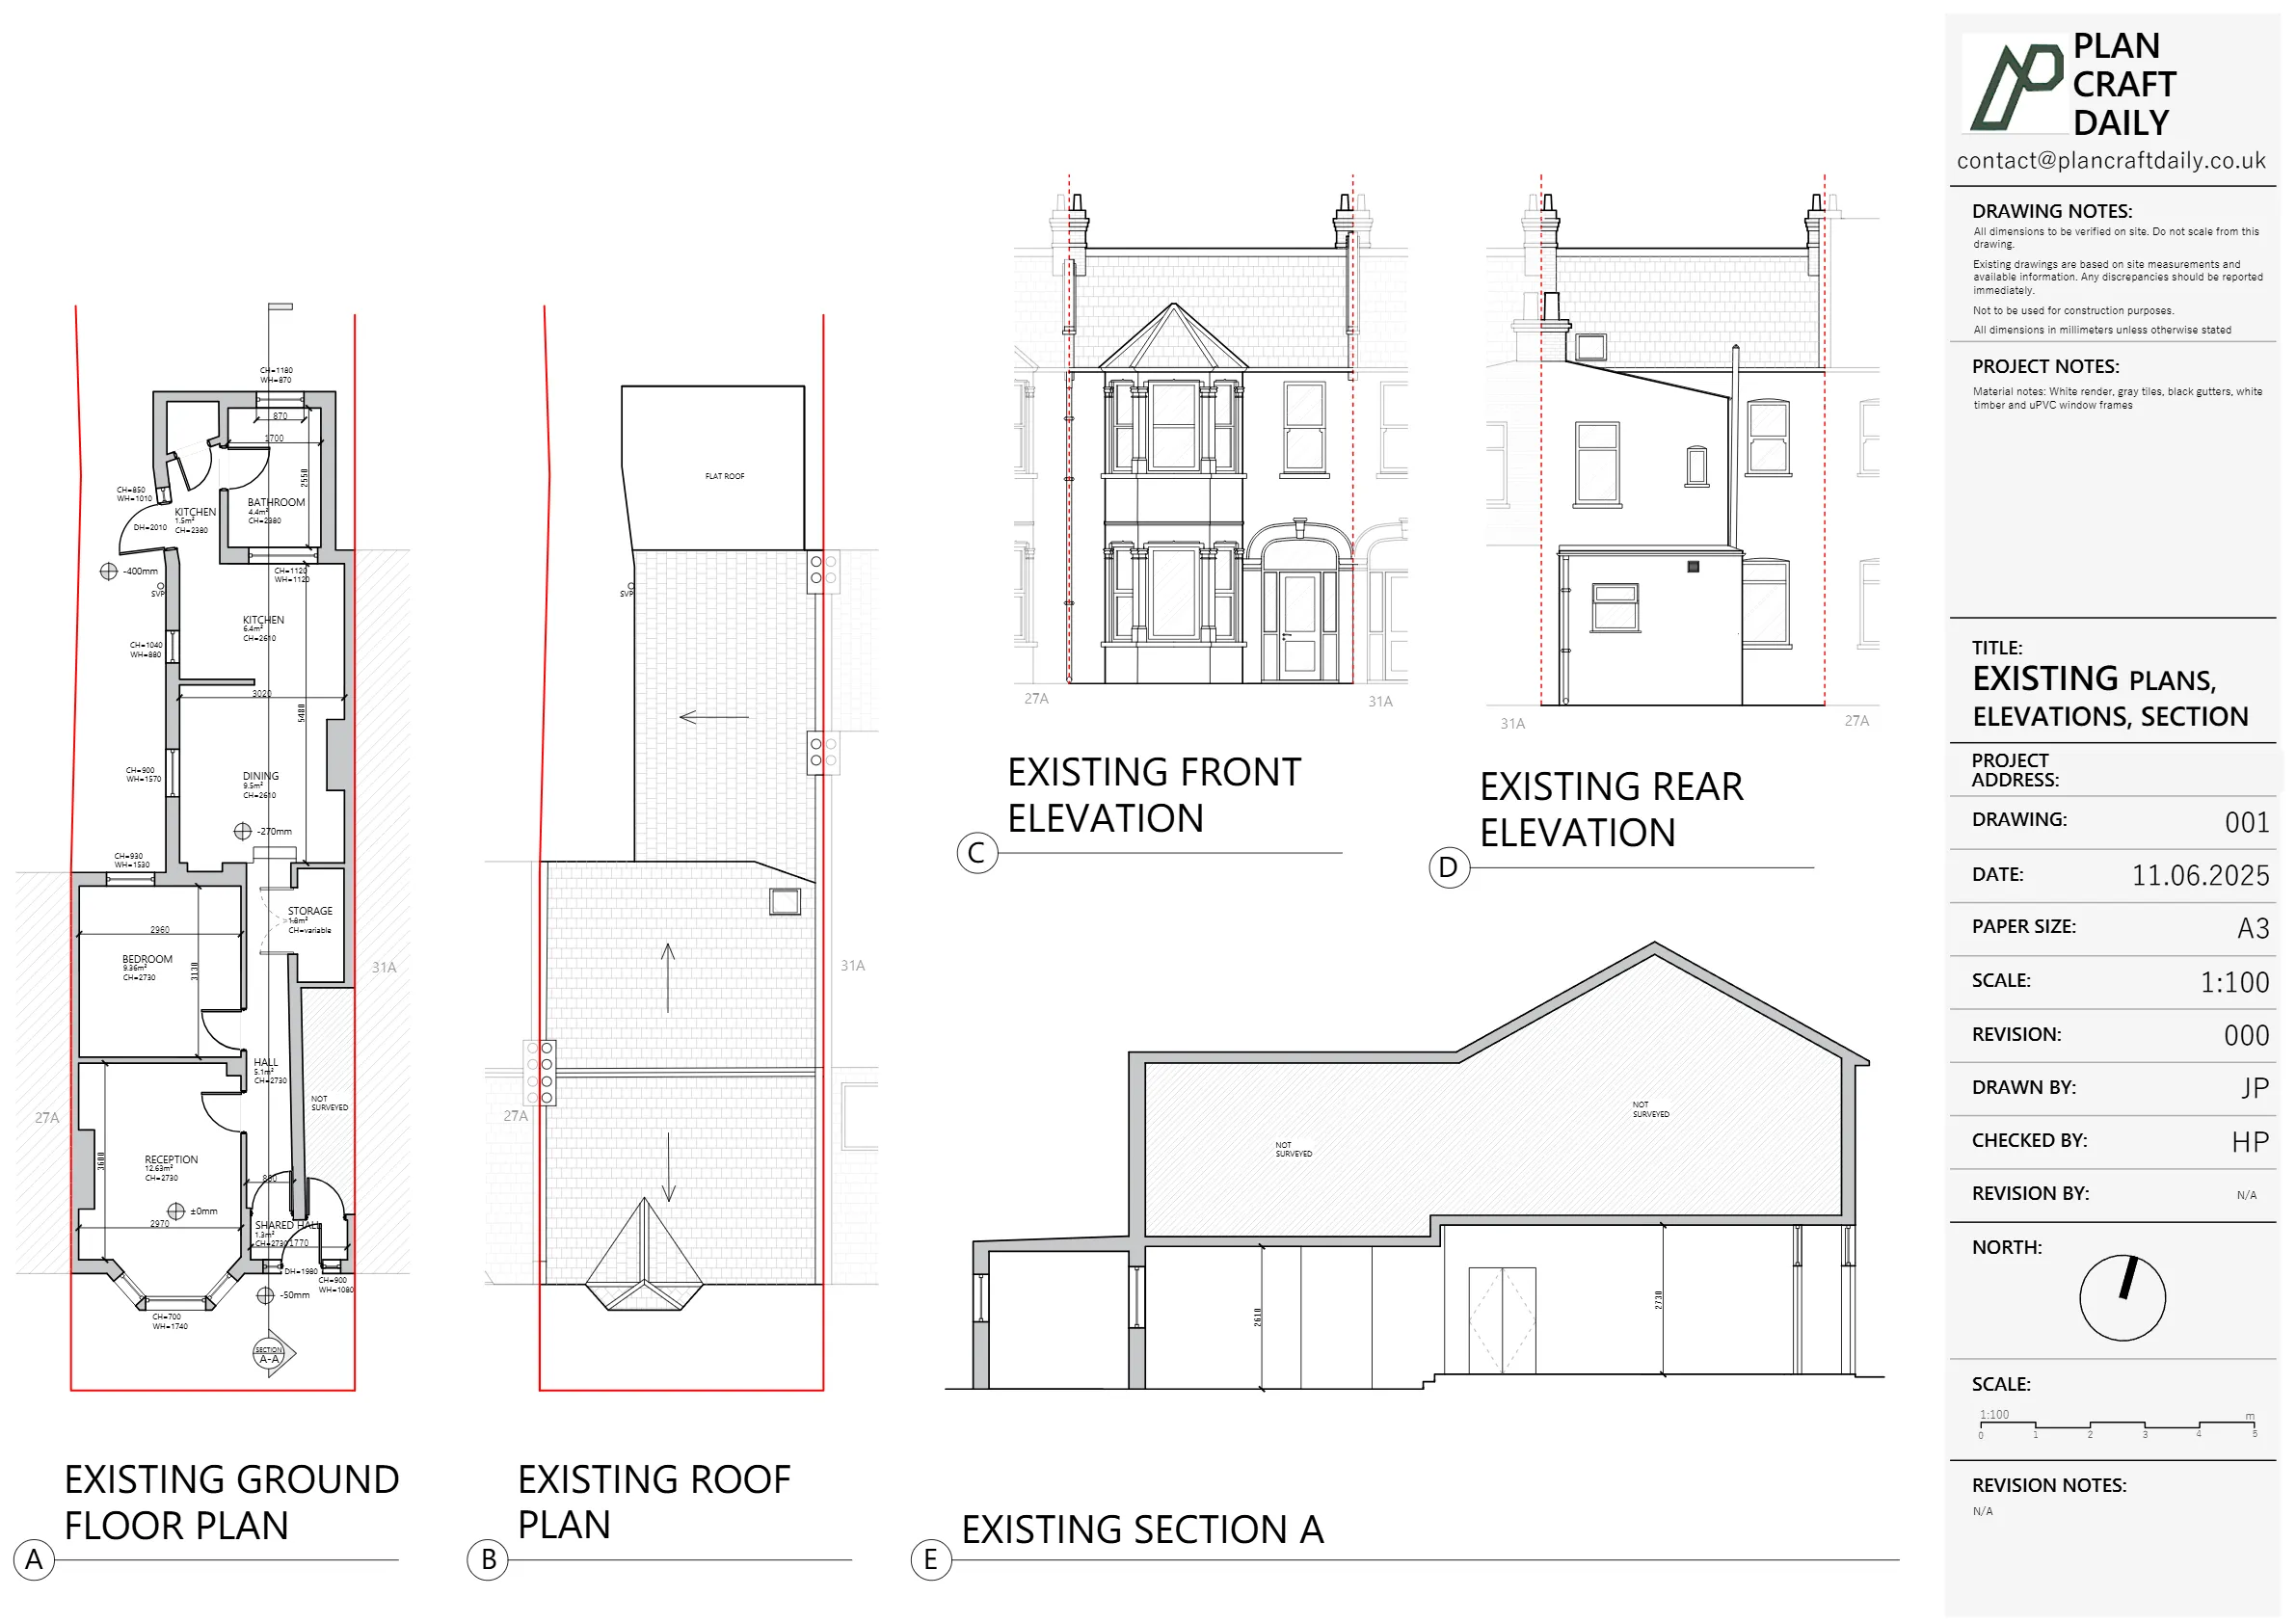
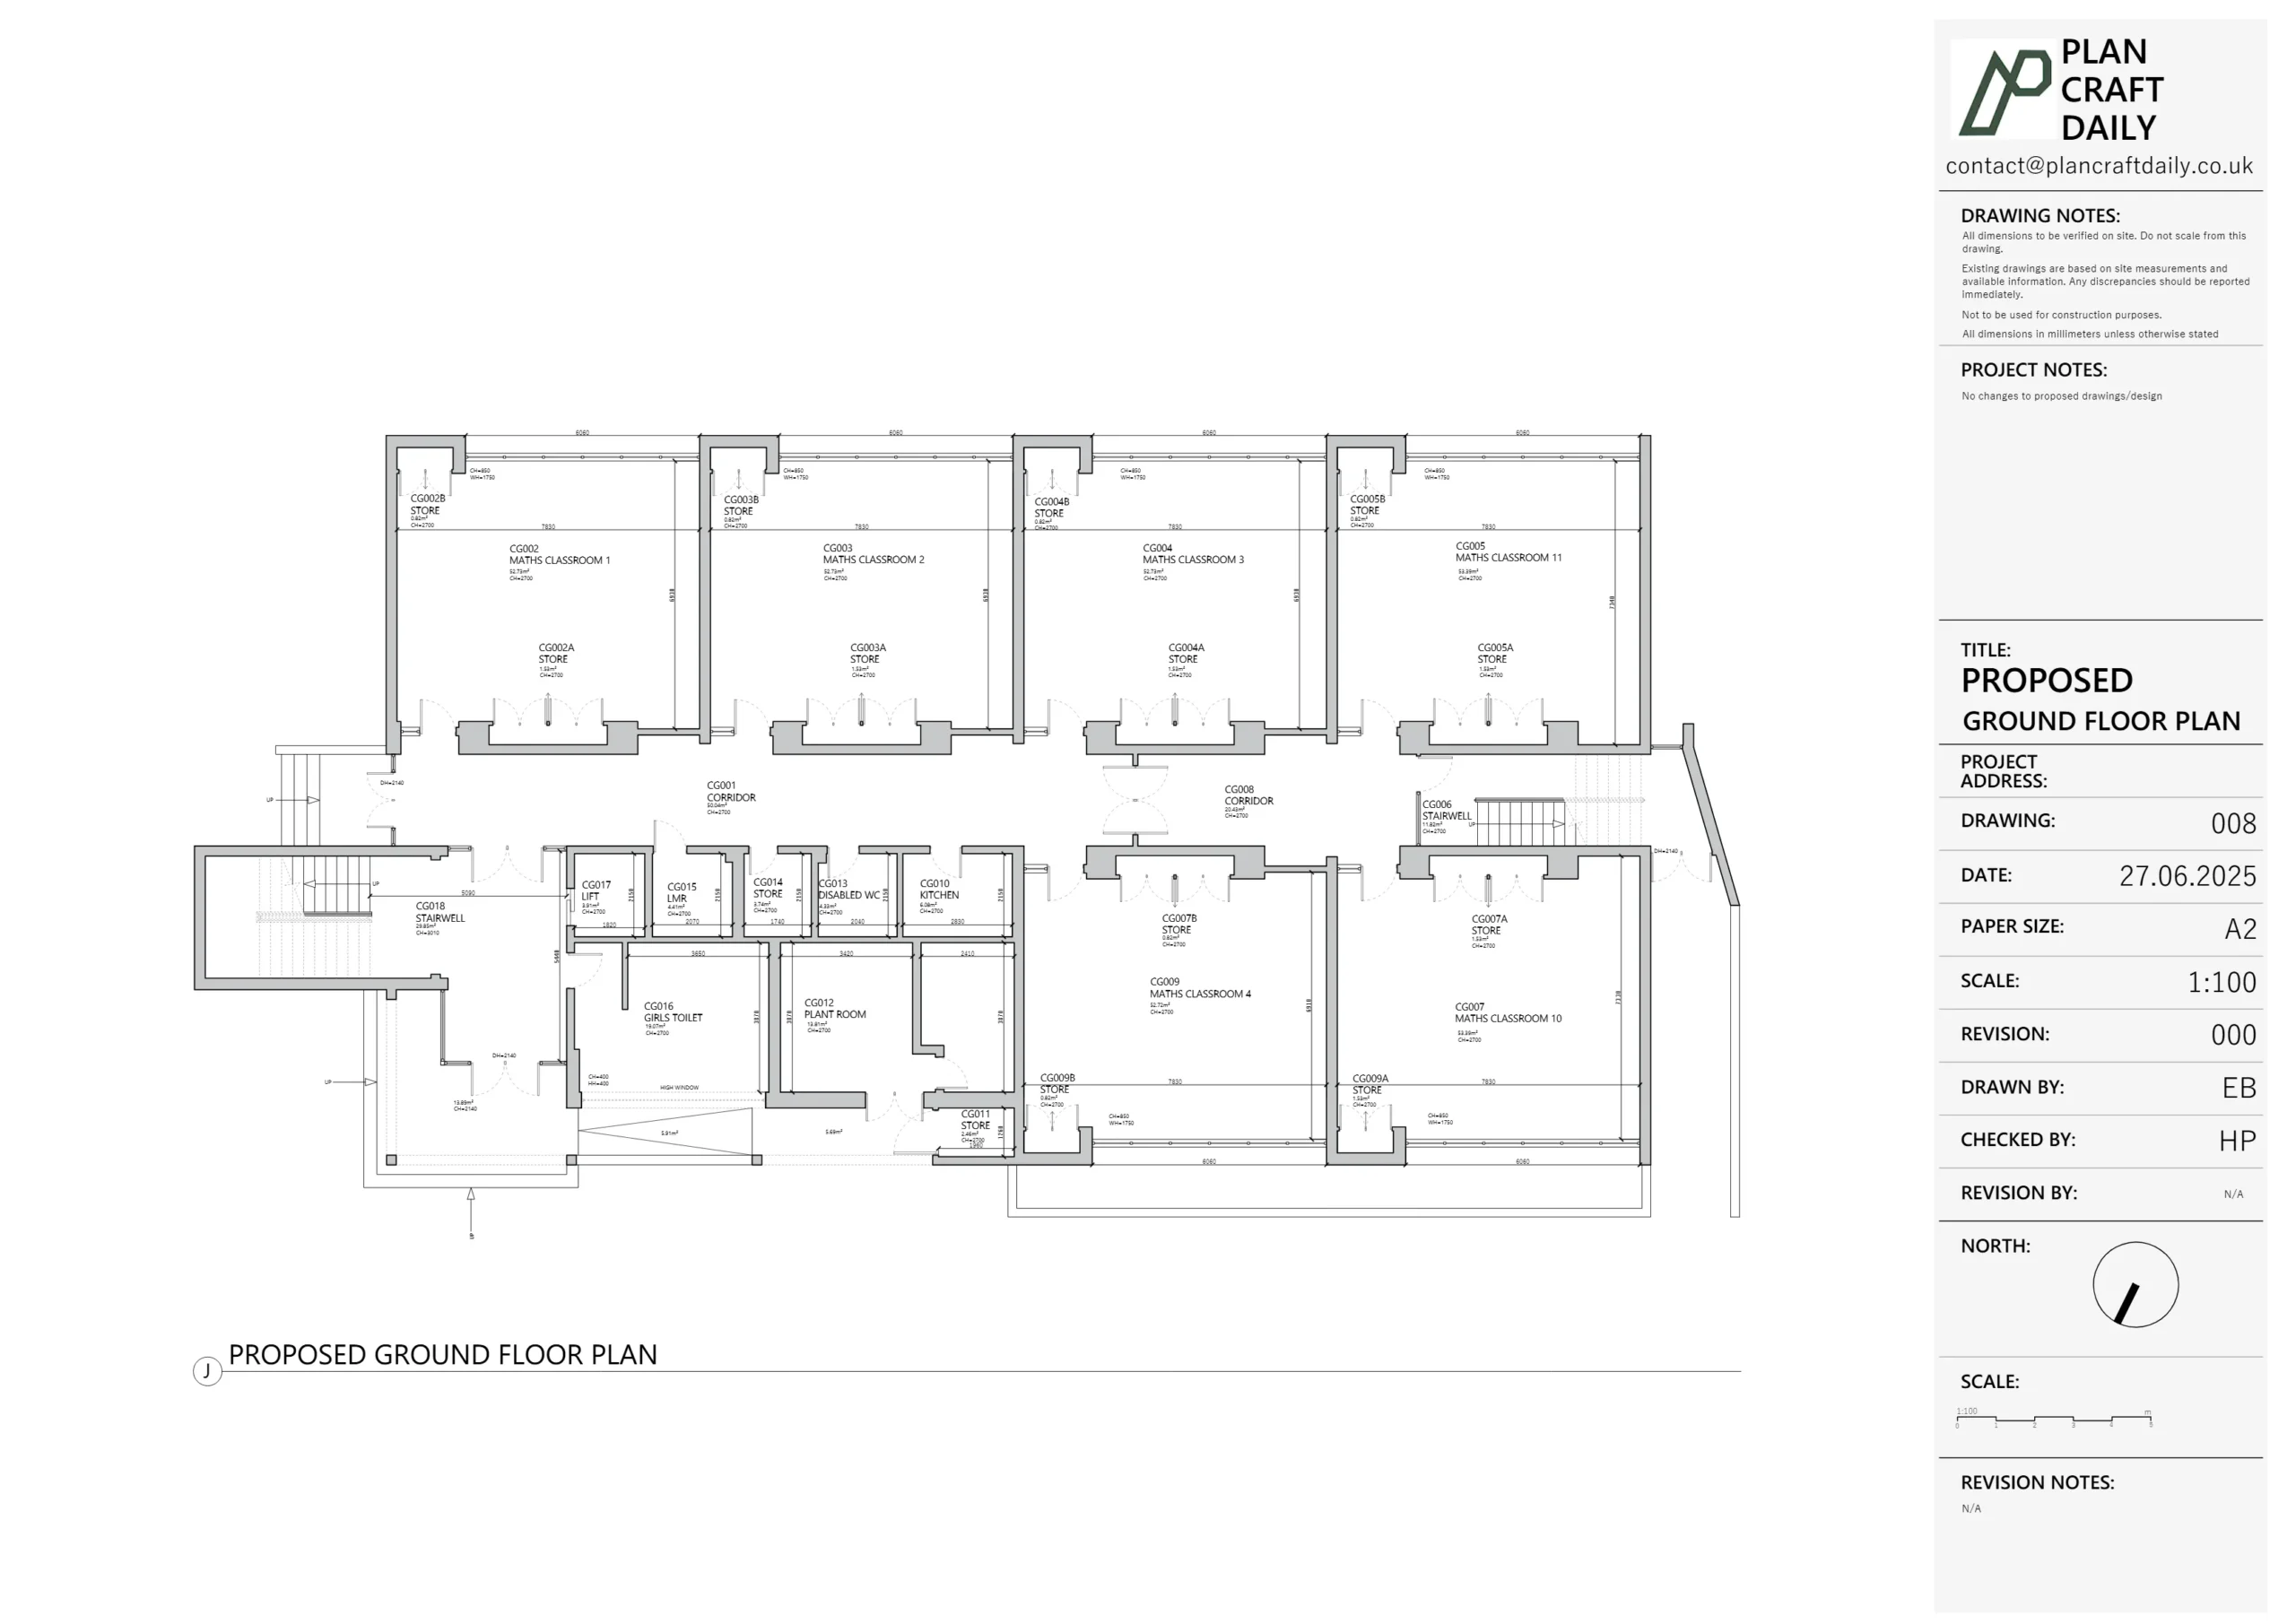
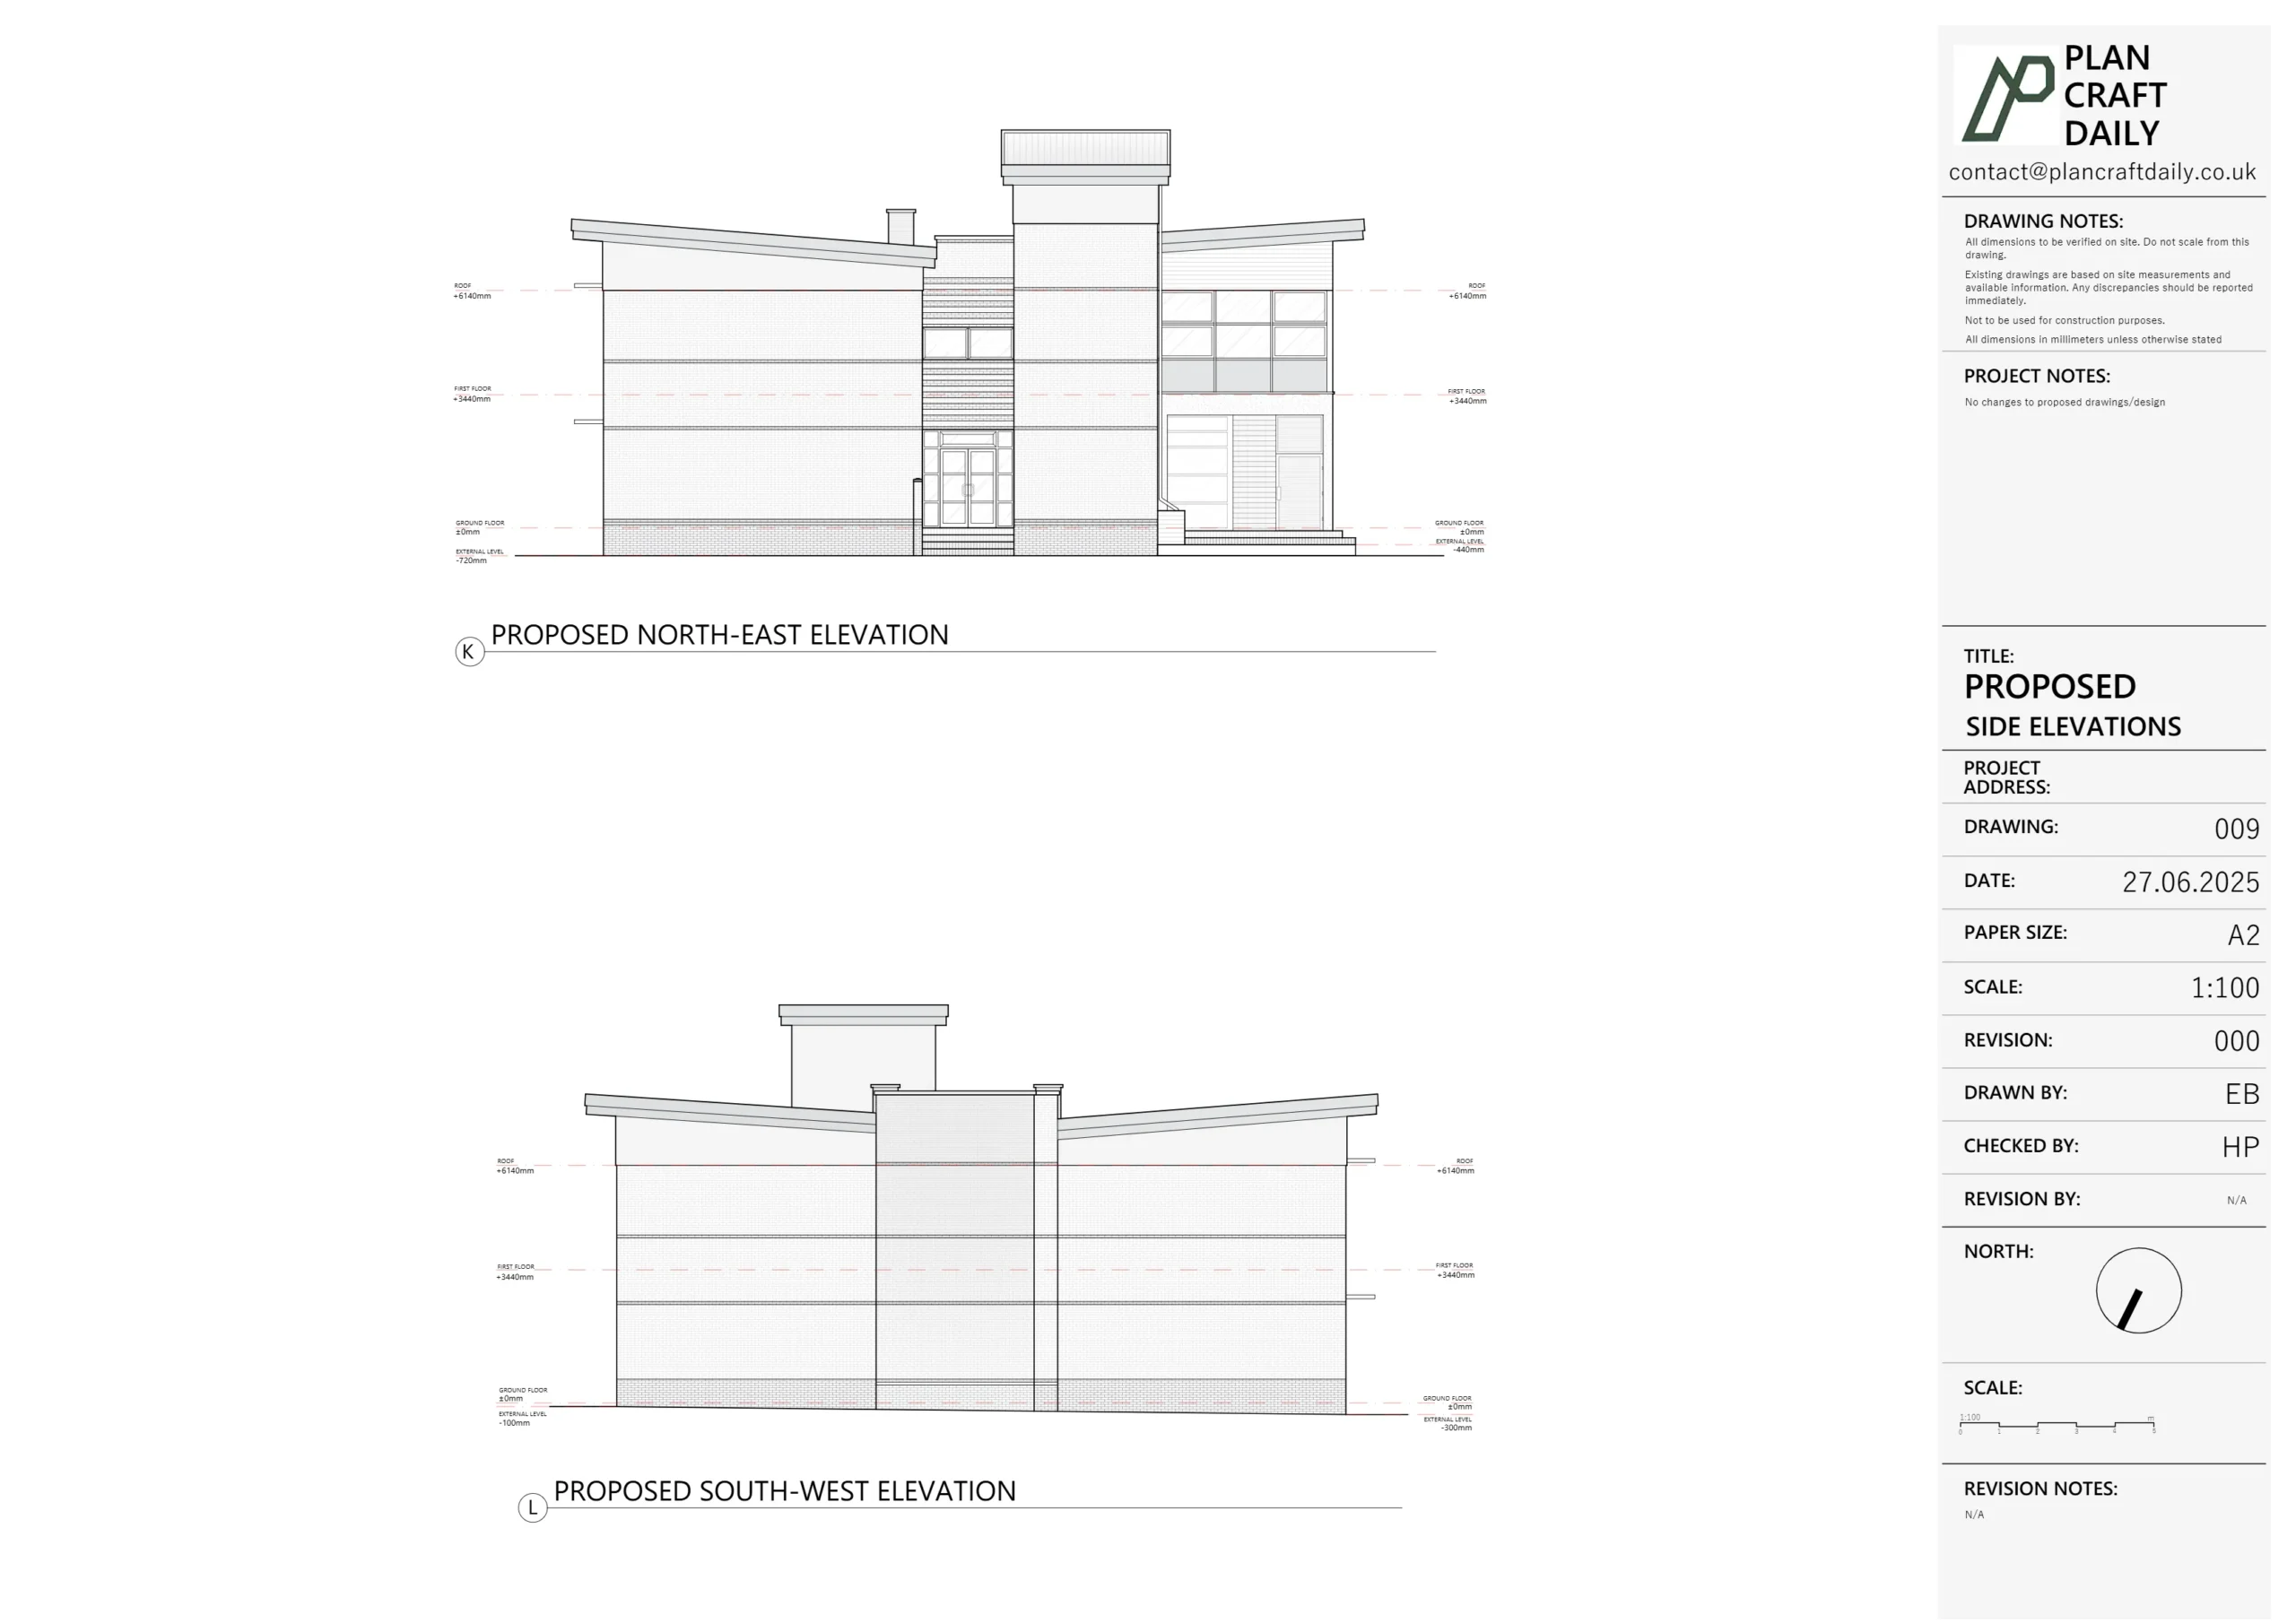
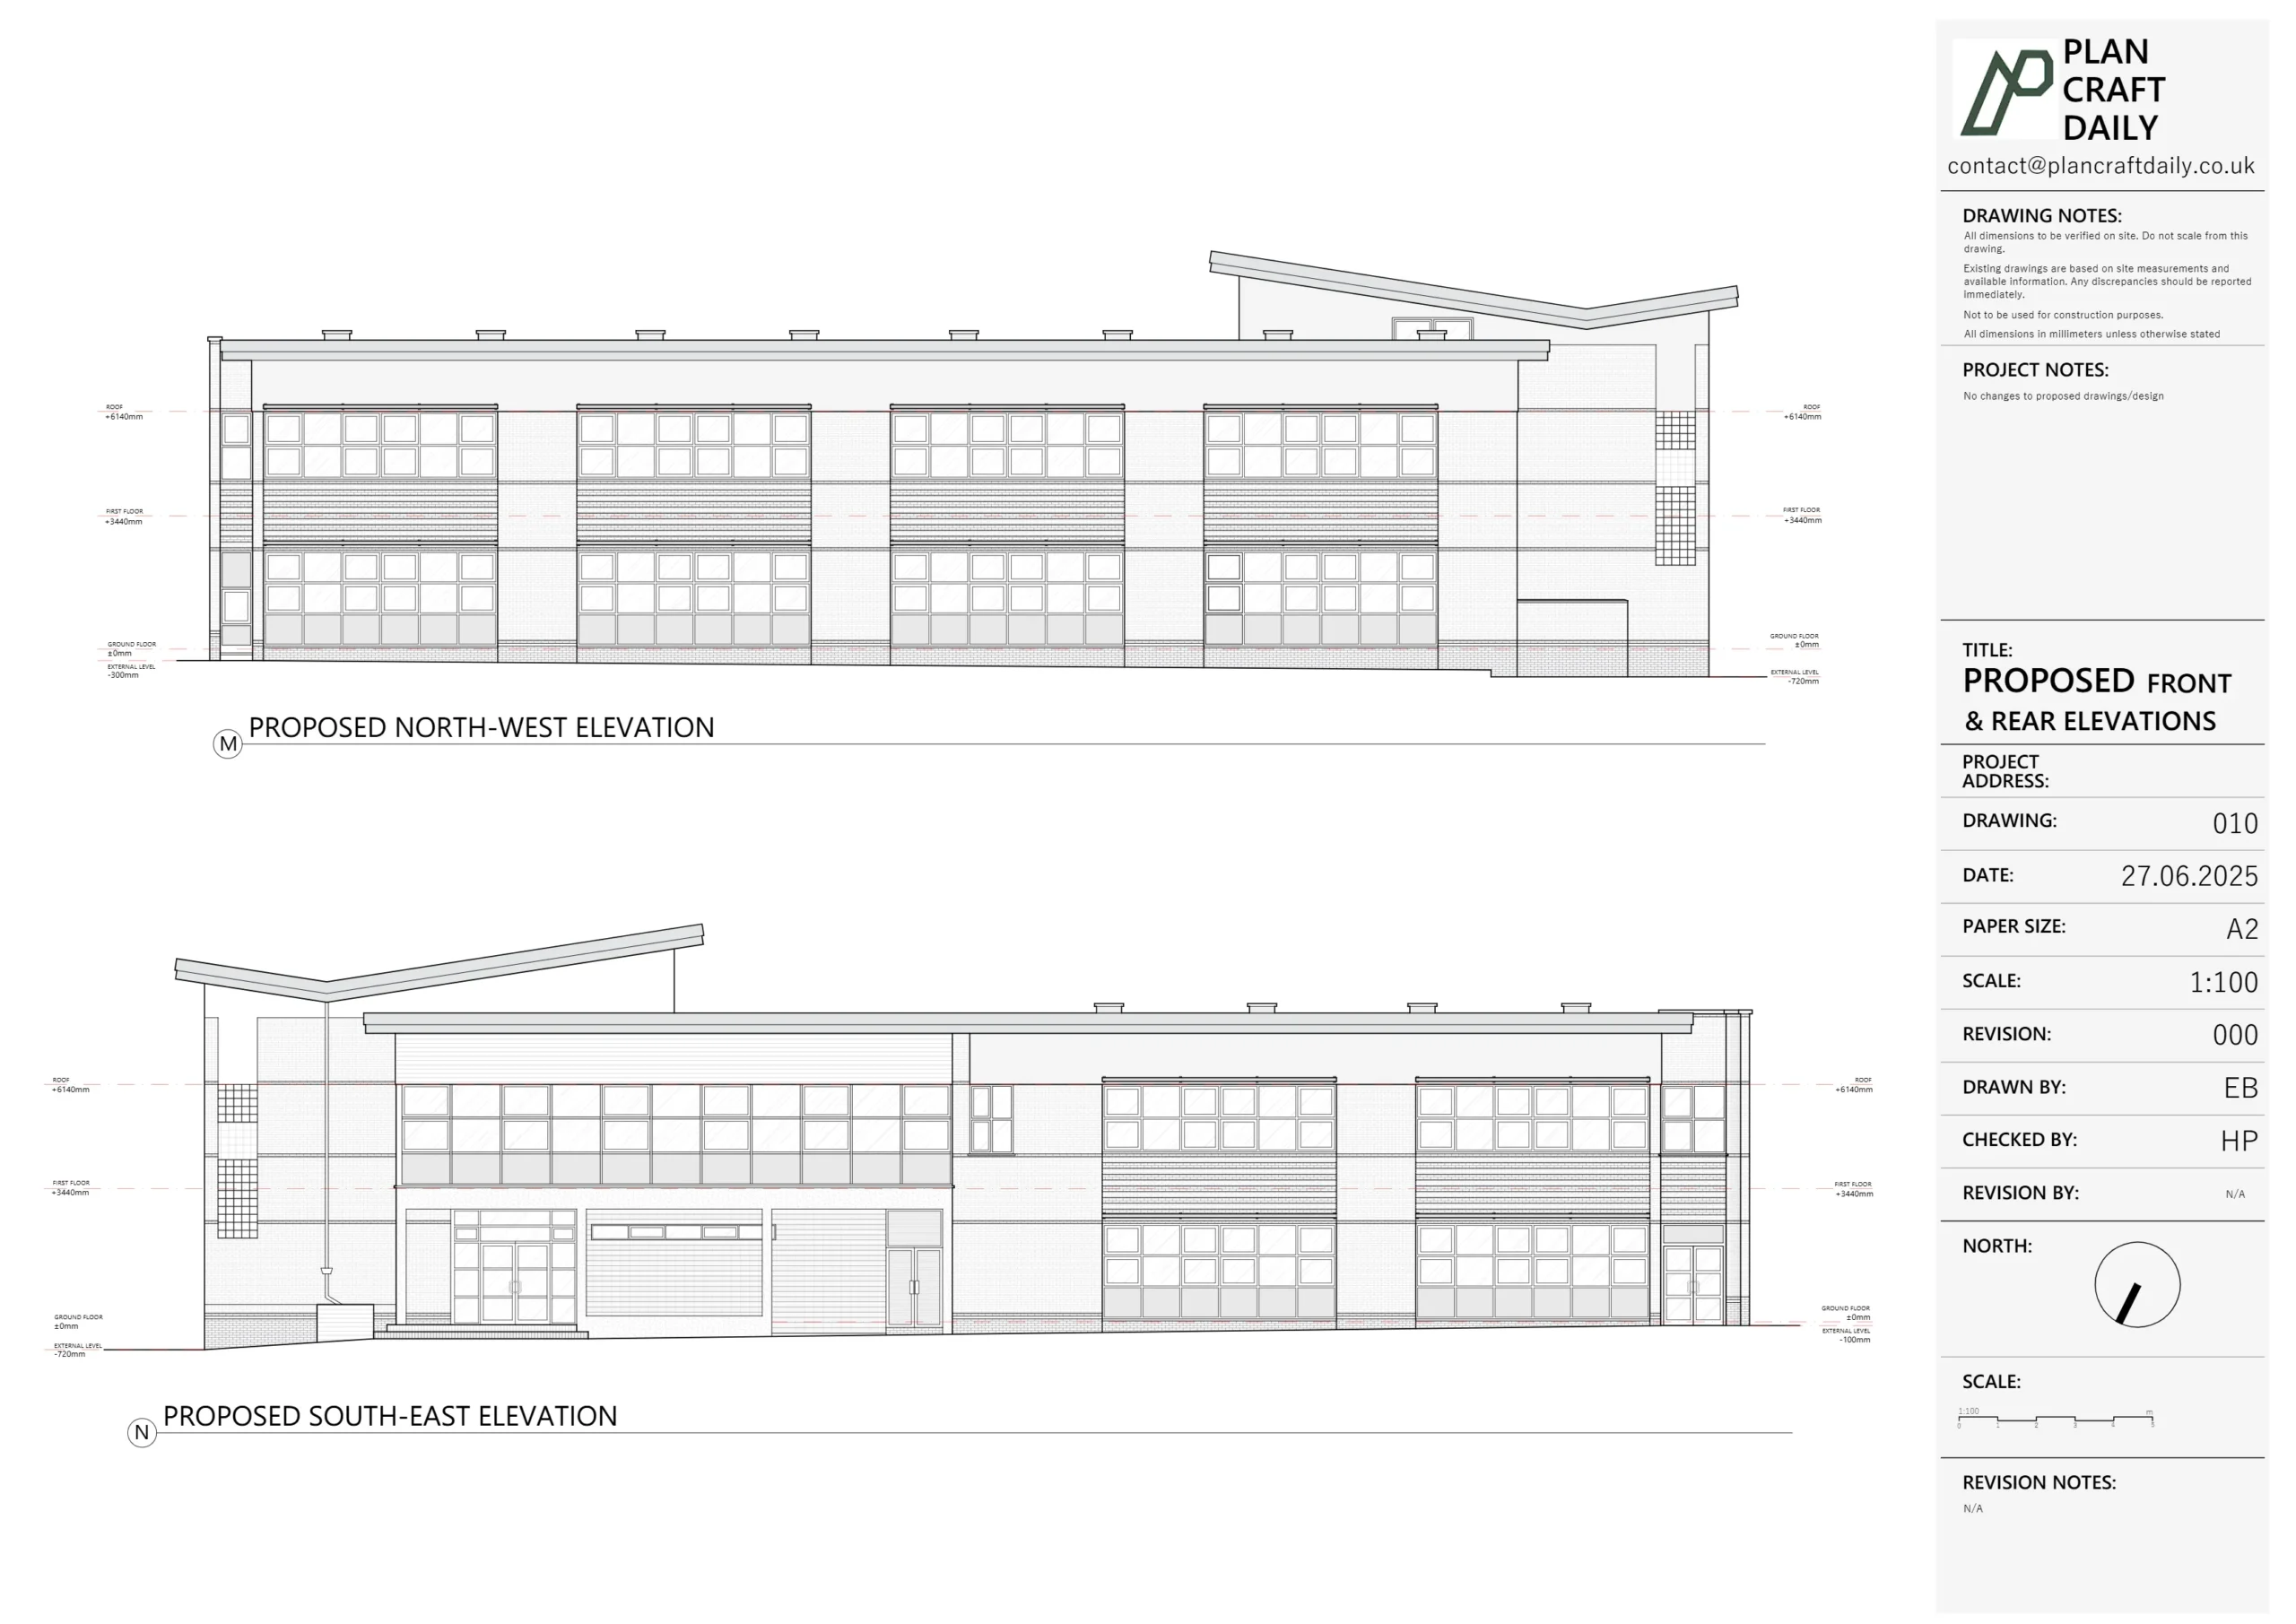
- Existing plans “all in plan form”, plus front and rear elevations and a section.
- Drainage recorded carefully – soil vent pipes, manholes (if present), and drain runs were highlighted as “important” in the initial email.
- A quick, dependable turnaround so they could keep their design work and client conversations moving.
Because we were instructed on both jobs together, we treated this as a small two-site package, coordinating diaries and pricing to make things efficient for the practice.
Scoping the work & clarifying drainage requirements
The first step was to pin down scope and expectations for the maisonette.
From Ells’ brief we confirmed:
- Only the ground-floor unit needed surveying – not the entire building.
- Deliverables would be:
- Ground-floor plan + roof plan (2 plans)
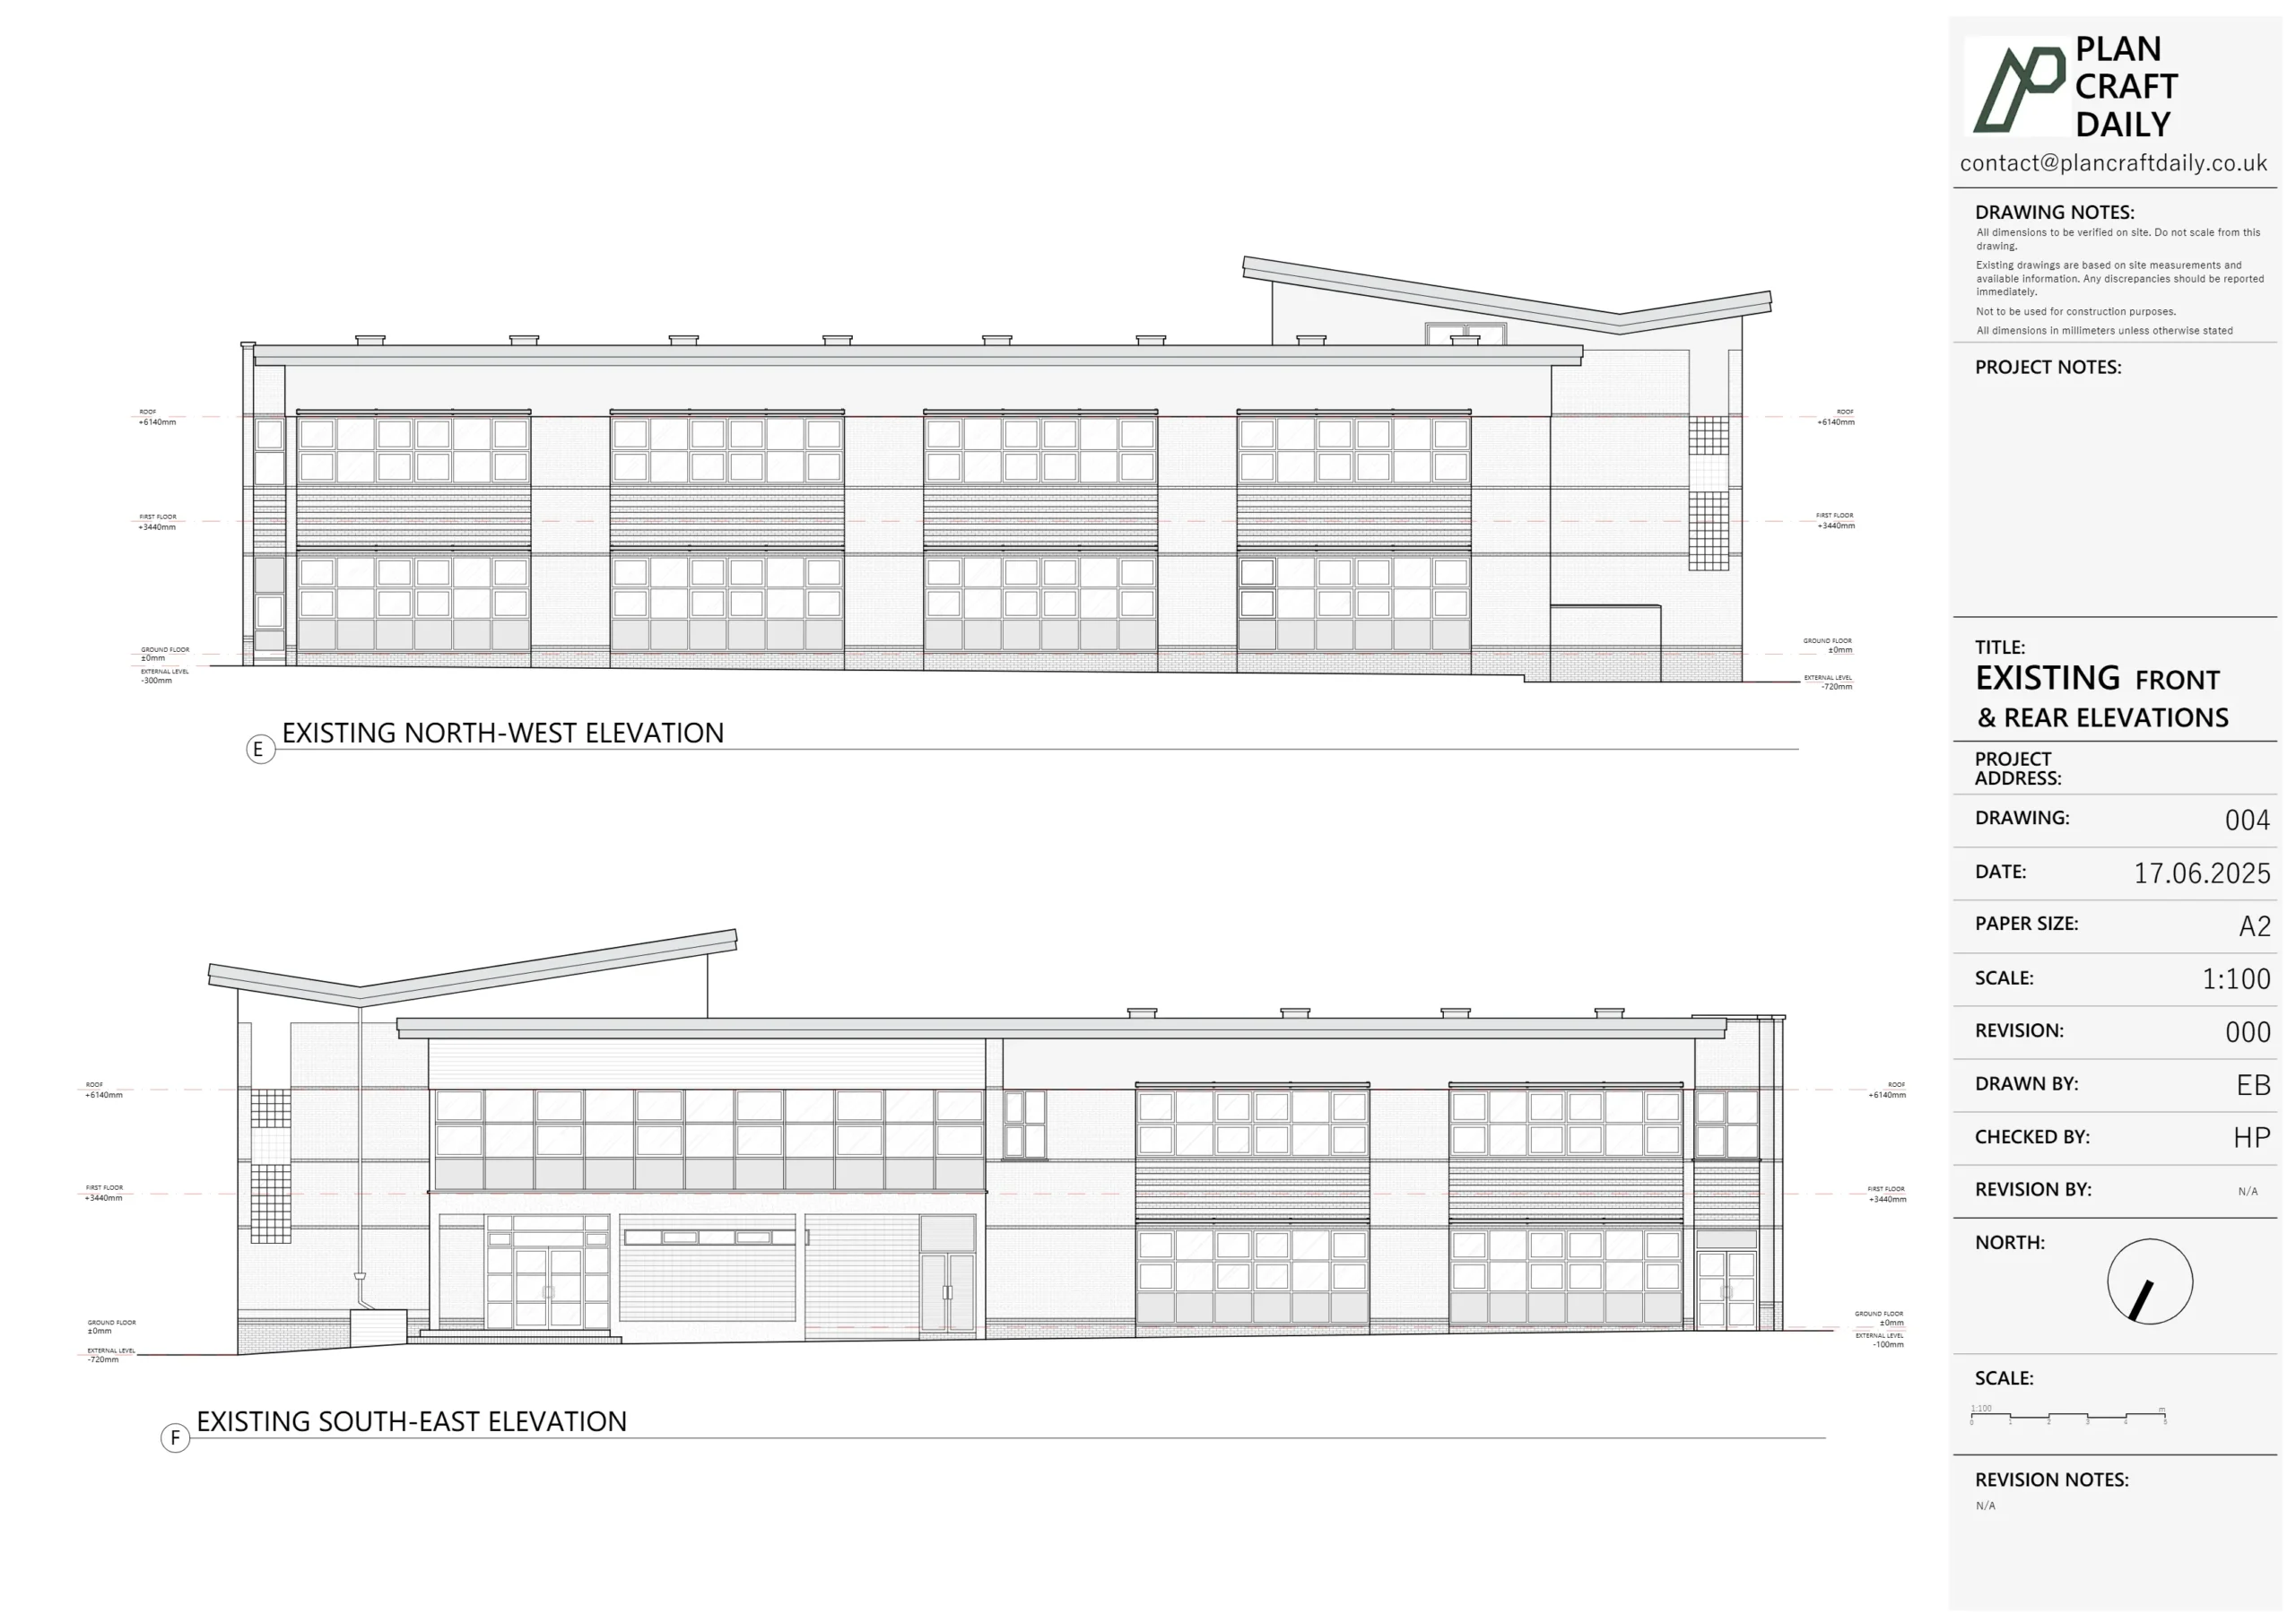
- Front & rear elevations
- One key section
- When Ells wrote “Drainage important”, we checked what that meant in practical terms. Our clarification email broke this down into:
- Mapping SVP locations
- Manholes and inspection chambers
- Visible drain runs, gullies and connections
Ells confirmed: “Yes. That’s it. All in plan form.”
With that agreed, we issued an itemised quote showing:
- Measured survey
- Existing drawings (plans, elevations, section)
- Drainage mapping integrated into the plan set
We also explained that our senior surveyor would attend, including internal 3D scanning and (where useful) photographic/drone coverage, to improve accuracy and speed.
Scheduling the survey around two live sites
Because 9 Leaf Close and 29 Strathville Road were both in play, diary-planning was a bit of a jigsaw:
- Ells had to juggle two different homeowners’ availability.
- We had other bookings already in the calendar.
- One of the projects was initially pencilled for a mid-week slot; then dates and times had to be swapped around.
To keep it simple, we:
- Offered clear windows
We shared the days and approximate times we could realistically cover each site and asked for a one-hour arrival window to account for London traffic and earlier surveys running over. - Locked in Strathville once the client confirmed
Once Ells came back confirming a specific time slot with the homeowner, we:- Fixed the date and time in our diary.
- Issued the invoice with a clear note that initial payment would secure and activate the survey slot.
- Chased payments gently but firmly
Before survey day, we sent a short, polite reminder that payment was still pending and asked Ells to confirm once it was made. As soon as the deposit hit our account, we issued a payment receipt and confirmed that the survey would go ahead as planned.
On-site survey – capturing the maisonette and its drainage
On survey day, our senior surveyor arrived within the agreed window with:
- A Disto laser for quick, precise internal measurements.
- A 3D scanner for a full internal capture of the ground floor.
- A photo checklist, with extra attention on drainage and external context.
The survey process included:
- Walkthrough & scope confirmation
We met the homeowner, confirmed exactly which spaces were in scope (the ground-floor maisonette only), and clarified areas that would be affected by the future wrap-around extension. - Primary geometry & levels
We captured:- External wall lines and overall footprint
- Internal wall positions and thicknesses
- Floor-to-ceiling heights, window and door heights
- Any level changes, steps, or structural nibs
- Drainage mapping
Because Ells had flagged drainage as critical, we paid particular attention to:- Positions of external SVPs
- Any manholes / inspection covers in gardens and hardstanding
- Visible rainwater pipes, gullies and downpipes
- Likely drain run directions, recorded diagrammatically with arrows and notes in our field sketches
- 3D scanning & photography
The scan gave us a dense internal point cloud for modelling, while photos captured context—particularly around proposed extension zones and drainage features.
After the visit, we let Ells know that the survey had gone well and noted anything worth flagging (for example, where manholes were not visible or where drainage positions were inferred).
From survey to drawings (and 3D scan)
Back in the studio, our CAD team turned the raw data into a clean existing-drawings set:
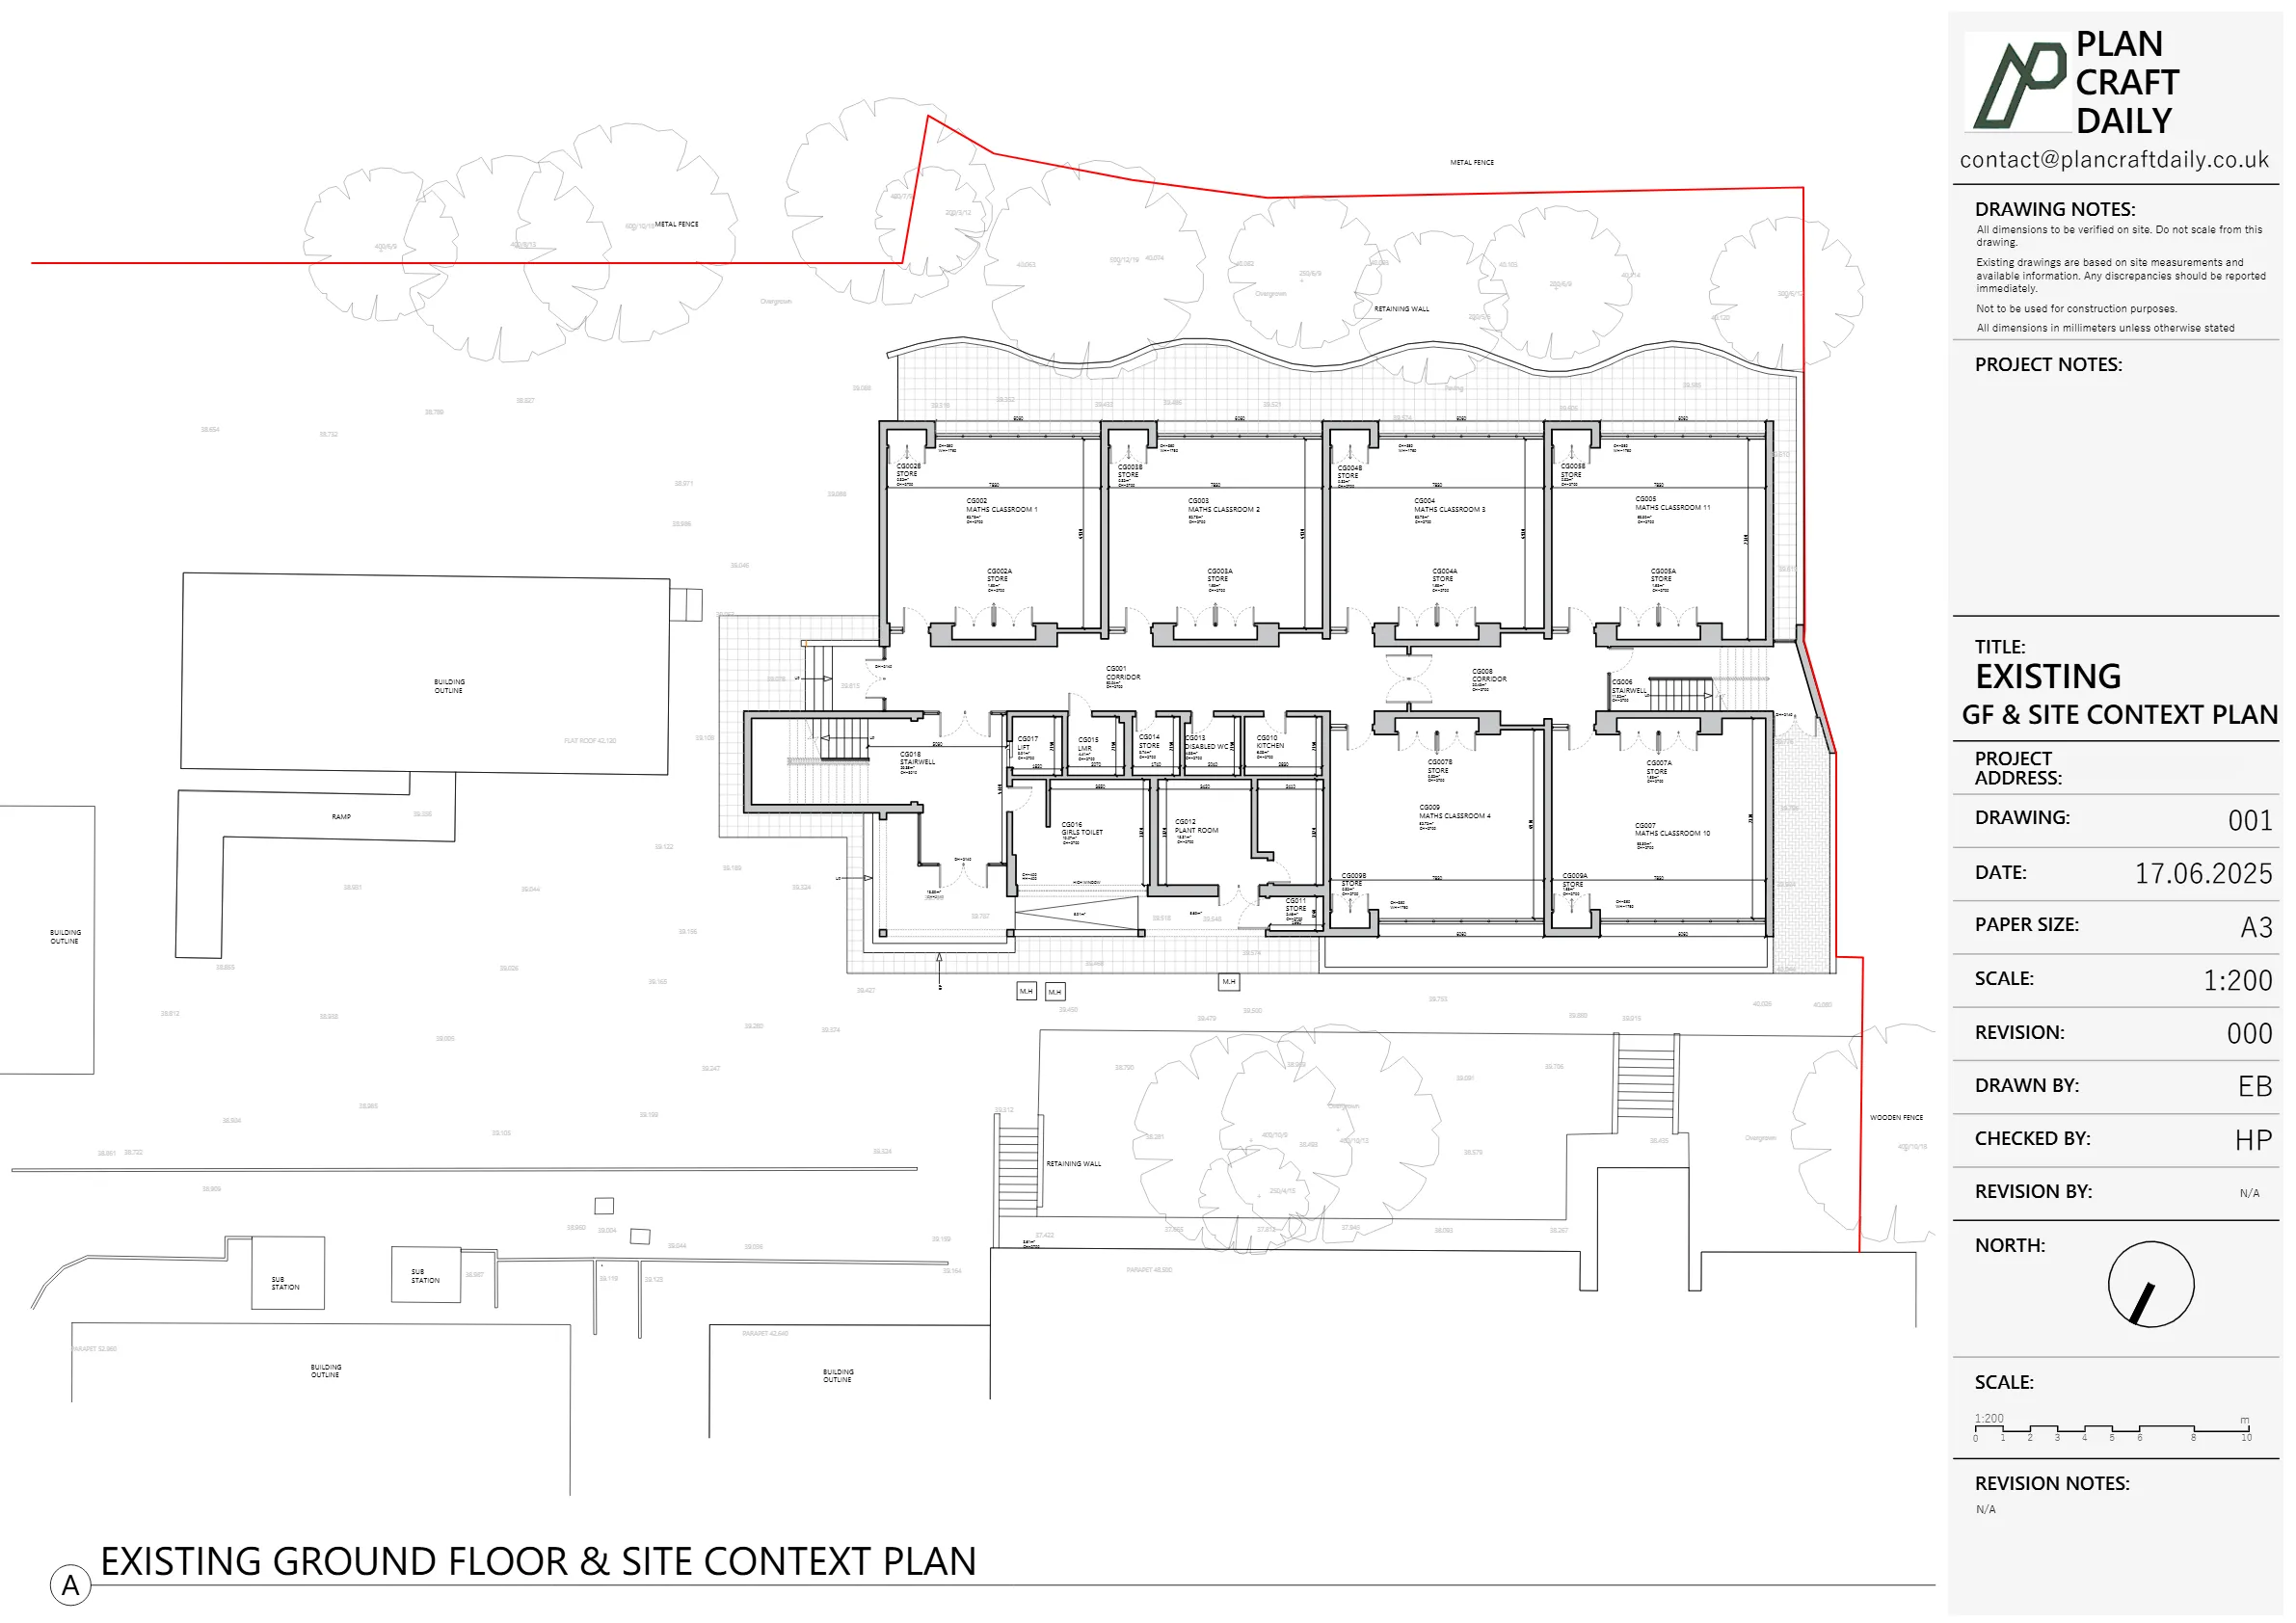
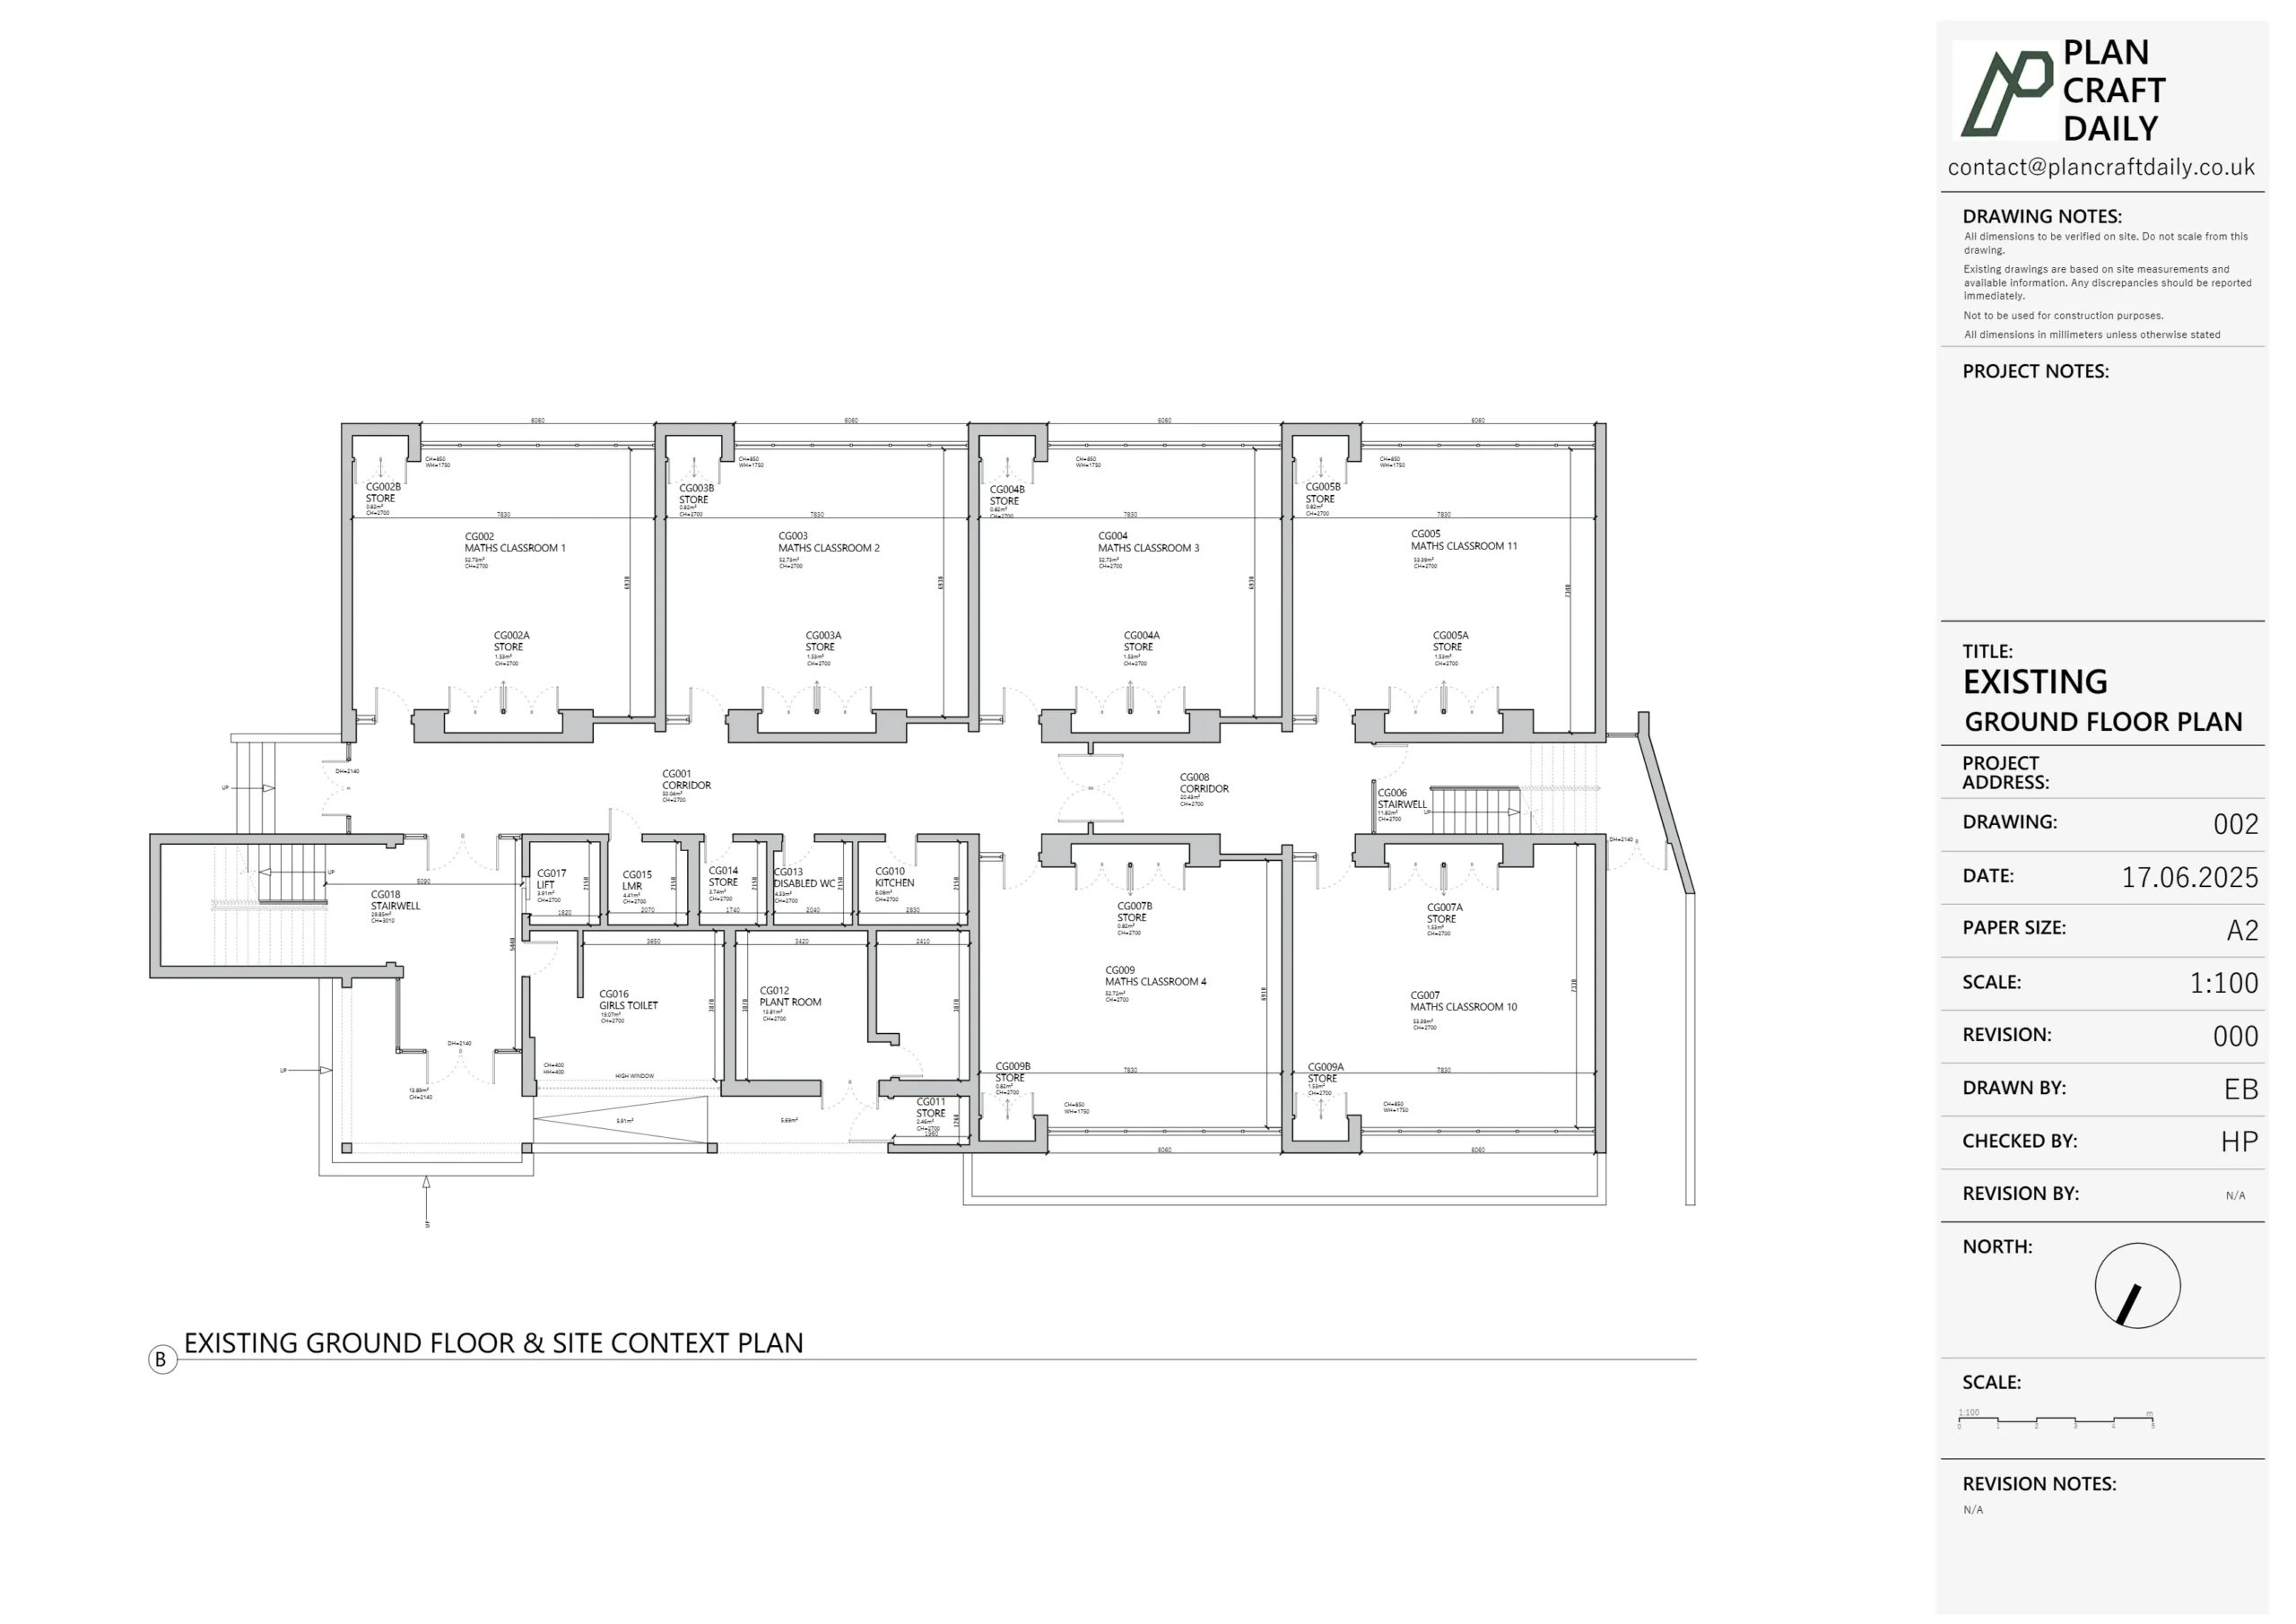
- Ground-floor plan & roof plan
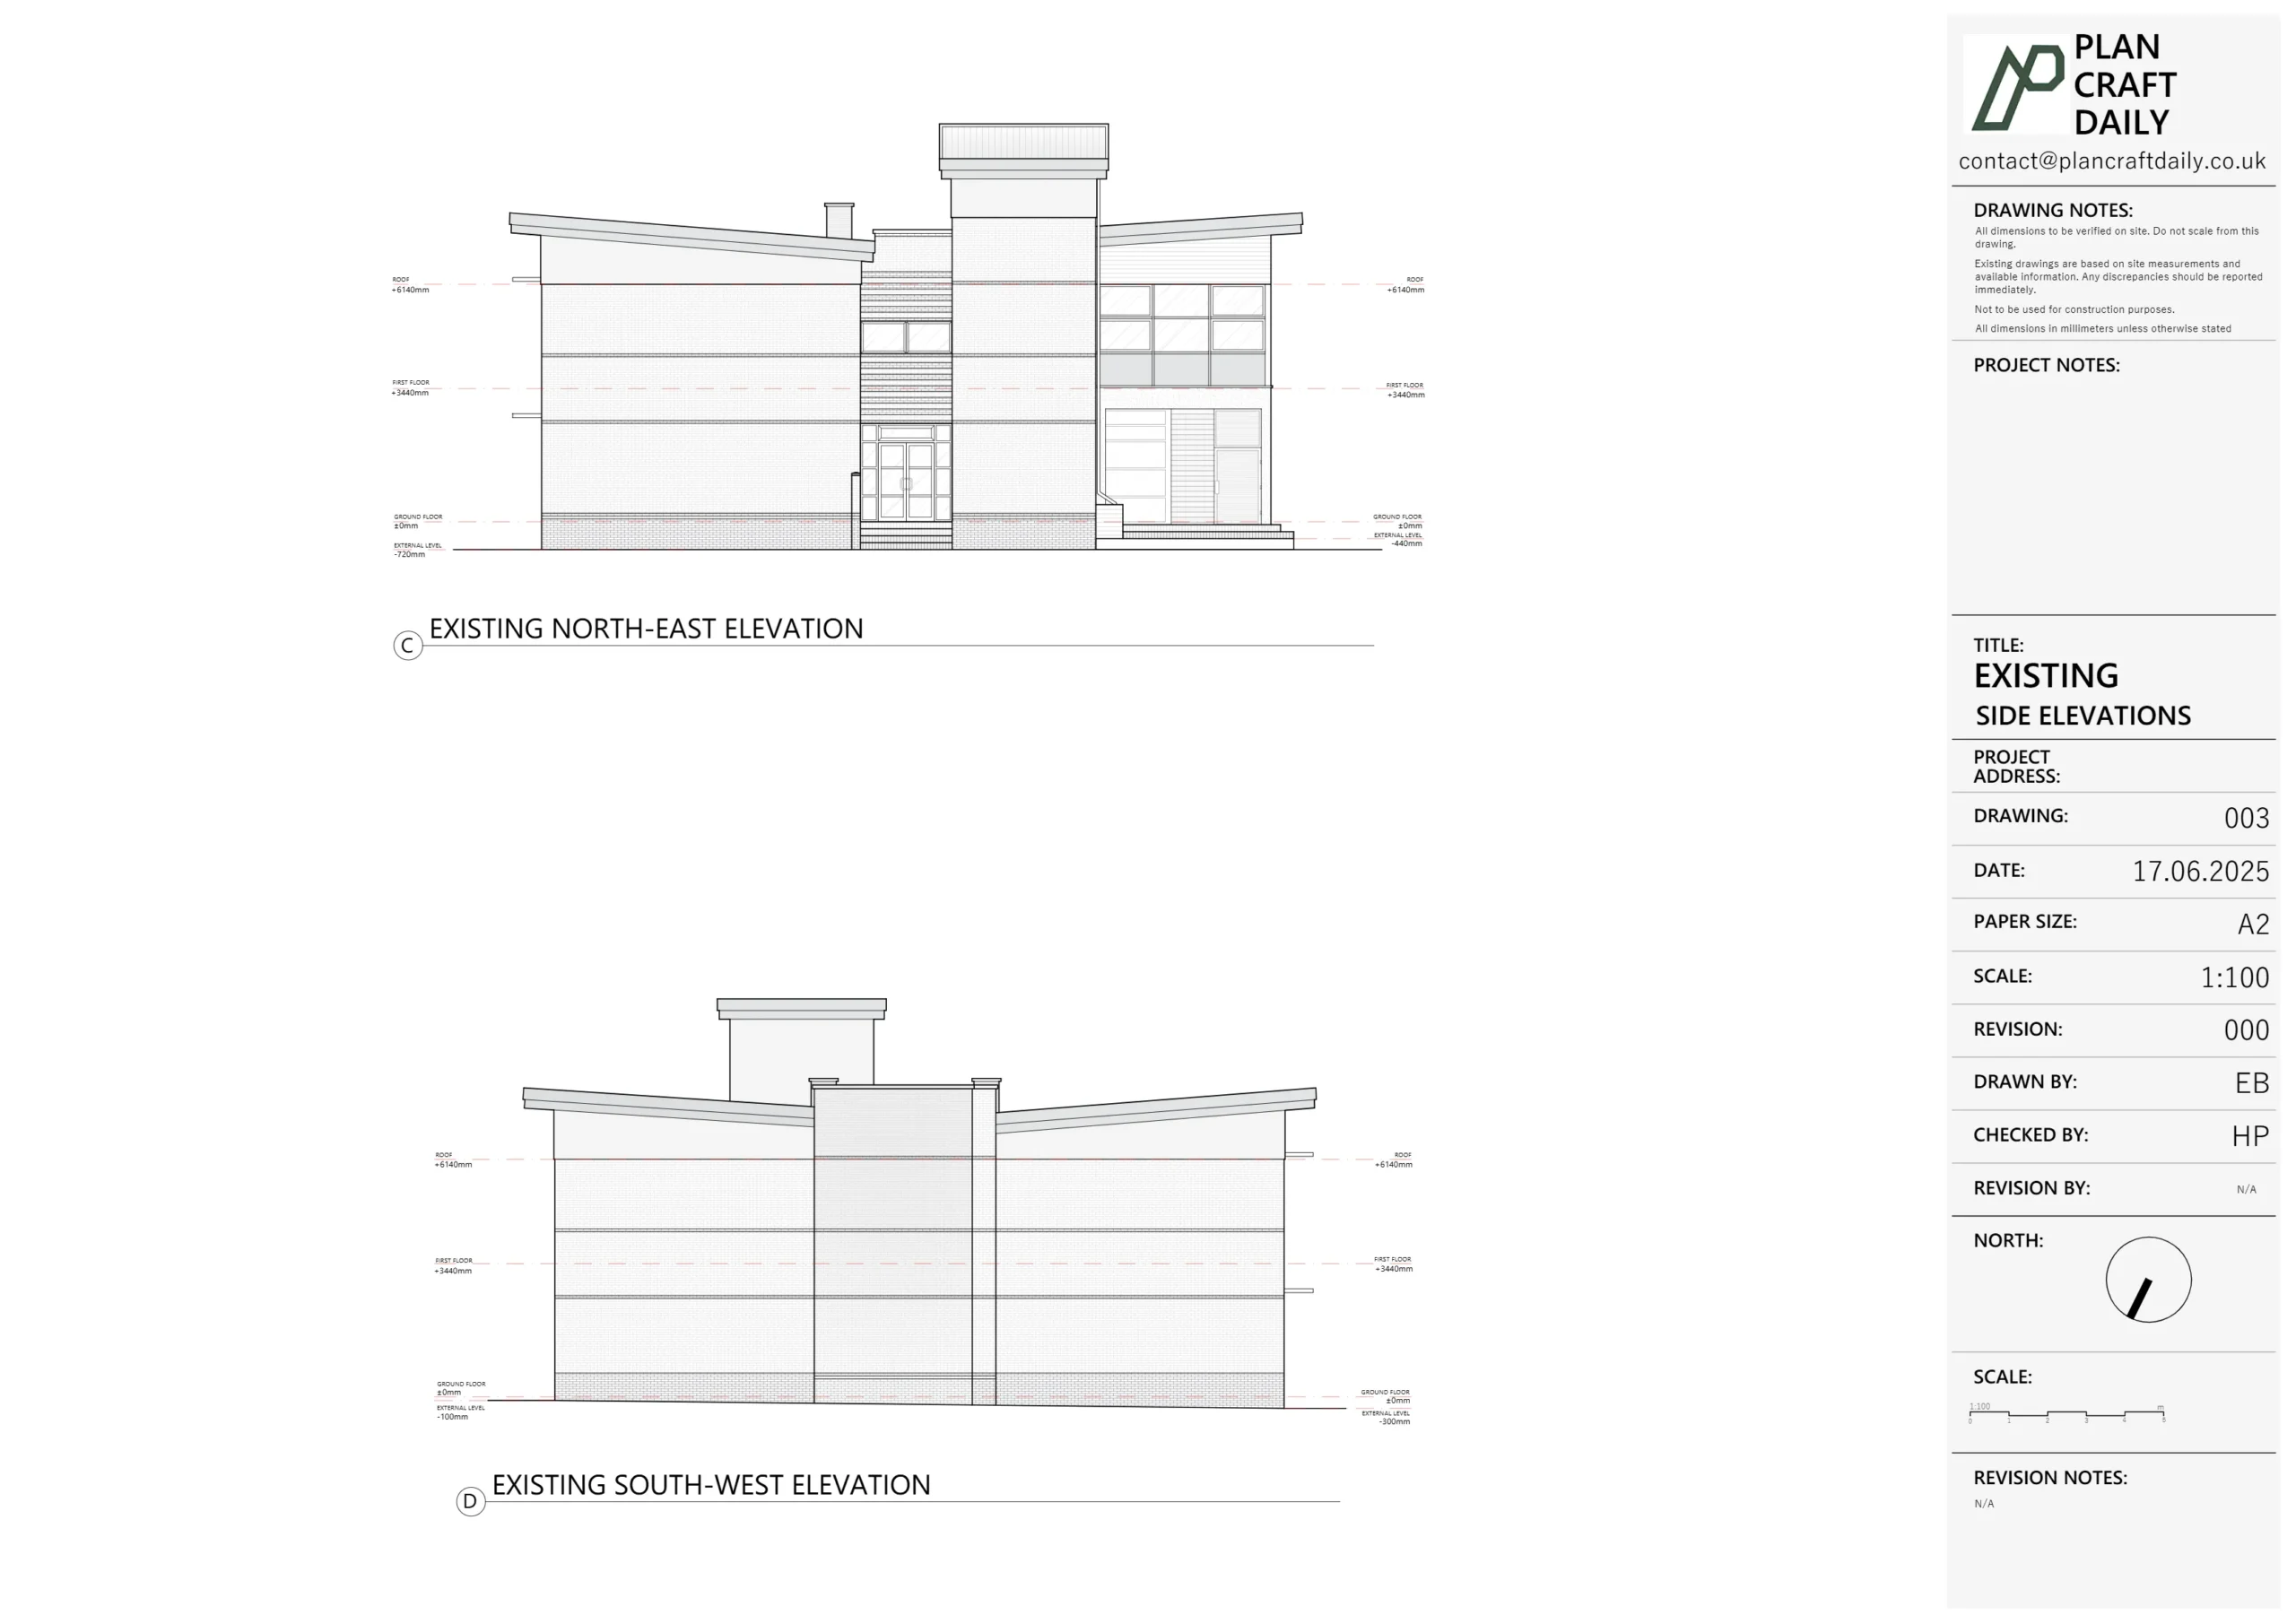
- Front and rear elevations
- One key section through the most relevant part of the maisonette
- Drainage information overlaid on plan, as requested
Our workflow:
- Set out the structural shell
Using control dimensions and the 3D scan, we built the external envelope and primary internal walls to a consistent, checkable grid. - Insert internal details
Doors, windows, internal partitions and features were added and checked against both scan and hand measurements. - Overlay drainage
Drainage symbols and notation were added to the plan, clearly identifying:- SVPs
- Manholes / inspection points (or their absence)
- Gullies and downpipes
- Indicative drain directions, where visible
- Generate section and elevations
The section was cut in a location that would be genuinely useful for extension and drainage design. Elevations were kept clear and consistent so the extension massing could be understood in context.
We then exported a draft drawings pack (PDF) and sent it to Ells along with the final invoice.
Managing expectations & final delivery
As sometimes happens on busy weeks, the two-week mark after survey passed and Ells sent a polite chaser for one of the paired projects. We responded with:
- An apology for the delay and thanks for their patience.
- Confirmation that the projects were now complete and draft packs were ready.
- The draft PDFs and final invoices attached for both sites.
Once Ells confirmed that everything looked good and settled the invoices, we:
- Issued final DWG files
- Sent the final PDF drawing sets
- Shared links to the 3D scan viewer so their team could “walk” the maisonette virtually when testing options
- Provided payment receipts confirming both projects were fully paid
The internal Trello card for the maisonette was then moved to Completed.
Outcome – a reliable base for a complex wrap-around extension
For Ells’ team and their client, the key benefits were:
- A robust, drainage-aware base plan for designing a single-storey wrap-around extension.
- Accurate existing geometry of the ground-floor maisonette, with walls, levels and openings matching the reality on site.
- Clear drainage information in plan form, ready for both their design work and later input from a structural or drainage engineer.
- A 3D scan link they could revisit at any time, especially useful once walls start being opened up or options tested.
For us at PCD, this project shows how we like to support architect studios on tightly constrained urban sites:
- Clarify the technical asks (like drainage) at quoting stage.
- Use senior surveyors and 3D scanning to capture more than just basic dimensions.
- Maintain traceable communication around deposits, surveys and deliverables.
- And finally, deliver drawings that are genuinely “ready to design on”, not just a rough starting sketch.
Project Details
| Service Type | Measured Survey, Existing Ground-Floor Plans, Elevations, Section & Drainage Mapping + 3D Scan |
| Time Taken | Around 1–2 weeks |
| Location | South West London |
| Client Type | Architect (studio client – “Ells”) |